Projector Wiring
Getting your projectors to work right electrically is easy. All you need to do for light output is plug in the blue 9007 connector on your projectors to your stock headlight connection. Your turn signal bulb fits into the provided housing without modification as well
leds and Halos
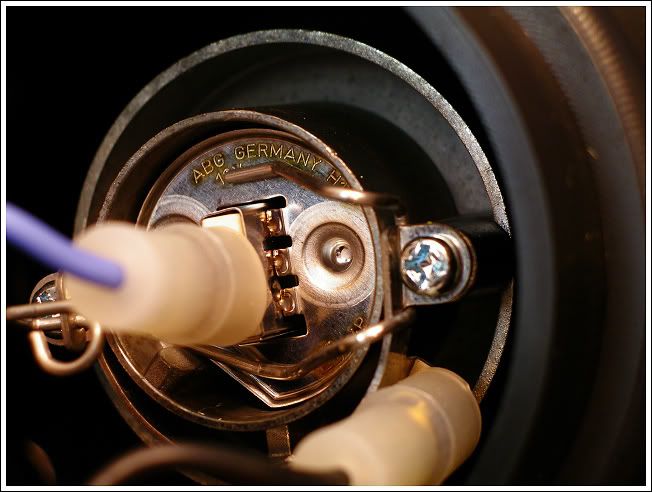
The part that people get caught up on are how to wire up your halos and leds. Its pretty simple. Look at the picture below. Note that the black grommets on the left can be pulled out, allowing you to swap out the 194 leds.
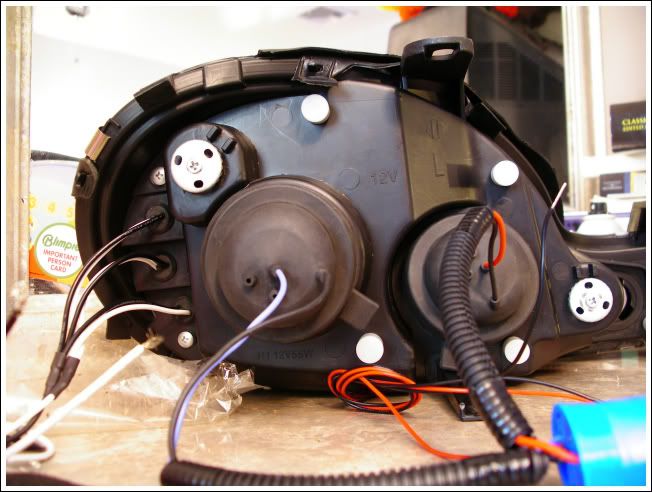
The black and white wires to the left are for the leds. The red and black wires on the bottom are for the halos. Most people like wiring the halos to the parking lights and the leds to the turn signals. You can choose to keep them unwired as well. Study the picture below.
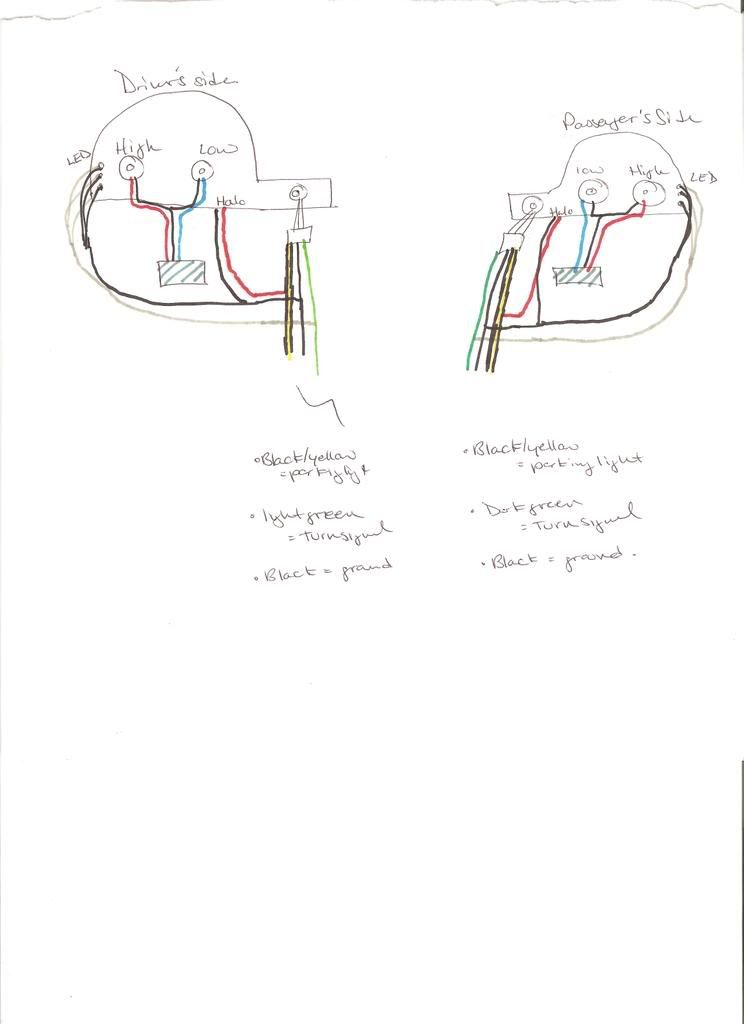
You'll be tapping into the wires leading to the turn signal connector for both headlights respectively. Regardless of what you do, solder all of the black wires together, and connect them to the turnsignal ground. You can solder, or use t-taps to join the wires together. Its best to solder, but there is not much room there, and it might be better to use a t-tap then to melt a wiring harness with your soldering iron by mistake.
Aligning your lights
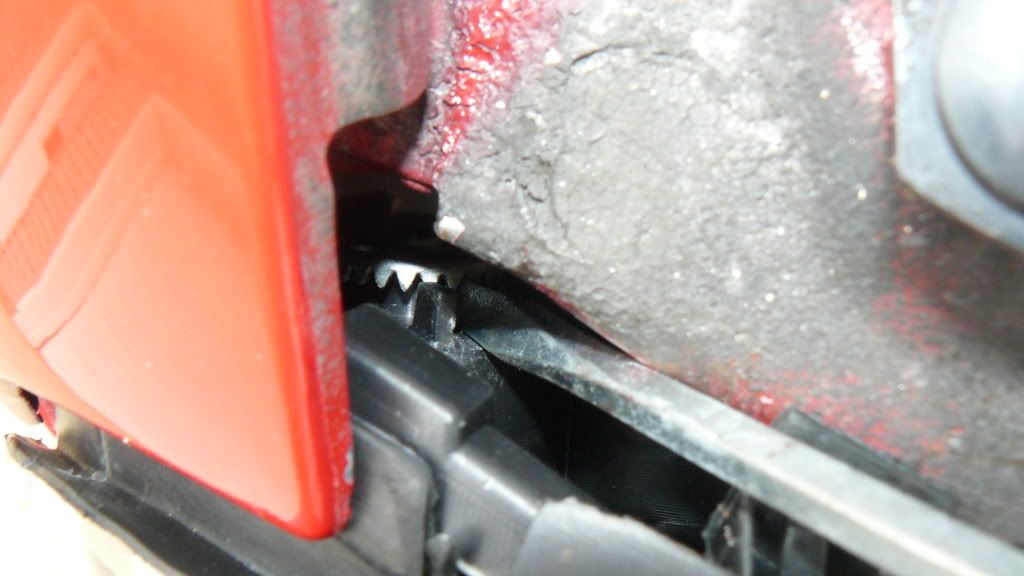
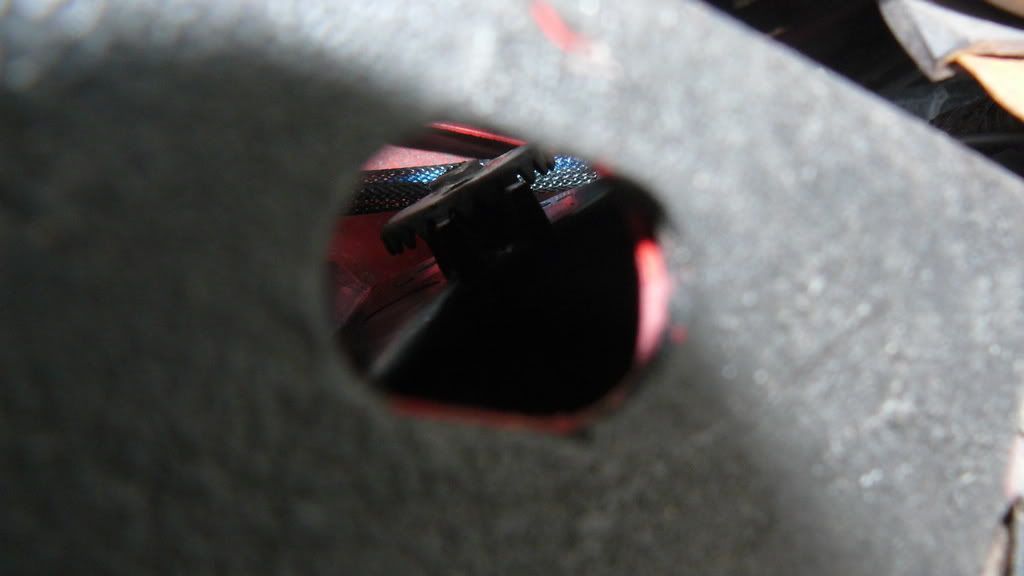
Its a little hare to align you lights by reaching the knobs with a phillips screw driver form behind. What I did was use a long flat head and inched the alignment wheels by sticking through the holes in the core support. There are two plastic slots so that your screw driver wont' slip off the wheel when you do it this way. I think they designed them like that.
High beam
Low beam
HID wiring
I'm not going to cover the wiring for bi-xenon HIDs or 9007 HIDs which are placed in the stock housings, because I don't want to support or promote that.
Installing the bulbs
As shown in Glasswars picture (again below) remove both wire connectors and undo the clip to remove the low-beam bulb. You are probably going to have to drill out the hole to allow your H1 bulbs to fit. Be careful not to allow any of the shavings to fall into the projector, they will make their way into the clear housing, like a snowglobe!
You can cut a small hole in the rubber boot to allow for the hid wiring grommet to make a tight connection like this.
Harnesses
Reasons to use a wiring harness.
- Hids have a higher "warmup" amp draw compared to halogens
Higher amps means more heat
More heat means melting wire insulation
Melting means your car will explode and you will turn into a flaming marshmallow
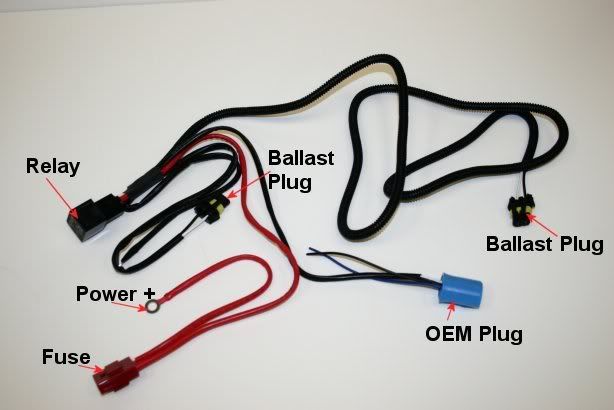
These are really plug and play, the only thing you have to take care of are the power and ground connections.
DIY Wiring
Materials
- Inline fuse holder
30A fuse
14ga wire (Black and red prefered)
12V automotive relay
O ring connectors (14ga for grounds)
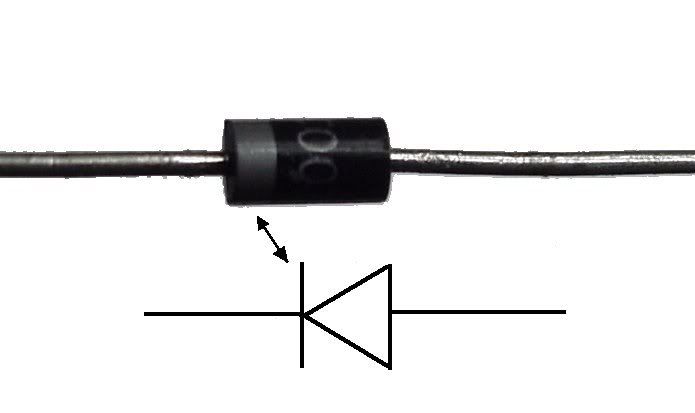
1N4001 Diode (HID on with Hi beam)
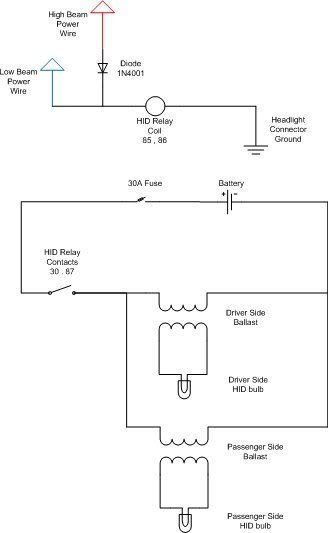
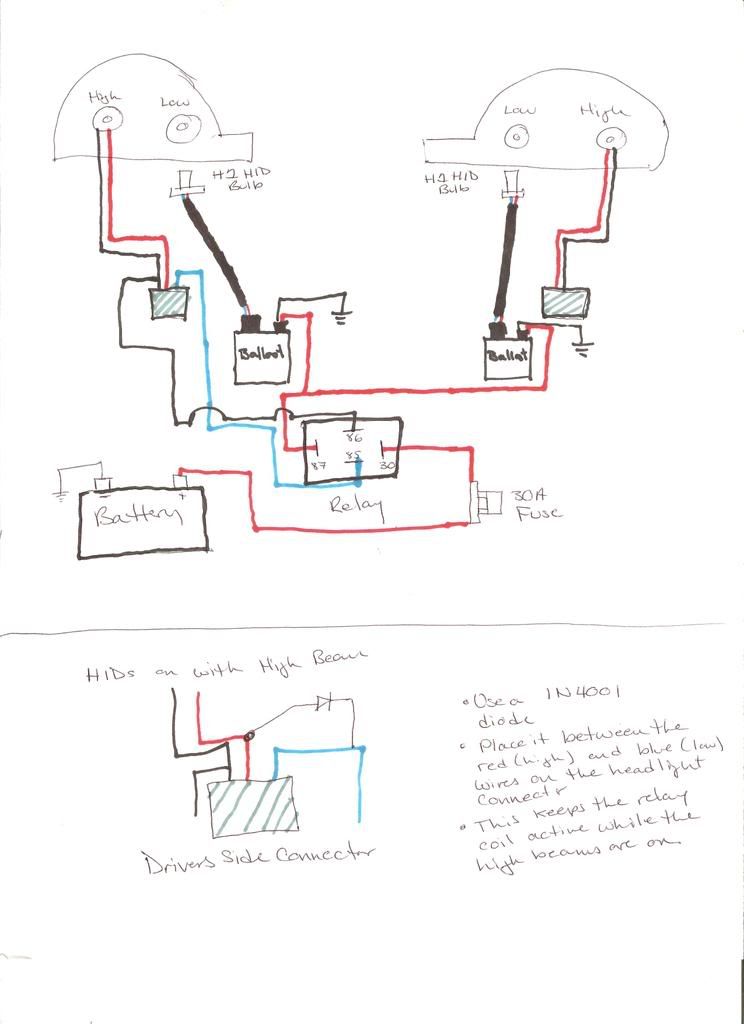
Here you can see the logic isn't too complex just a single relay. Below is a drawing of what the wiring should look like when you are finished, minus the halo and led connections.
Follow these steps to accomplish this.
- 1) Unplug your low beam bulb, and replace with the Hid bulb.
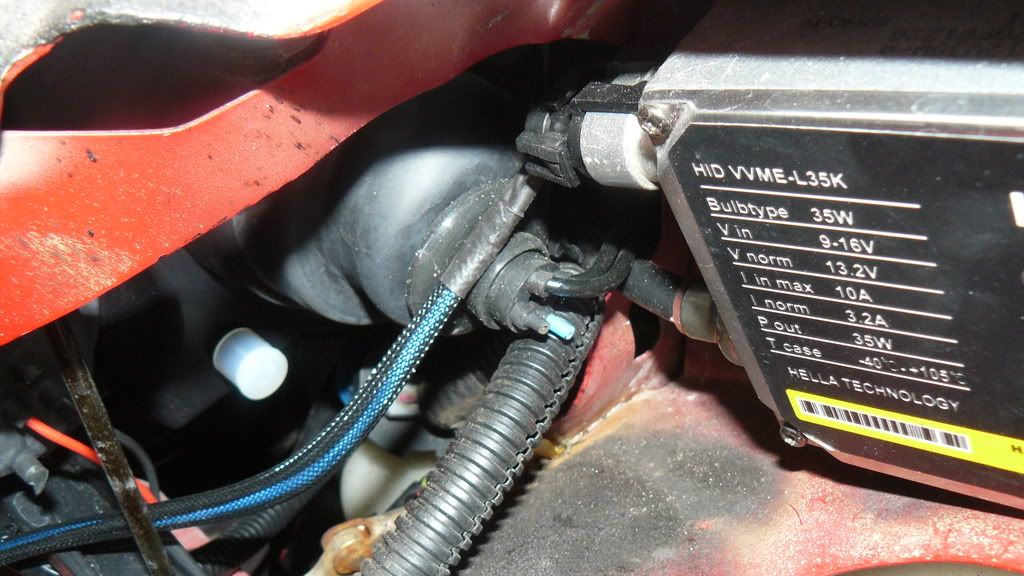
2) Mount the ballasts, and connect the HID bulb to the ballast using the existing wiring.
3) Tap into the originaly plug that was in your projector low beams. (The one with the purple lens) Send the blue wire to the 85 post on the relay, and the black to the 86 post.
4) Cut off the connector on the power cord to each ballast. Ground the black wire. Connect both red wires to the 30amp fuse.
5) Using 14g wire connect the fuse to post 57 on the relay.
6) Using 14g wire connect post 30 on the relay to ground.
HIDs on with High Beams
This is a great idea if you use your brights a lot. Not only will your light output be better, but also you won't be cycling power to your ballasts (bad for them). The downside is that you can't flash your brights during the day w/o flashing your hids as well.
As shown in the bottom part of the picture above, you will need to link the high to the low beam the leads to the balast. This is done via a diode. This allows for voltage to be seen at the relay coil while the high beams are on. The diode prevents reverse current so that your high beams aren't on when you only want your hids on.
To make the connection, I soldered to short lengths of wire to to the ends of the diode, then connected them to the respective wires. You will want the line of the diode pointed towards the blue low beam wire. Refer to the picture below.
I think that pretty much covers it. Any wiring questions feel free to reply here or in Glasswars' sticky.
Good Luck
-Chad