How To: Change a Camshaft Position Sensor

Post Reply
Barry McCockener
2GN Member
Posts: 151
Joined: Sun Jul 31, 2011 12:48 pm
Location: Ethiopia, Mongoria

How To: Change a Camshaft Position Sensor

Post by Barry McCockener » Mon Apr 16, 2012 7:26 pm

My Cam Position Sensor took a dump on me this morning on the way to work so I towed it home and put in a new sensor. Since this seems to be a common issue I figured I'd post up a how to. I will also include the part number from Autozone, Advance, and Napa. All will be for the 2.0 SOHC.

Time to complete: Between 30 and 60 minutes depending on the car and you.

Tools needed:
10mm socket- Battery tray
13mm socket- Battery tray
8mm socket- Cam sensor
1/4" ratchet and extensions- Cam sensor removal
3/8" ratchet and extensions- Battery tray removal
Pliers- Hose clamps if stock or stock style
Flat head screwdriver- Removing the connector

Part Numbers:
Napa:
2000- MPE CSS702SB or ECH CSS702
2001- MPE CSS705SB or ECH CSS705
2002- MPE CSS705SB or ECH CSS705
2003- MPE CSS705SB or ECH CSS705
2004- MPE CSS705SB or ECH CSS705
2005- MPE CSS705SB or ECH CSS705

Autozone:
2000- SU3020
2001- SU3020
2002- SU3020
2003- SU3020
2004- SU3020
2005- SU3020

Advance:
2000- CSS34
2001- CSS34
2002- CSS34
2003- CSS34
2004- CSS34
2005- CSS34

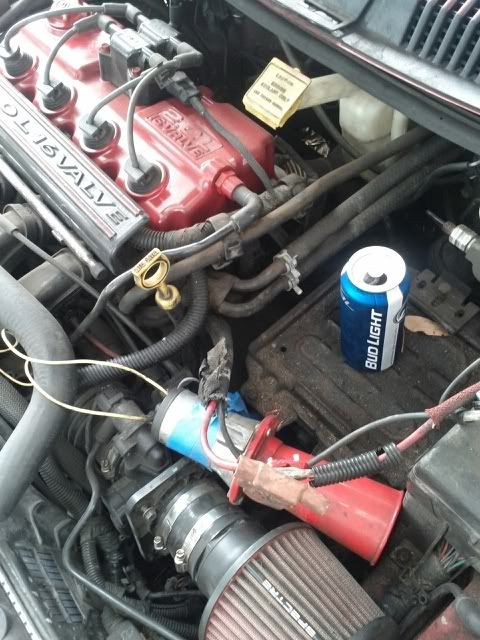
First step is to remove the battery. Beer is optional but preferred, even at 9:30 in the morning.
Image

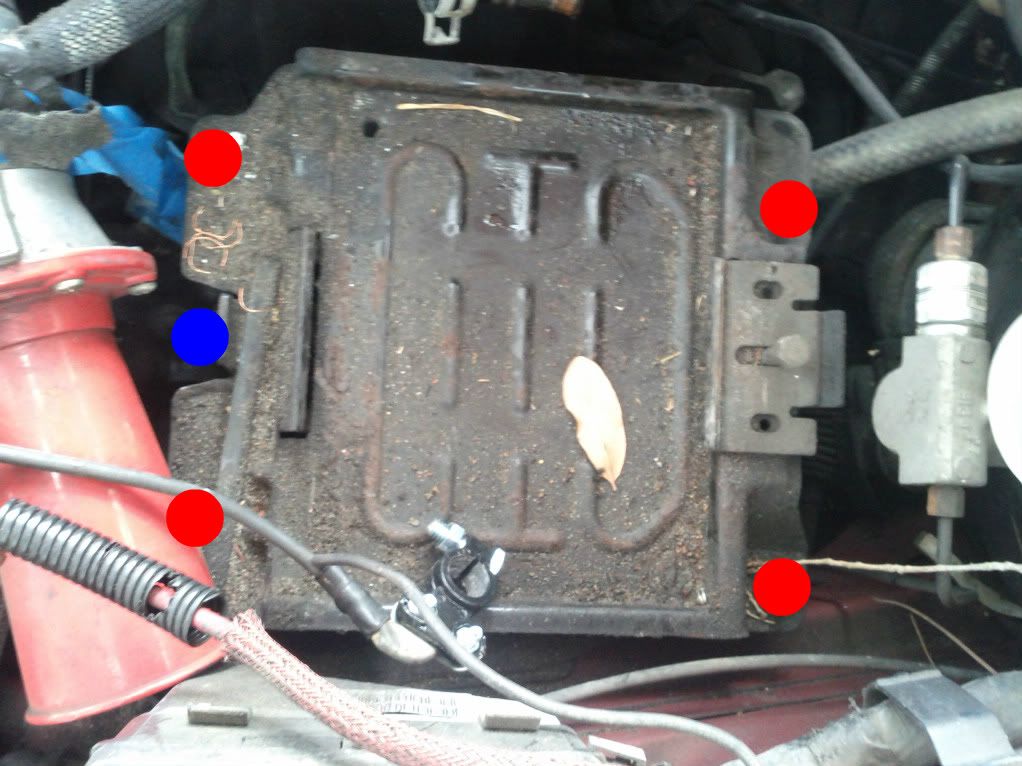
Next thing to do that will help tremendously is to take off the battery tray. The red dots are 10mm and the blue dot at the front is a 13mm.
Image

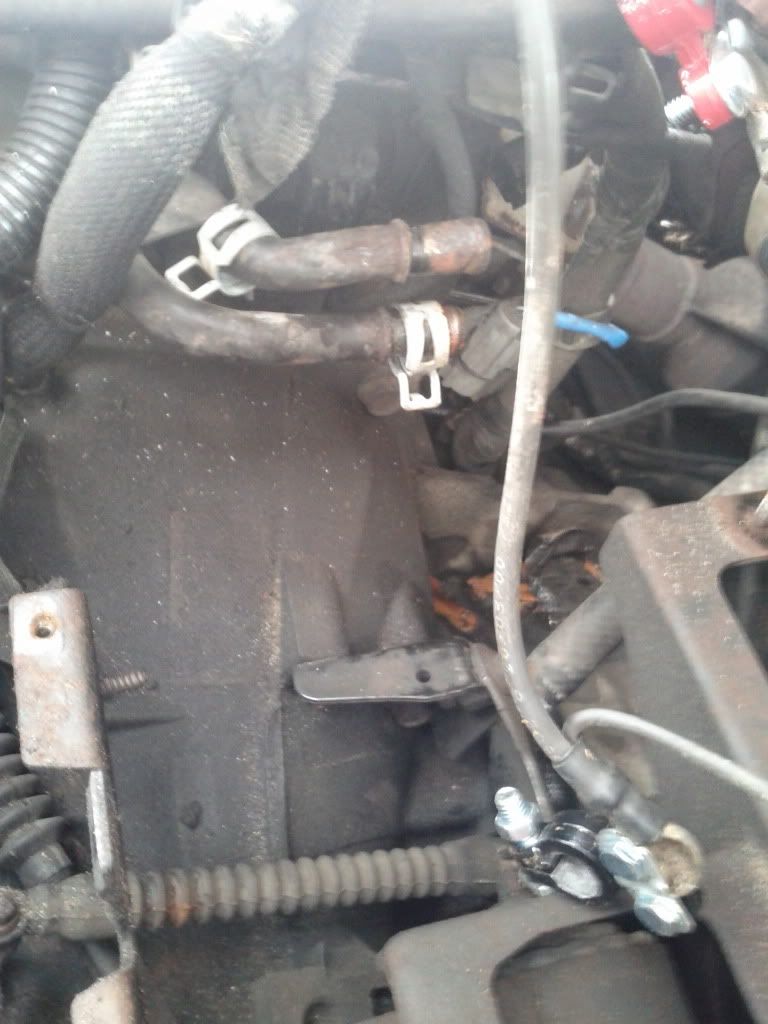
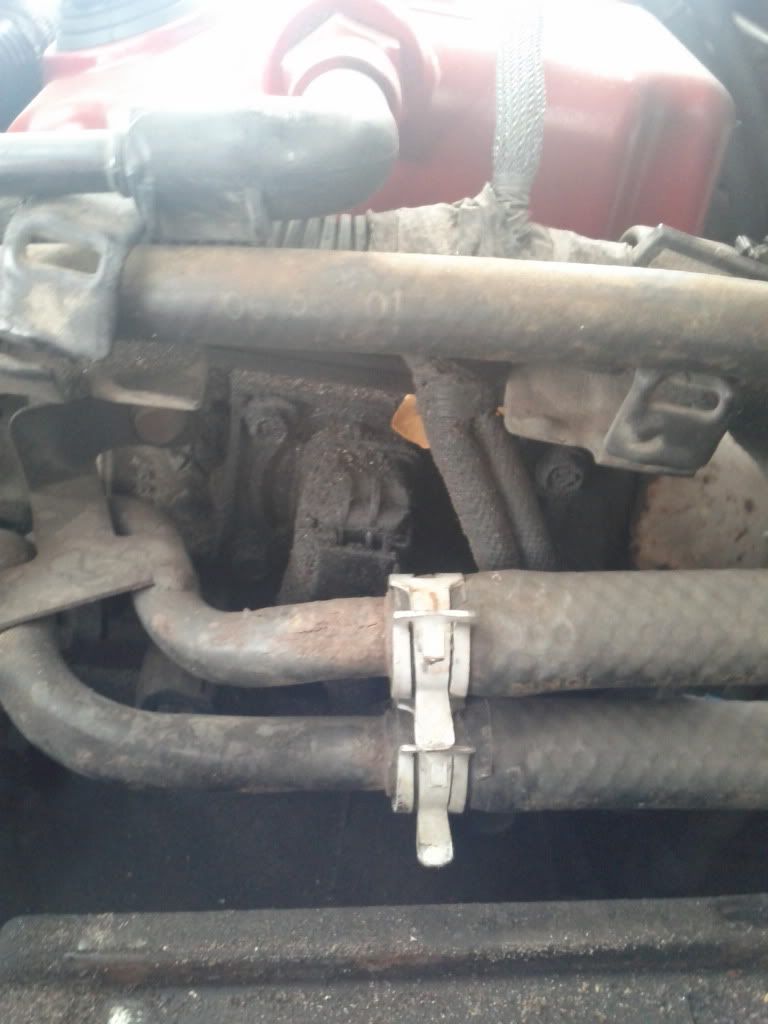
After that remove the 2 heater hoses. As you can see they're in the way. I took this pic with the battery tray still attached so you can see how little space there is to work with.
Image

Vise-grips work awesome for getting those pesky clamps off and holding them open for you:
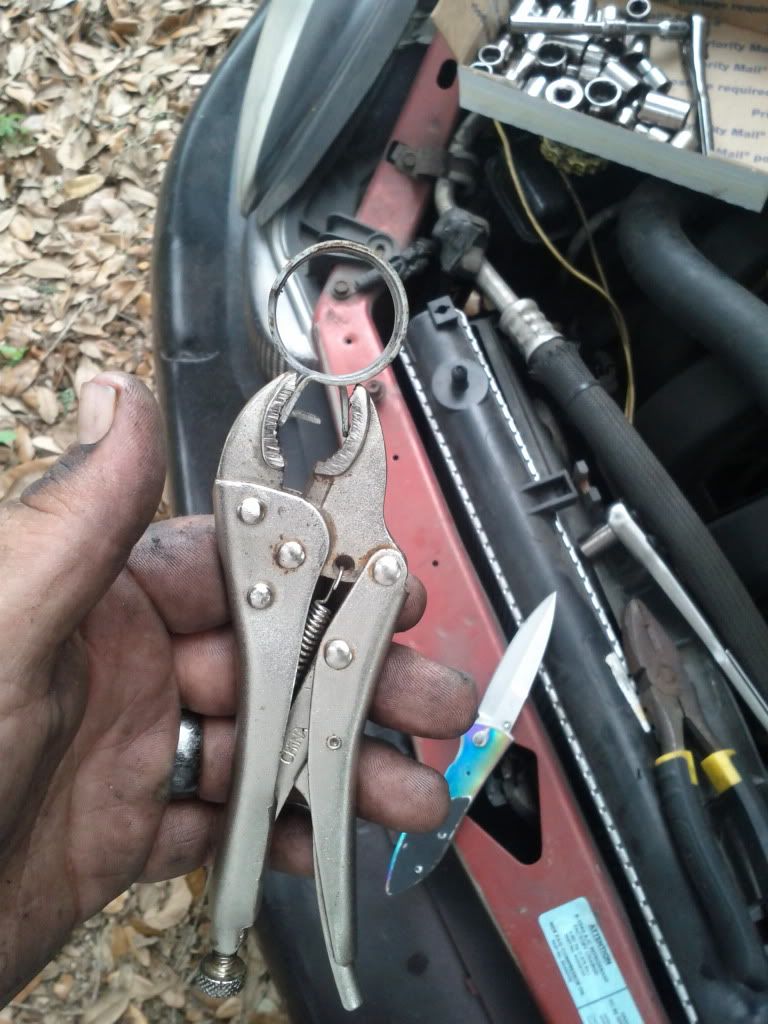
Image


As you can see, without the hoses and tray there's a little more room to work with.
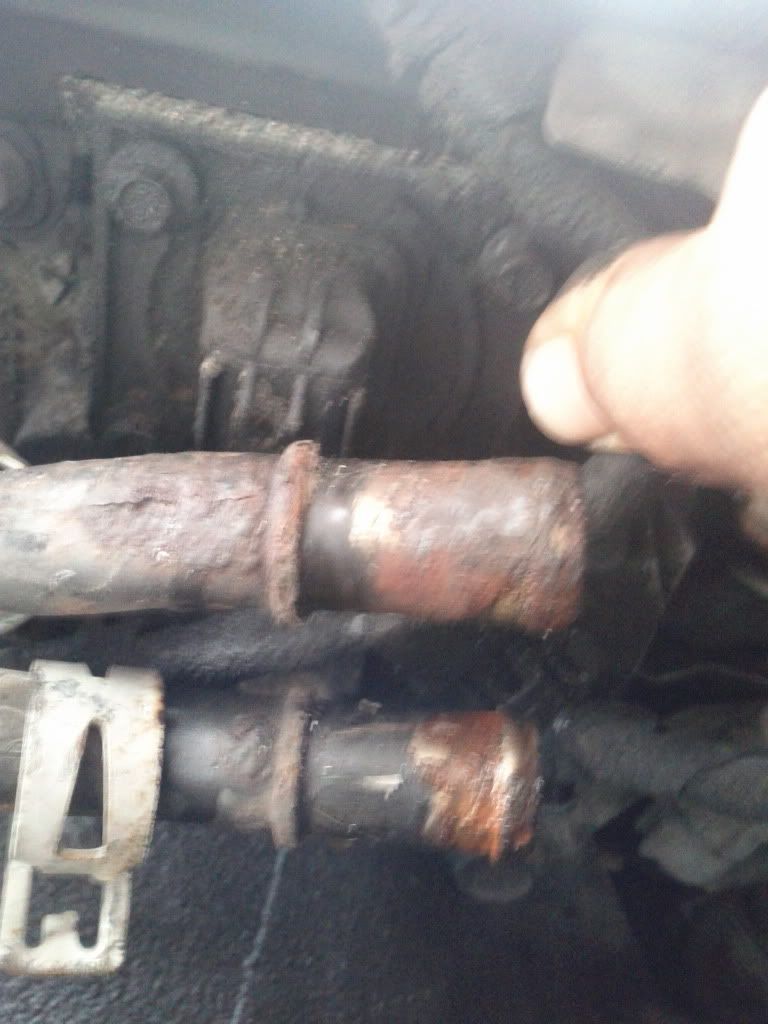
Image
Image

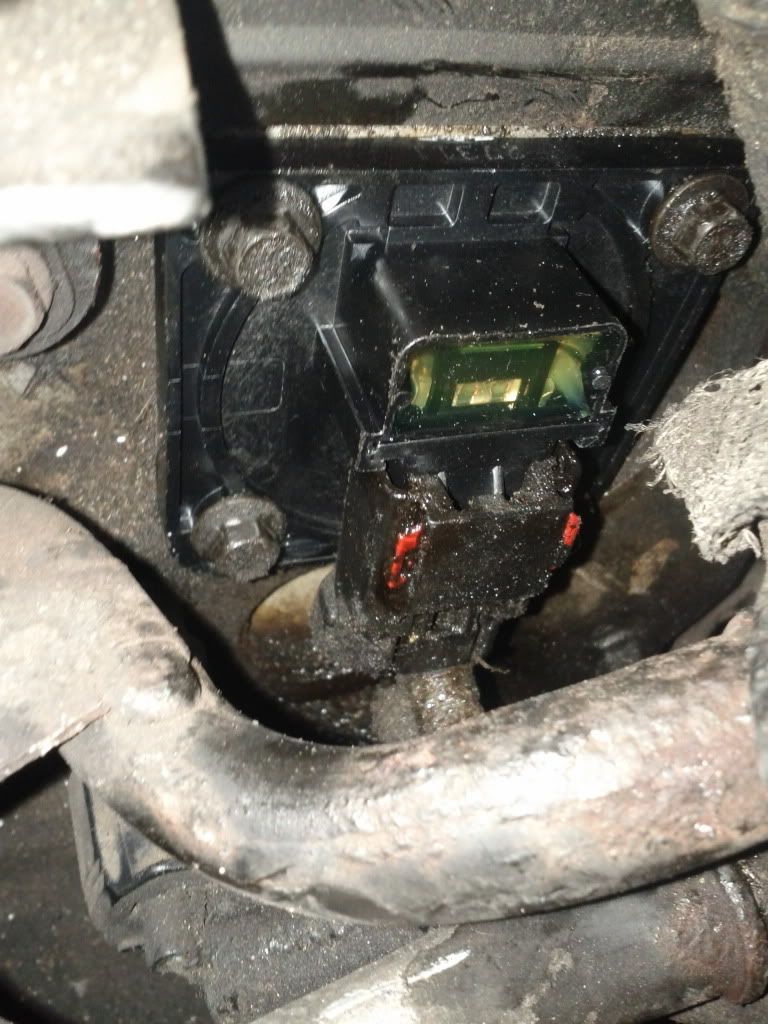
I took the connector off before taking off the hoses and battery tray but looking back it's smarter to do the connector after so coolant doesn't splash in there. You may have to wipe off some grease to see a little red piece in the connector. With your flat head screwdriver, push the front end(facing front of car) in until the other side pops out like in the picture. Then slide the connector off the sensor.
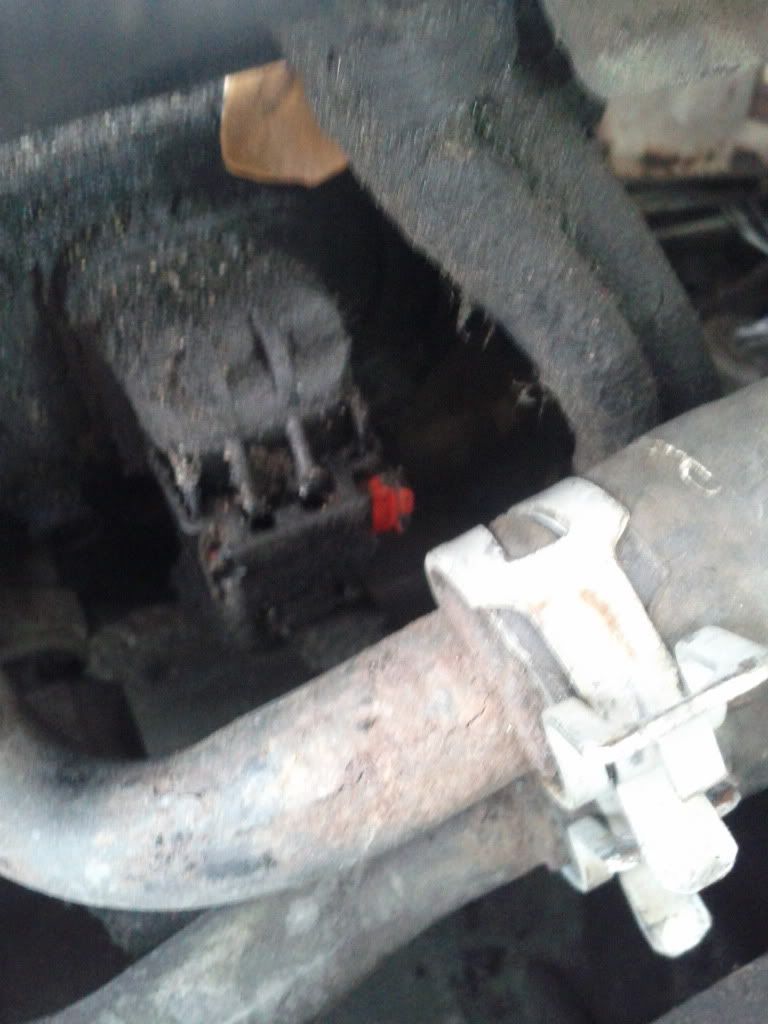
Image

Remove the 4 bolts from the sensor with the 8mm socket. It gets kind of tricky because or how things are positioned. I used my extensions for the top ones and used a short socket with my 1/4" ratchet and got the bottom bolts from underneath. You'll be glad you took out the battery tray for this part.


After you pull the old sensor off, this is what you should see.
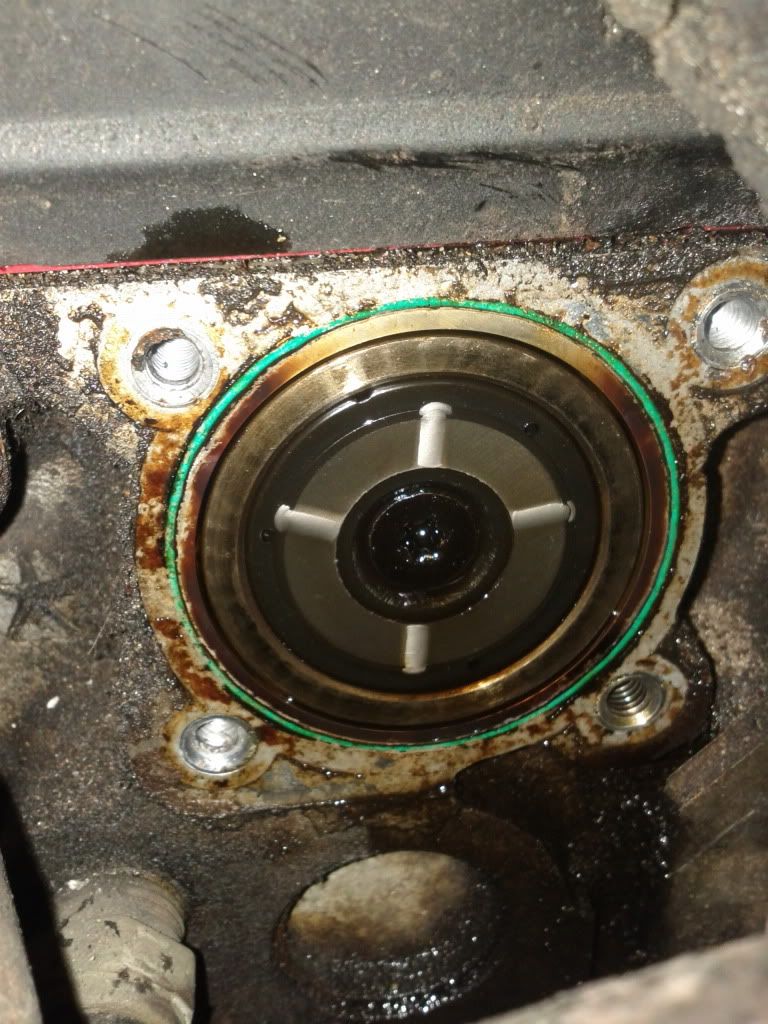
Image

Put the new sensor on and put everything back together.
Image

occasional demons
Junior Admin
Posts: 20306
Joined: Thu May 03, 2007 12:14 pm
Location: Ashland Ohio

Post by occasional demons » Mon Apr 16, 2012 9:17 pm

Already one, but the more the merrier.
This one was done without removing the heater hoses tho.
viewtopic.php?t=21611


You really need to remove your heater tubes and fix the rust. Once you see the price of them, you won't want to buy them, and they don't show up on ebay for neons too often.
viewtopic.php?p=633857#633857

You may have gotten away with cleaning the metal sludge that has accumulated at the magnet poles.

Which is kind of cool comparing a NGC magnet to pre '03.

Image

Image
Bill
Olha Koba, a psychologist in Kyiv, said that “anger and hate in this situation is a normal reaction and important to validate.” But it is important to channel it into something useful, she said, such as making incendiary bombs out of empty bottles.
2000 Neon MTX swap with '02 R/T PCM
1999 neon coupe 2.4 swap
2021 Forester

Barry McCockener
2GN Member
Posts: 151
Joined: Sun Jul 31, 2011 12:48 pm
Location: Ethiopia, Mongoria

Post by Barry McCockener » Tue Apr 17, 2012 10:22 pm

Oh, didn't see that one. What would I do about the rust? Just sand it down or what? I didn't wipe off the magnet. Think I should or is that supposed to be replaced at the same time? The difference is cool to look at between the 2. I'm glad I'm pre-NGC.

occasional demons
Junior Admin
Posts: 20306
Joined: Thu May 03, 2007 12:14 pm
Location: Ashland Ohio

Post by occasional demons » Wed Apr 18, 2012 7:57 am

Magnet just needs cleaned, they are good forever (at least in neon terms), unless it gets cracked.

The rust, well you really would have to remove the tubes to sand/wire wheel them as best as possible. Which basically requires removing the IM to get to them.

Then a good coat of rust primer/and something like Rustoleum's Appliance Epoxy to top coat with. Home Depot or Lowe's carries it for sure, Wal marts are hit/miss. It only comes in Black, Almond, or White tho. Edit: Now in "Stainless Steel"
Bill
Olha Koba, a psychologist in Kyiv, said that “anger and hate in this situation is a normal reaction and important to validate.” But it is important to channel it into something useful, she said, such as making incendiary bombs out of empty bottles.
2000 Neon MTX swap with '02 R/T PCM
1999 neon coupe 2.4 swap
2021 Forester

Post Reply

Return to “HT Engine”