How To: Change manual transmisson fluid

OB
Former Moderator
Posts: 9686
Joined: Tue Nov 15, 2005 9:38 pm
Location: Bay Area, CA

How To: Change manual transmisson fluid

Post by OB » Fri Apr 13, 2007 3:18 am

Transmission fluid is often overlooked when doing basic maintenance on a vehicle. I decided to swap mine out for some Redline MTL manual transmission fluid. There are several options as far as aftermarket alternatives for the fluid, including the oem's recommended ATF+4. Please note that some of the older models (00-02) may suggest a different fluid, so check with the FSM or with the dealer before using something else.

Est. time: 1-2 hours

MATERIALS:

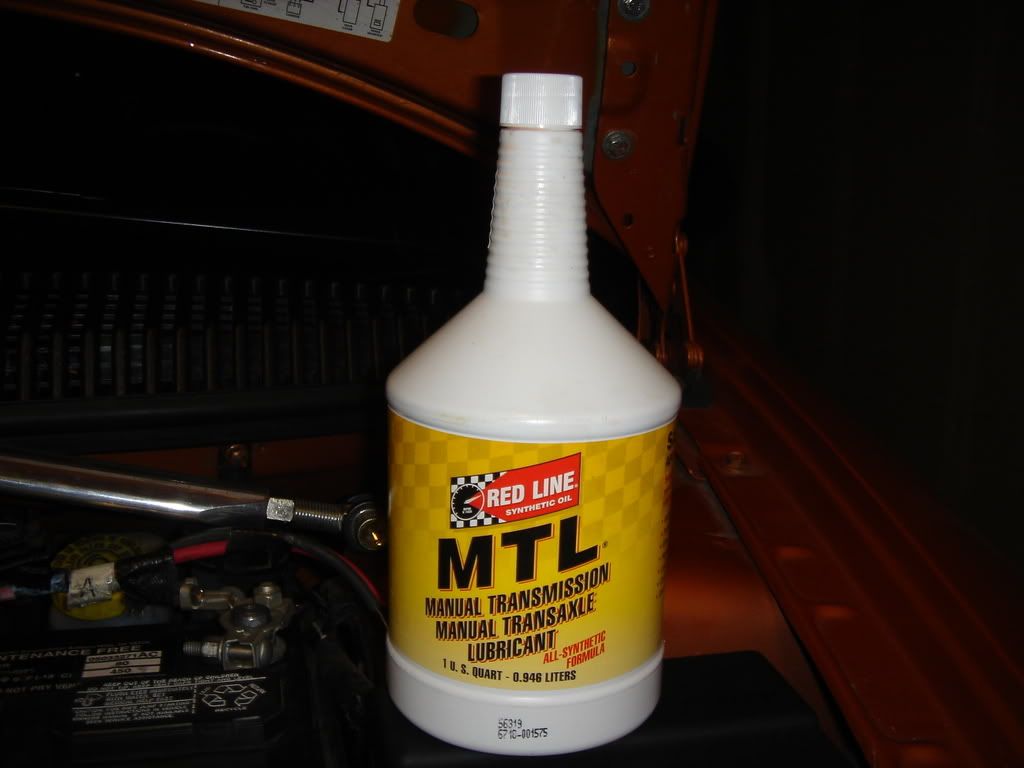
* 3 quarts of the MTX fluid of your choice.
* A tube/hose about 1/2" to 5/8" in diam. and 2-3 feet in length.
* Various sized funnels
* Pan to catch and store the fluid.
* Jack, stands, (or ramps), chocks, and various basic hand tools.

Image

STEP 1

Park the car on a level spot and raise it high enough to crawl under it comfortably. Be sure to use jackstands. Pull the ebrake up all the way, and use wheel chocks in the rear if you have them. Lay down some cardboard underneath to prevent the ground from getting fluid all over it.

STEP 2

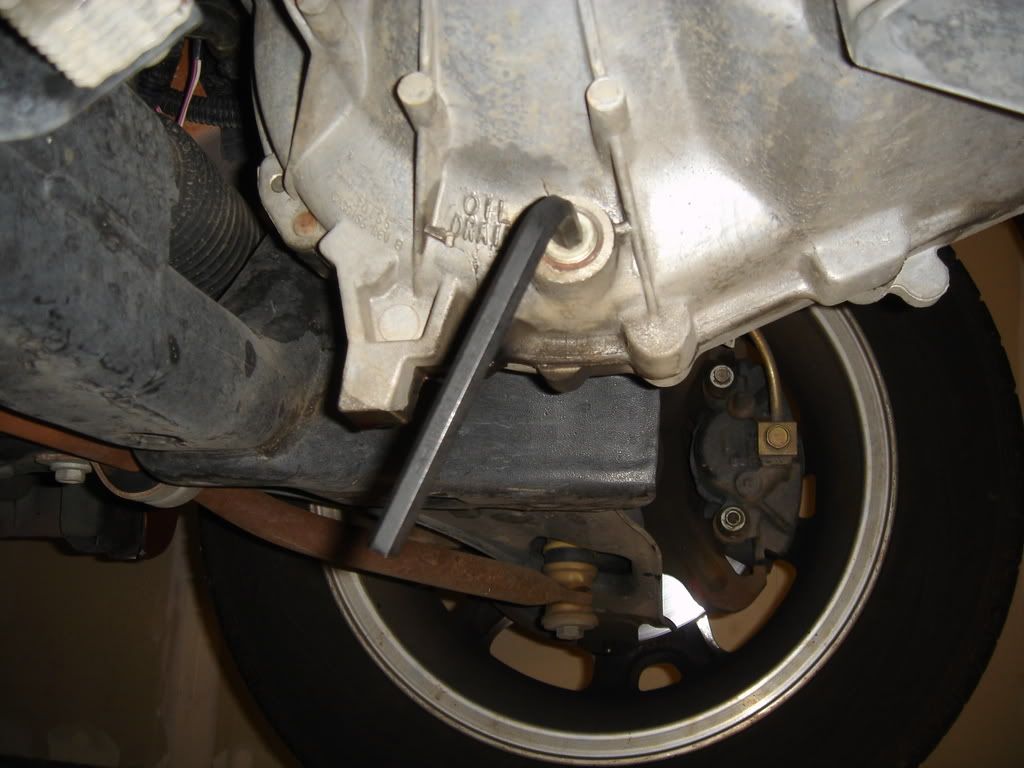
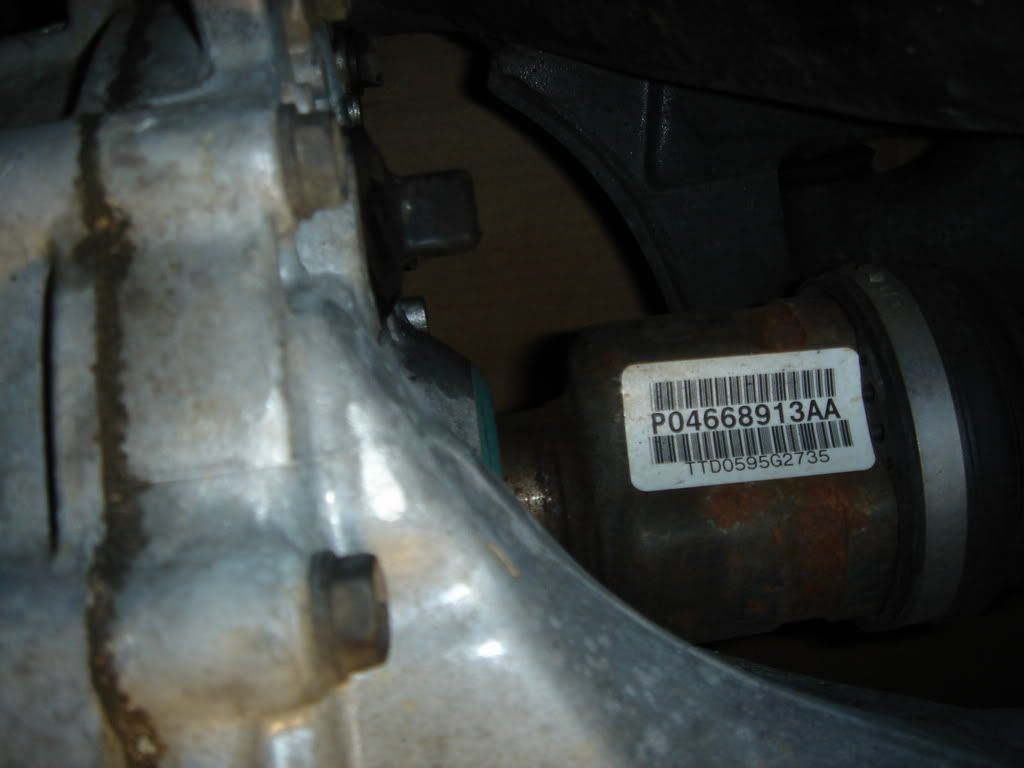
Slide under the front of the car and locate the drain plug at the lower right side of the differential housing on the transmission. Grab your drain pan, and a funnel to catch the fluid. Using an 8mm allen wrench, loosen the plug slowly, and remove it. The fluid doesnt come out too fast, so a well postitioned funnel and pan will prevent much of a mess. Allow several minutes for the fluid to completely drain.

Image

STEP 3

Replace the drain plug, and torque it to 250 in lbs (appx 21 ft lbs). Be careful not to overtighten.

STEP 4

Clear out anything that might be under the car and lower it back down. Be sure to remove the wheel chocks if you used them, so you dont forget them later. Keep the cardboard underneath the transmission to catch the new fluid that may drip out later.

STEP 5

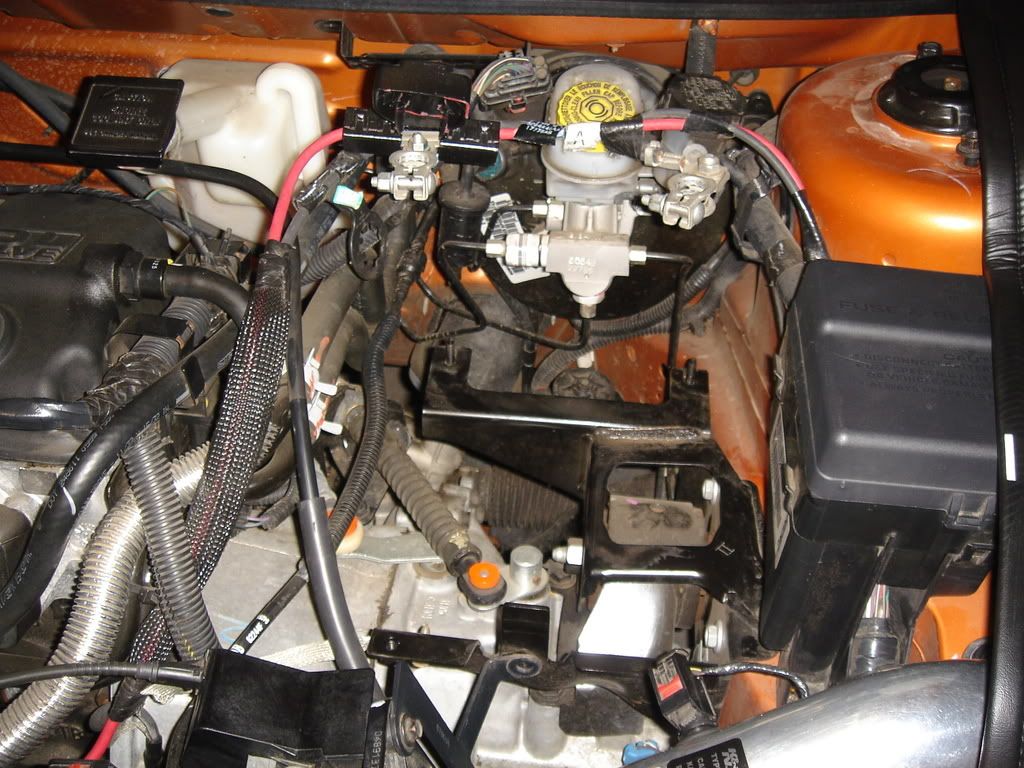
This part of the procedure isnt necessarily required, but if youre not using a lift, its the best way to do this. Loosen the battery-wire terminal nuts with a 10mm wrench and isolate them from the terminals. Remove your strut tower brace if you have one, using a 13mm socket. Loosen the 13mm battery hold-down bolt behind the battery, and remove the battery from the tray.

Remove the four 10mm screws/nuts that hold down the battery tray, as well as the 13mm screw on the lower front of the tray. Remove the battery tray.

Image[/b]

STEP 6

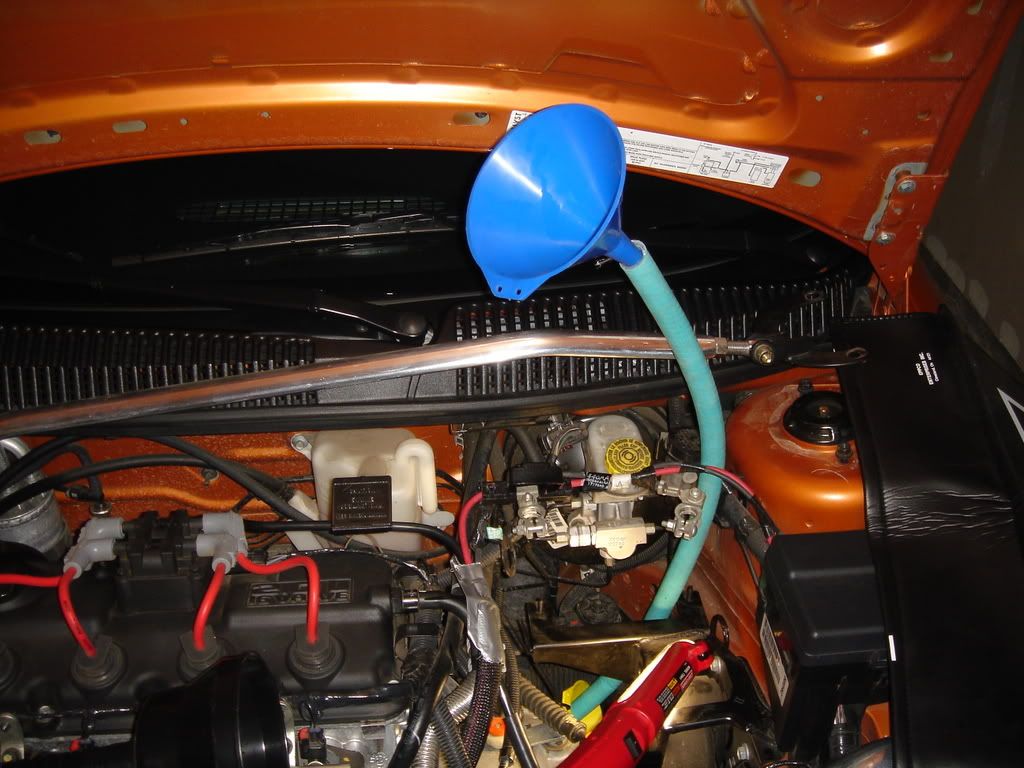
This part of the procedure can be done many ways. Locate the rubber fill plug on the drivers side of the transmission, directly under the master cylinder. Remove it. Using your hose (and a small funnel at the bottom of it, if necesarry), fill the transmission slowly. Keep an eye on the fill hole, making sure all the fluid goes in. This can be pretty tedious, so take your time and spill as little as possible. The FSM calls for the fluid to reach 3/16" below the opening at the fill hole, but its safe to let it fill until it overflows a bit. Replace the rubber plug.

Image

Image

STEP 7

Reinstall the battery tray, reverse of the way you took it out. Do the same with the battery, tightening the battery hold-down carefully. Do not overtighten, or you could damage the battery. Reinstall your strut tower brace if applicable, and torque to 25 ft lbs. Once everything is good and snug, clean up your mess, put your tools away, and take the car out for a spin!

Special thanks to racer12306 for his help and info. All comments and suggestions are welcome. Feel free to PM with any specifc questions. Thank you.

-OB
Last edited by OB on Sun Apr 15, 2007 2:59 am, edited 3 times in total.
-Derek

|Donate to 2gn|Feedback || OB's | GozziFab | All Business |


User avatar
Cabbs
2GN Member
Posts: 853
Joined: Tue Mar 13, 2007 11:22 pm
Location: Kent, Washington
Contact:

Post by Cabbs » Fri Apr 13, 2007 4:39 am

Nice write up! I still love your car though.

koreysxt
2GN Member
Posts: 402
Joined: Thu Mar 16, 2006 3:06 pm
Location: Olathe, KS

Post by koreysxt » Fri Apr 13, 2007 2:07 pm

Very nice write-up. I guess this would also be a good time to put Boogers on (if you don't already have them). Why couldn't a person use ramps instead of jacks/stands?
Traded 05 SXT mtx, for new 07 Fusion SE I4 5A.

OB
Former Moderator
Posts: 9686
Joined: Tue Nov 15, 2005 9:38 pm
Location: Bay Area, CA

Post by OB » Sat Apr 14, 2007 8:18 pm

cabb- thanks!

korey- you could get away with ramps no problem. I dont use them, so I didnt think to include them. Ill throw that in right now.

And yes, if you have boogers that need installing, this is a great time to throw them on.
-Derek

|Donate to 2gn|Feedback || OB's | GozziFab | All Business |


danman132x
2GN Member
Posts: 1075
Joined: Sun Oct 01, 2006 7:36 pm
Location: Crestview, FL

Post by danman132x » Sat Apr 14, 2007 8:46 pm

You can also put the fluid in the reverse light switch. This method is much, much easier. Just remove the wire pigtail, unscrew the sensor and start pouring it in. It will fill up to the hole on the side where you remove the plug so you can see it. Very easy if you have a spotter.

Also start slowing down with your pouring speed when you get to 2.4 or so quarts.
2003 Dodge Neon R/T

Image

http://myspace.com/danman132x

User avatar
dgodard
2GN Member
Posts: 212
Joined: Fri Jun 24, 2005 4:48 pm
Location: Tx

Post by dgodard » Sat Apr 14, 2007 9:35 pm

Nice tip danman132x,
2005 SRT-4 Orange Blast
Stock!!!

2003 NEON R/T Bright Silver
Iceman CAI, Clear corners, Booger bushings, Prothane MMI, Mpx UDP, Tokico Blue, MSD coil & wires,

RIP
2001 NEON SE

User avatar
MyNeonSaysHi
2GN Veteran
Posts: 12090
Joined: Mon May 23, 2005 8:46 pm
Location: Kansas

Post by MyNeonSaysHi » Sat Apr 14, 2007 10:46 pm

Great write up man! I plan to do it next week with some Royal Purple Synchromesh!

08 Acura TL-S
23 Hyundai Elantra N

racer12306
Junior Admin
Posts: 16126
Joined: Sun Oct 24, 2004 8:53 pm
Location: Baltimore, MD
Contact:

Post by racer12306 » Sat Apr 14, 2007 11:14 pm

Out of curiosity, could you post a screen shot of the 48000 mile fluid change interval. I have searched for an interval in the past and wasn't able to find one.

Good write up.

You can also take off the driver side tire and the fill plug is easily accessible. You will still need a long hose or a long flex funnel.
-Frank
Member of Spork Racing
Forum issues: racer12306@2gn.org
Forum Behavior
Support your favorite forum, DONATE!

OB
Former Moderator
Posts: 9686
Joined: Tue Nov 15, 2005 9:38 pm
Location: Bay Area, CA

Post by OB » Sat Apr 14, 2007 11:16 pm

danman, yeah thats a way to go as well, but I wanted to keep it by the book. Good tip
-Derek

|Donate to 2gn|Feedback || OB's | GozziFab | All Business |


User avatar
60trim
2GN Member
Posts: 800
Joined: Wed Oct 20, 2004 6:26 pm
Location: Aurora, Colorado
Contact:

Post by 60trim » Sun Apr 15, 2007 2:46 am

danman132x wrote:You can also put the fluid in the reverse light switch.

Also start slowing down with your pouring speed when you get to 2.4 or so quarts.
You sir are a genius. Good idea.
2003 Silver SXT - Totalled
2005 Silver Subaru Legacy 2.5GT Turbo -Daily
1990 White SR powered 240sx - My sliding slut.

I miss my neon at times. She treated me well and taught me a lot about cars in general. I will always have a special place in my heart for these cars. Heres to the 2gn community.

OB
Former Moderator
Posts: 9686
Joined: Tue Nov 15, 2005 9:38 pm
Location: Bay Area, CA

Post by OB » Sun Apr 15, 2007 2:57 am

racer12306 wrote:Out of curiosity, could you post a screen shot of the 48000 mile fluid change interval. I have searched for an interval in the past and wasn't able to find one.

Good write up.

You can also take off the driver side tire and the fill plug is easily accessible. You will still need a long hose or a long flex funnel.
I just ran out to my garage to check that for you, and sure enough, in the maintenance and lubrication section (0-7) the FSM states that one should change the mtx fluid at 48k miles. However, I must have missed the following sentence, which basically said that the said procedure only needed to be done if the vehicle was used under certain conditions (i.e. taxi) which would require extra maintenance on the transmission. Anyways, I didnt waste my time taking a picture of my mistake, and im gonna edit that part out right now. thanks frank, nice catch.

oh and I thought about taking the wheel off and seeing if it was easily accessible, but that would have made it pretty difficult to lower the car back down and get it level for accurate filling of the fluid. Otherwise (for those of you who have access to a lift) that is a very good idea. Whatever works, right?
-Derek

|Donate to 2gn|Feedback || OB's | GozziFab | All Business |


racer12306
Junior Admin
Posts: 16126
Joined: Sun Oct 24, 2004 8:53 pm
Location: Baltimore, MD
Contact:

Post by racer12306 » Sun Apr 15, 2007 2:46 pm

having a lift kicks ass. it makes work so much easier.

one thing you can do is lower the jack down so that the car appears level and then you will be good. but if you are using ramps it wouldnt help you.
-Frank
Member of Spork Racing
Forum issues: racer12306@2gn.org
Forum Behavior
Support your favorite forum, DONATE!

User avatar
Canada
Junior Admin
Posts: 4816
Joined: Tue Jun 28, 2005 4:05 pm
Location: Island Grove, Ontario, Canada

Post by Canada » Sun Apr 15, 2007 2:51 pm

Awesome write up Derek! I think I may do this at the end of the summer this year!

phenomeneon21
2GN Member
Posts: 554
Joined: Sun Sep 04, 2005 3:06 am
Location: Charleston, South Carolina

Post by phenomeneon21 » Mon Apr 16, 2007 3:44 pm

Very good write-up...I'm inching up on 60K here, and need to do this badly...guess I'll do it sometime this week...
Image
2007 Subaru WRX STi

User avatar
MyNeonSaysHi
2GN Veteran
Posts: 12090
Joined: Mon May 23, 2005 8:46 pm
Location: Kansas

Post by MyNeonSaysHi » Sat Apr 21, 2007 12:56 am

Did mine at school. Very easy job, just like changin' oil.
As for the fluid being changed, you really don't need to change the fluid in an MTX. So I been told from an instructor...

08 Acura TL-S
23 Hyundai Elantra N

OB
Former Moderator
Posts: 9686
Joined: Tue Nov 15, 2005 9:38 pm
Location: Bay Area, CA

Post by OB » Sat Apr 21, 2007 1:57 am

What school do you go to?

It isnt a necessity to change it, but its a good idea. especially if you drive the car hard and/or shift often during your daily routine.
-Derek

|Donate to 2gn|Feedback || OB's | GozziFab | All Business |


ragek23
2GN Member
Posts: 2476
Joined: Wed Sep 27, 2006 9:22 am
Location: Torrington, CT

Post by ragek23 » Sat Apr 21, 2007 2:03 am

haha i didn't even know that plug was there i just drained the tranny fluid when i changed my clutch so as the tranny came off all the fluid came out!! opps.

good write up!

2002 Neon SXT Sold
2006 EVO MR Weekend Warrior
2003 SRT 4 DD
-Kevin

Image

ewetho
2GN Member
Posts: 694
Joined: Sat Jun 10, 2006 5:49 pm
Location: Kankakee, IL
Contact:

Post by ewetho » Mon Apr 30, 2007 10:07 pm

It has been shown and some manufacturers actually require gear oil changes early on once just to get wear in metals out. MTX is just a big gear box. So I would recommend it at least once to good synthetic oil. I used Amsoil ATF that they say meets ATF+4 and works great.

Also another way if you have room to get under neath easy enough is to use a syphon pump thingy (looks like grease gun) and fill it that way (how I did mine).

But that way works easy enough.
2004 Neon SE -- Mods -- K&N CAI, R/T Muffler, Booger Bushings, Prothane Suspension & Race MM Inserts, Vitor's TM Inserts

lolelectricbluesxt
2GN Member
Posts: 1184
Joined: Thu Feb 23, 2006 11:40 pm
Location: Irvine, CA.

Post by lolelectricbluesxt » Mon Apr 30, 2007 10:41 pm

Nice write up Derek! Looks easy enough.
Image

User avatar
flamingpinhead
2GN Member
Posts: 151
Joined: Tue Apr 03, 2007 9:23 pm
Location: Kansas

Post by flamingpinhead » Wed May 02, 2007 4:54 am

very good writeup. its really an easy DIY job. i honestly do not take the time to remove the battery tray, just fed the line down to the fill hole

OB
Former Moderator
Posts: 9686
Joined: Tue Nov 15, 2005 9:38 pm
Location: Bay Area, CA

Post by OB » Wed May 02, 2007 6:25 am

Its very tough to get a hose to the fill plug from above, and even if you could, holding in without spilling the 7$ fluid (well, in my case) is nearly impossible. If you fill it in the reverse light switch as mentioned above, you might save some time. Removing the batt and tray takes 10 mins and makes things a ton easier if you care to do things by the book. Removing the driver side wheel seems to be another alternative, but I avoid that if possible because im lazy.
-Derek

|Donate to 2gn|Feedback || OB's | GozziFab | All Business |


getcrunk88
2GN Member
Posts: 143
Joined: Tue Feb 13, 2007 7:13 pm

Post by getcrunk88 » Sun May 06, 2007 1:33 pm

When i did mine i did both i took out the battery tray 4 bolts up top and one bigger one in the middle on the bottom of the tray its kinda hard to get to if your using your stock air box setup but i got it and i took off the drivers side wheel made it easy to get the hose in there then after the hose was in there good i put the wheel back on in a pattern where i can see the fluid coming out so i know when to stop filling
Image

racer12306
Junior Admin
Posts: 16126
Joined: Sun Oct 24, 2004 8:53 pm
Location: Baltimore, MD
Contact:

Post by racer12306 » Sun May 06, 2007 5:45 pm

^^^damn right that battery tray is a pain when you have the airbox in. i elected to leave my airbox in when i did my boogers. that was a mistake.
-Frank
Member of Spork Racing
Forum issues: racer12306@2gn.org
Forum Behavior
Support your favorite forum, DONATE!

getcrunk88
2GN Member
Posts: 143
Joined: Tue Feb 13, 2007 7:13 pm

Post by getcrunk88 » Sun May 06, 2007 6:54 pm

Yea it was a real PITA because it looked like some battery acid had leaked onto the bolt so it was corroded real bad thats when i wipped out the hammer lol
Image

racer12306
Junior Admin
Posts: 16126
Joined: Sun Oct 24, 2004 8:53 pm
Location: Baltimore, MD
Contact:

Post by racer12306 » Wed Sep 12, 2007 9:50 am

I don't think this was mentioned, but if you want the fluid to come hauling out of the drain hole, pull the fill plug. If you leave the fill plug in it will be like turning a soda bottle up side down, it will come out in spurts. But with the fill plug removed it takes all of about 30 seconds (or less) for the fluid to be out.

Think of when you shotgun a beer, the beer doesn't start hauling ass until you pop the top.
-Frank
Member of Spork Racing
Forum issues: racer12306@2gn.org
Forum Behavior
Support your favorite forum, DONATE!

01NeonSnooZer
2GN Member
Posts: 214
Joined: Sat Sep 15, 2007 8:31 pm
Location: OKC, OK

Post by 01NeonSnooZer » Sat Sep 15, 2007 9:21 pm

I agree with this guy^^. I do a lot of oil changes as i am an hourly-paid apprentice tech and I take off the oil cap and it comes out like gangbusters.

MyNeonSaysHi - You little Governator avatar scares me, lol.
Gimme some chopsticks, I wanna eat rice!

User avatar
neonxrt
2GN Member
Posts: 46
Joined: Thu Apr 24, 2008 10:48 pm
Location: Milwaukee, WI
Contact:

Post by neonxrt » Sun Apr 27, 2008 2:40 am

I'm going to have to do this one of these weekends coming up.
I haven't looked yet (and its probably obvious) but where it the reverse light switch? I've seen the rubber plug before while I was under the car, but haven't ever paid attention to the reverse light switch. Anyone use the AMSOIL Synthetic Synchromesh fluid? I think that's teh way I'm going to go.
Image
FOR SALE: NEW Electrical Autometer Phanton Oil Press. Gauge || Kato Combat" Body Kit (front needs some minor repair work) || Stock Taillights

WTB: Fuel Rail Cover, 2 Pod Full Pillar || Chrome Grill Piece (00-01) || Rearview Mirror w/ Maplights (need glass only) || 15: (5x100) "stealie"

racer12306
Junior Admin
Posts: 16126
Joined: Sun Oct 24, 2004 8:53 pm
Location: Baltimore, MD
Contact:

Post by racer12306 » Sun Apr 27, 2008 4:17 pm

The AMSOIL MTF is supposed to be the top stuff for our transmissions.
-Frank
Member of Spork Racing
Forum issues: racer12306@2gn.org
Forum Behavior
Support your favorite forum, DONATE!

User avatar
neonxrt
2GN Member
Posts: 46
Joined: Thu Apr 24, 2008 10:48 pm
Location: Milwaukee, WI
Contact:

Post by neonxrt » Tue May 06, 2008 5:52 pm

I checked it out briefly, and I can't find the reverse light switch, or I just don't know what I'm looking for. Either way, anyone able to post a picture or explain where its located? Is there a possiblity of breaking teh switch when removing it? Thanks!
Image
FOR SALE: NEW Electrical Autometer Phanton Oil Press. Gauge || Kato Combat" Body Kit (front needs some minor repair work) || Stock Taillights

WTB: Fuel Rail Cover, 2 Pod Full Pillar || Chrome Grill Piece (00-01) || Rearview Mirror w/ Maplights (need glass only) || 15: (5x100) "stealie"

yellowpatrol
2GN Member
Posts: 2847
Joined: Mon Jan 01, 2007 8:12 pm
Location: Kansas City

Post by yellowpatrol » Wed Jul 09, 2008 12:03 pm

neonxrt wrote:I checked it out briefly, and I can't find the reverse light switch, or I just don't know what I'm looking for. Either way, anyone able to post a picture or explain where its located? Is there a possiblity of breaking teh switch when removing it? Thanks!
I'm sure you've found it by now, but I'm going to do this myself today and I had the same question. I looked in the FSM and found this pic:

Image

Hopefully that helps anyone else who has the same question.
FEEDBACK
Image
Adionik wrote:On a 100% stock SRT engine i've seen detonation on 93 octane, I know what i'm talking about.

Post Reply

Return to “HT Drivetrain”