How-to: Rear spring install without a spring compressor

Post Reply
daaboots
2GN Member
Posts: 762
Joined: Wed Mar 22, 2006 8:22 am
Location: Ottawa, ON
Contact:

How-to: Rear spring install without a spring compressor

Post by daaboots » Tue Jul 04, 2006 12:42 pm

Disclaimer: I assume no responsibility for injury or death by following these instructions.

Installing rear drop springs on your Neon is fairly simple assuming that you have some knowledge in automotive maintenence and repairs. You will not need a spring compressor in order to install springs on the rear.

Tools you will need:
- car lift jack and safety stand
- spark plug socket
- 10mm socket, 1/4 drive
- 1/4 drive extension
- 1/4 drive ratchet
- a wrench or vise grip pliers
- ratchet and socket to remove your rear tires
- torque wrench
- WD-40

Overview:
We are going to use the weight of the car to our advantage in order to remove the rear springs. First we will remove the nut that holds the strut to the strut top hat. Next we'll remove the tire, jack the car up and let the spring decompress which will force the suspension down. Then we will remove the old spring and replace it with the new one. Finally we will do the above in reverse order to complete the install.

Start by pulling the trunk carpet back to expose the rear strut towers.
Image

These are the tools you will need to remove the nut that holds the strut to the top hat.
Image

Remove the rubber piece from the spark plug socket if it contains one. Insert the 1/4 drive extension into the spark plug socket.
Image

Attach the 10mm socket to the drive extension.
Image
Image

Now using the socket setup and the wrench or vise grip pliers, remove the nut. Give the nut and threads a shot of WD-40 first to help it come off easier.
Image

Jack up your car and remove the tire. Your strut and spring should still be connected at this point.

Now step on your rear suspension setup to decompress the spring and lower your suspension. BE CAREFUL!! Dont place your fingers anywhere inside the wheel well or under the suspension when you do this! It should look something like this when it finally releases.
Image
Image

In order to remove the spring, you will need to compress the strut plunger (correct term?) with your hands. Keeping the strut plunger compressed, you'll need to twist the spring out of place.
I recommend placing a safety stand somewhere under the car just in case the jack slips off the car. Use common sense and be careful!
Image

STOP. Now is a real good time to clean your strut and wheel well. If you want to spay some rust proofing in your wheel well, do it now!
Image

Installing the new spring is the exact opposite of removing. Installing the strut plunger back into the strut top hat will require a lot of force. You'll need to compress the plunger some and just keep pushing until it finally lines up with the hole. Make sure the spring is sitting in the rubber spring bushings correctly.
Image

Now just tighten the strut nut, re-install your wheel, torque your lug nuts, and you're done :D

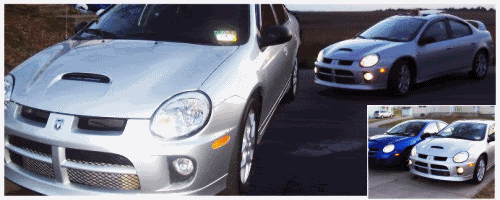
I installed used SRT-4 springs. Here are the before and after results. Didn't really drop the car that much. I'm hoping it will settle some with time.

Before:
Image

After:
Image

Stock and SRT-4 springs.
Image

Comments and corrections are welcome
Last edited by daaboots on Tue Jul 04, 2006 7:20 pm, edited 6 times in total.
2005 SX 2.0 - http://www.cardomain.com/ride/2092484
Rear sway bar brackets on sale! - viewtopic.php?t=19840
My Feedback - viewtopic.php?t=10546
Image

User avatar
Nick Drake
2GN Member
Posts: 1179
Joined: Tue Feb 28, 2006 9:17 pm
Location: Near Albany NY

Post by Nick Drake » Tue Jul 04, 2006 12:50 pm

Why not just take the strut out? Just incase, I mean your way works but I could see someone scratching the paint trying to get my new spring in there.
kc2002acr wrote:because if I was racing you at a 60 roll, I would have been in second for a second till I hit 3rd, then I would have called you on my cell phone and asked you if my taillights were all working. :rofl: ;) :D

daaboots
2GN Member
Posts: 762
Joined: Wed Mar 22, 2006 8:22 am
Location: Ottawa, ON
Contact:

Post by daaboots » Tue Jul 04, 2006 12:58 pm

Nick Drake wrote:Why not just take the strut out? Just incase, I mean your way works but I could see someone scratching the paint trying to get my new spring in there.
You'd need a wheel alignment if you removed the strut. This way you dont.
2005 SX 2.0 - http://www.cardomain.com/ride/2092484
Rear sway bar brackets on sale! - viewtopic.php?t=19840
My Feedback - viewtopic.php?t=10546
Image

SlvrACR
2GN Member
Posts: 4220
Joined: Thu Jun 16, 2005 5:13 pm
Location: Roseville MI

Post by SlvrACR » Tue Jul 04, 2006 1:55 pm

Um not really. Unless you have camber bolts if you just take the strut out it wont throw off the alignment. I just replaced my strut mounts and put them back in. Then i went to align it at work and the alignment was perfect. You need a alignment more because the spring change more then the strut.
2gn Member Feedback
My Project Log
01 Dodge ACR - SOLD
01 Dodge RT - 279whp 329wtq

Image

User avatar
Nick Drake
2GN Member
Posts: 1179
Joined: Tue Feb 28, 2006 9:17 pm
Location: Near Albany NY

Post by Nick Drake » Tue Jul 04, 2006 1:59 pm

daaboots wrote:
Nick Drake wrote:Why not just take the strut out? Just incase, I mean your way works but I could see someone scratching the paint trying to get my new spring in there.
You'd need a wheel alignment if you removed the strut. This way you dont.
Whenever you change the height of your car, your wheels will be tilted. So you still need an alignment...however small the change will be.
kc2002acr wrote:because if I was racing you at a 60 roll, I would have been in second for a second till I hit 3rd, then I would have called you on my cell phone and asked you if my taillights were all working. :rofl: ;) :D

daaboots
2GN Member
Posts: 762
Joined: Wed Mar 22, 2006 8:22 am
Location: Ottawa, ON
Contact:

Post by daaboots » Tue Jul 04, 2006 7:17 pm

Whenever I took my car in for an alignment due to a pull to the right, the tech adjusted my rear camber by loosing the two rear strut bolts and then somehow adjusted the camber angle back to factory settings. This is why I feel that removing the strut completely will cause the rear camber to be out of alignment.

Yes I realize that lowering the car, even slightly, will throw the camber out. Since the SRT-4 springs only lower my car about 3/4", the negative effects should be very minimal, much less than if I had remove the entire strut in my opinion.

Whether my rear needs and alignment or not is really not an issue anyway. When I replace the front in a few days I'll be going in for a full alignment. This is the way I decided to install my springs, and in doing so, I thought I'd share it with everybody. If you don’t like it or disagree with the procedure, feel free to change your springs the way you want to.
2005 SX 2.0 - http://www.cardomain.com/ride/2092484
Rear sway bar brackets on sale! - viewtopic.php?t=19840
My Feedback - viewtopic.php?t=10546
Image

SinfulNeon
2GN Member
Posts: 254
Joined: Sun Feb 04, 2007 2:21 am
Location: Redding, Ca
Contact:

Post by SinfulNeon » Sat Mar 17, 2007 4:53 pm

hmm cool thanks for the how to, I know it has been some time now but could you or anyone else do a how to on removing the front springs as well???

again thanks and nice how to
Image
::WTB:: Dual or Tri-pod A-Pillar (black) : Passenger A-Pillar (Black) : AGP Dog Bone Motor Mounts : 1st Gen ACR Springs : Shorty Attn. :

daaboots
2GN Member
Posts: 762
Joined: Wed Mar 22, 2006 8:22 am
Location: Ottawa, ON
Contact:

Post by daaboots » Sat Mar 17, 2007 7:51 pm

SinfulNeon wrote:hmm cool thanks for the how to, I know it has been some time now but could you or anyone else do a how to on removing the front springs as well???

again thanks and nice how to
I'll be putting my SRT-4 springs back on the car once the weather gets warmer. If you like, i'll take some pics a do a write up. There might already be one if you look around.
2005 SX 2.0 - http://www.cardomain.com/ride/2092484
Rear sway bar brackets on sale! - viewtopic.php?t=19840
My Feedback - viewtopic.php?t=10546
Image

SinfulNeon
2GN Member
Posts: 254
Joined: Sun Feb 04, 2007 2:21 am
Location: Redding, Ca
Contact:

Post by SinfulNeon » Sat Mar 17, 2007 7:56 pm

ya I looked didnt really see one here but kinda foind one on neons.org and it had no pics so some of the things it ref. I didnt or at least wasnt sure what they were talking and its always nice to have pics to have a visual of what your doing to see if your doing it right. ^_^ and thanks

Also I have heard that you could use a bunch of industrial like heavy duty fat zip ties while the springs are compressed and put a bunch of zip ties to keep them compressed to make it easier to slide on and off the springs when you lower the suspension, I think it was a car show that I saw them do that and then they just cut the zip ties after they installed it once the spring was back under tension with the weight of the car so that it would recoil when you cut them? You think that could work?
Image
::WTB:: Dual or Tri-pod A-Pillar (black) : Passenger A-Pillar (Black) : AGP Dog Bone Motor Mounts : 1st Gen ACR Springs : Shorty Attn. :

User avatar
kc2005ptgt
Former Moderator
Posts: 6587
Joined: Wed Dec 14, 2005 7:39 pm
Location: Kansas City, MO
Contact:

Post by kc2005ptgt » Sat Mar 17, 2007 10:17 pm

OWE - do not use zip ties (industrial or not) - guys, this is great and all, but why not just rent a spring compressor? I see lots of problems with any other way than this.

I replaced my springs on all four corners in less than 5 hours, granted I did it in 90+ weather, and took my time... the rear 1gn RT springs dont even need to be compressed to put on.

Also, nice write up. I will never do it this way :lol: But good to know that someone tried it another way.
SOLD 5/13- 2005 Chrysler PT Cruiser GT Convertible | 2.4L Turbo HO | Bright Silver Metallic
SOLD 7/09- 2002 Dodge Neon ACR | Flame Red
The Offical: Sold My Neon Even Though I Swore I Never Would Club | Member #777

Image

SlvrACR
2GN Member
Posts: 4220
Joined: Thu Jun 16, 2005 5:13 pm
Location: Roseville MI

Post by SlvrACR » Sat Mar 17, 2007 10:26 pm

Ya you can rent them for $15 and if you want just keep it.
2gn Member Feedback
My Project Log
01 Dodge ACR - SOLD
01 Dodge RT - 279whp 329wtq

Image

SinfulNeon
2GN Member
Posts: 254
Joined: Sun Feb 04, 2007 2:21 am
Location: Redding, Ca
Contact:

Post by SinfulNeon » Sat Mar 17, 2007 10:33 pm

well I was planning on picking one up tomorrow, I was just wondering if the zip tie idea would work anyways just the want to know not the want to do lol just my curiosity.
Image
::WTB:: Dual or Tri-pod A-Pillar (black) : Passenger A-Pillar (Black) : AGP Dog Bone Motor Mounts : 1st Gen ACR Springs : Shorty Attn. :

daaboots
2GN Member
Posts: 762
Joined: Wed Mar 22, 2006 8:22 am
Location: Ottawa, ON
Contact:

Post by daaboots » Sat Mar 17, 2007 10:46 pm

SinfulNeon wrote:well I was planning on picking one up tomorrow, I was just wondering if the zip tie idea would work anyways just the want to know not the want to do lol just my curiosity.
For your safety, please do not use zip ties. The amount of force it requires to compress the springs enough is tremendous. Just rent a spring compressor.
2005 SX 2.0 - http://www.cardomain.com/ride/2092484
Rear sway bar brackets on sale! - viewtopic.php?t=19840
My Feedback - viewtopic.php?t=10546
Image

SinfulNeon
2GN Member
Posts: 254
Joined: Sun Feb 04, 2007 2:21 am
Location: Redding, Ca
Contact:

Post by SinfulNeon » Sat Mar 17, 2007 10:51 pm

well I figured as much.
Image
::WTB:: Dual or Tri-pod A-Pillar (black) : Passenger A-Pillar (Black) : AGP Dog Bone Motor Mounts : 1st Gen ACR Springs : Shorty Attn. :

User avatar
flamingpinhead
2GN Member
Posts: 151
Joined: Tue Apr 03, 2007 9:23 pm
Location: Kansas

Post by flamingpinhead » Fri May 25, 2007 4:21 pm

given the front is much heavier duty springs, will this method work on the front end as well or will i need a spring compressor?

daaboots
2GN Member
Posts: 762
Joined: Wed Mar 22, 2006 8:22 am
Location: Ottawa, ON
Contact:

Post by daaboots » Mon May 28, 2007 8:25 am

flamingpinhead wrote:given the front is much heavier duty springs, will this method work on the front end as well or will i need a spring compressor?
I recomend using a spring compressor for the front end. I'm pretty sure this method will not work.
2005 SX 2.0 - http://www.cardomain.com/ride/2092484
Rear sway bar brackets on sale! - viewtopic.php?t=19840
My Feedback - viewtopic.php?t=10546
Image

Mopar65
2GN Member
Posts: 721
Joined: Sun Jul 27, 2008 9:16 am
Location: Buffalo, NY

Post by Mopar65 » Sun Mar 29, 2009 9:53 am

Nice write-up. So you are running SRT springs on stock SXT struts then? I think I gotta get some new springs then

Mike

illriginalized
2GN Member
Posts: 135
Joined: Mon Nov 12, 2012 11:04 pm
Location: United States

Post by illriginalized » Wed Nov 21, 2012 12:04 am

I've replaced springs and struts on a Corolla this way. All I did was press down on the suspension with my foot while holding my strut/spring with one hand until the strut assembly was able to pull right out from under the fender.

If I'm not mistaken I had to jack the car up a little more in order to install new struts + lower springs. Once I bolted the bottom portion I raised the suspension up and aligned the piston with the strut mount hole.. then screwed the nut just enough to hold the assembly in place.

Anyways, this is an easy task.. even without the spring compressor. Think it took me around 45-60 minutes each wheel. After that, just go pay for an alignment.

Post Reply

Return to “HT Chassis”