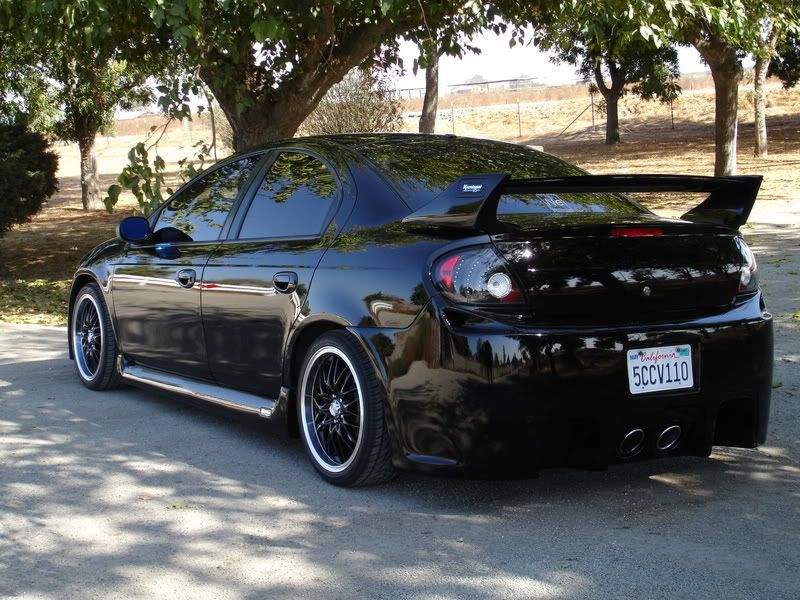
2003 Dodge Neon SXT
BC Racing Sports Inverted Coilover Suspension
Tools Needed:
3/8" Drive Ratchet
1/2" Drive Ratchet
10mm socket
12mm socket
13mm socket
21mm socket
13mm box end/open end wrench (X2)
hammer/mallet
torque wrench (1/2" drive)
Jack
Jack stands
Slave........Any human with minimal mental function will do.
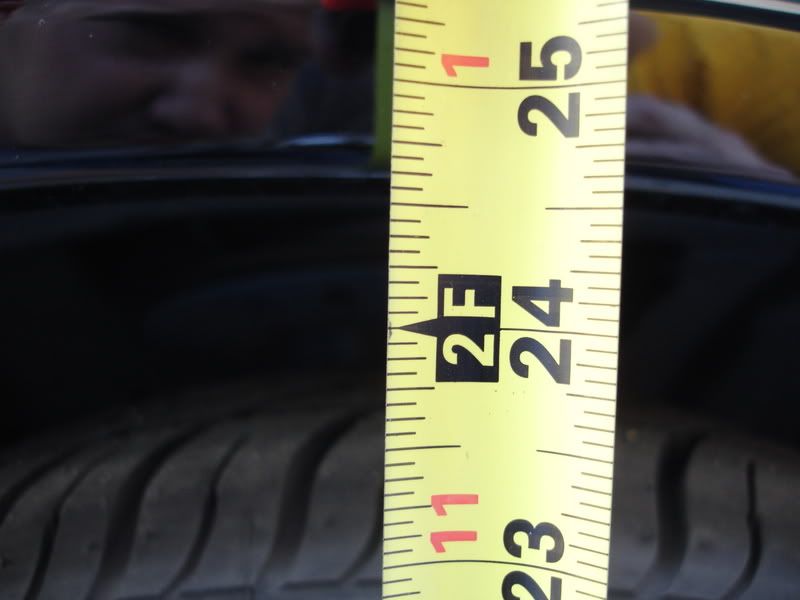
First thing you want to do is get your car on a flat, level surface, and measure your ride height. Take your measurements from the ground to the bottom edge of your fender lip (as shown). Write them down respectfully (your writing won't respect you, if you don't respect it). Put your measurements on the forehead of your slave with TWO staples, one just won't do.
1. Break lugnuts loose, but keep them snug.
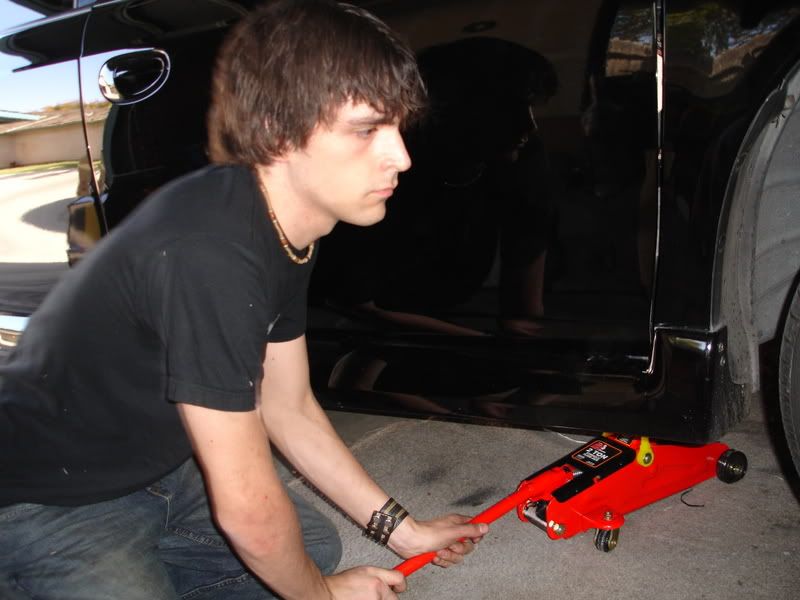
B. Jack up car from jack points, and place jack stands under car accordingly
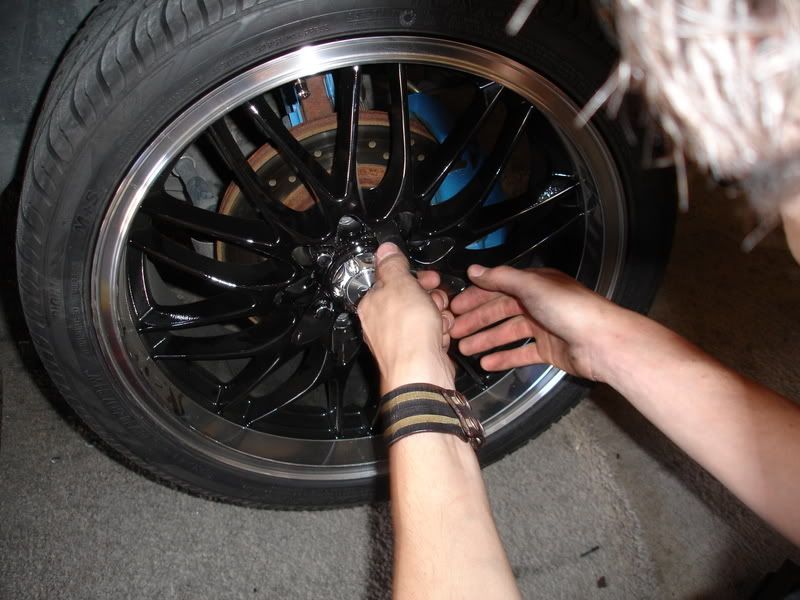
3. Remove Lugs from your front rim, and set rim aside.
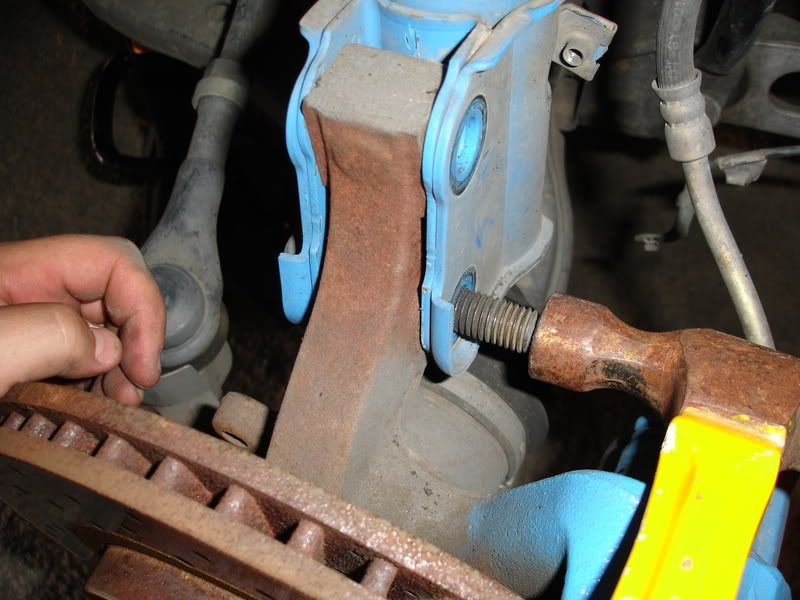
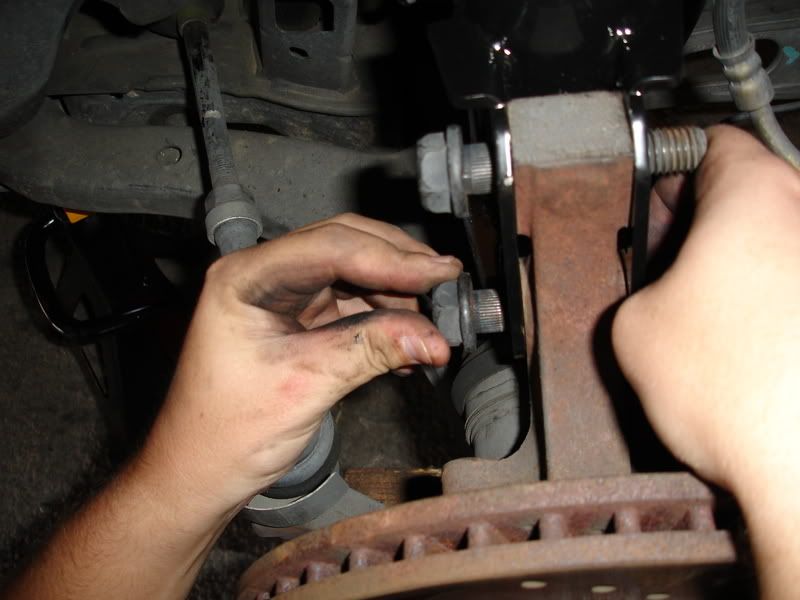
C. Grab your 21mm socket and slap it on your 1/2" drive ratchet, loosen the two nuts that connect the strut body to the cars steering knuckle. It is not necessary to hold the opposite side of the bolt to loosen these, if you turn the bolt side of the fastener, you will need to make a trip to your local dealership, or crack dealer to get new ones.
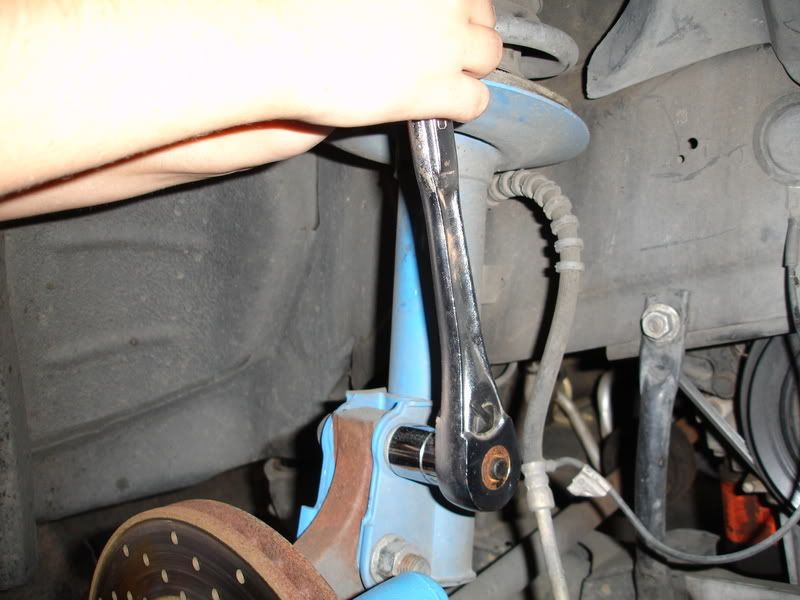
The bolts are knurled so that they don't spin in the knuckle, because of this, they require some "convincing" with a hammer or mallet to remove, simply tap them out............firmly, but gently as to not damage any of the other components of the steering or suspension, should you miss your target. Once they are loose, simply pull them out to remove them.
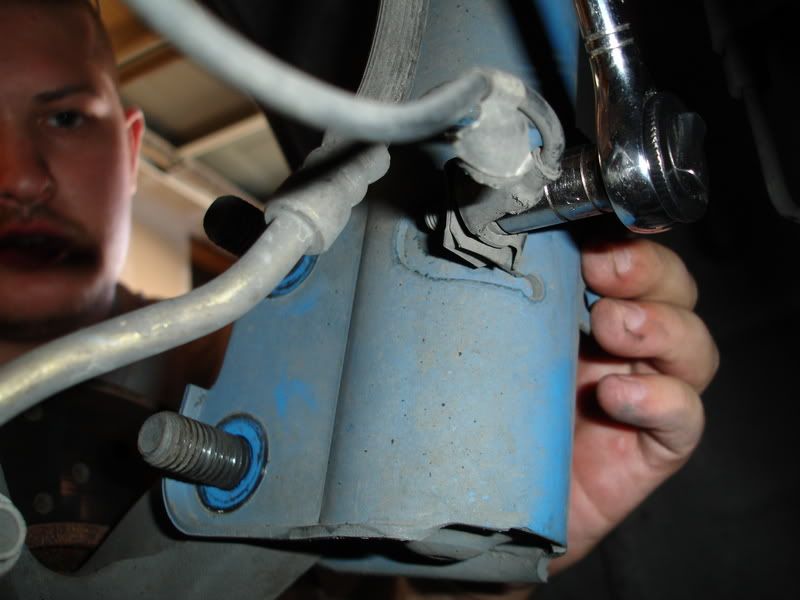
5. Then grab your 10mm socket and use your 3/8" drive ratchet to remove the static ground strap from the factory strut body, put it out of the way, being careful not to break it in any way, or leave it in a place where it could possibly be damaged.
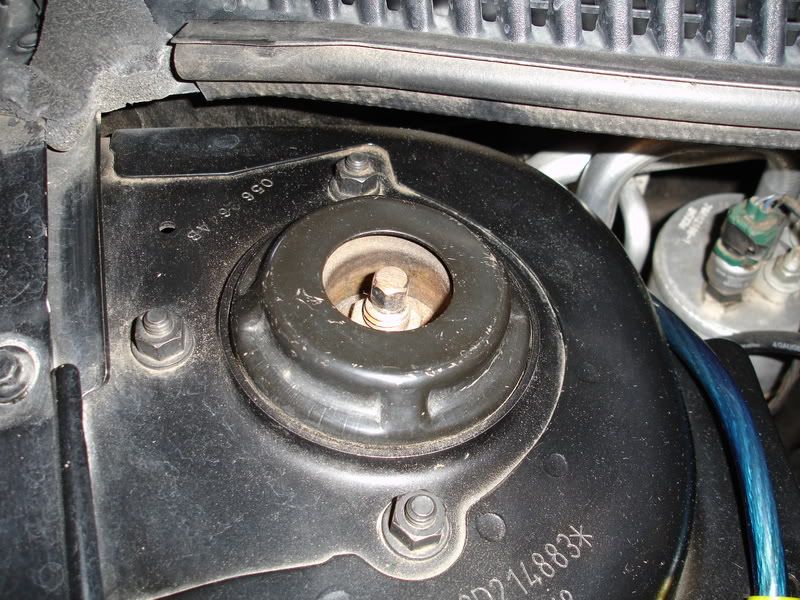
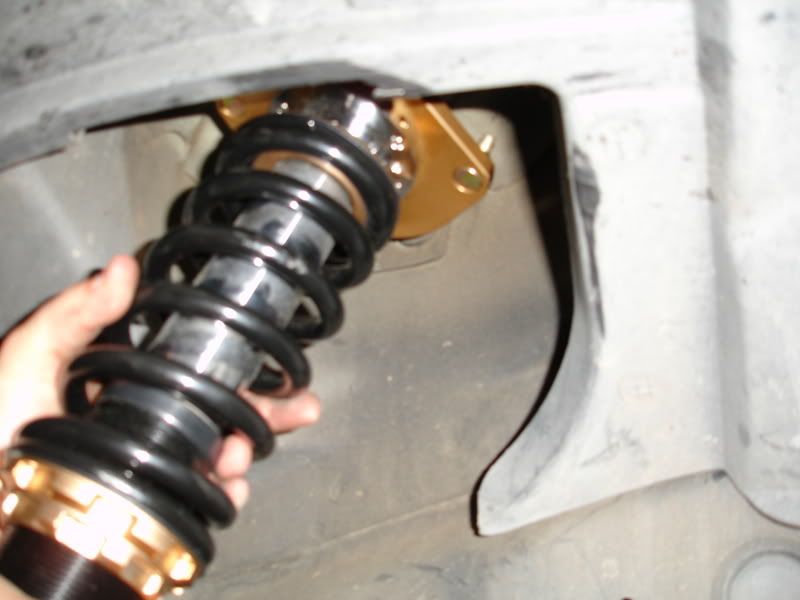
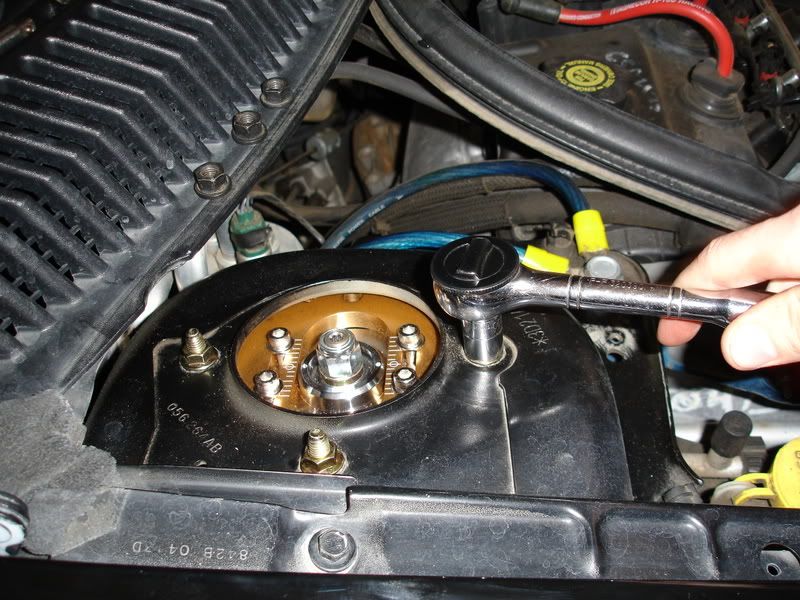
E. Next, use your 13mm socket on your 3/8" drive socket and remove the three nuts on the top of the strut tower. Before the last one is removed, have your slave for the day hold the strut as it will be completely free from the car. Remove the strut and spring assembly, take care not to damage your CV axle boot in the process, if you do, blame it on your slave, and kick him accordingly.
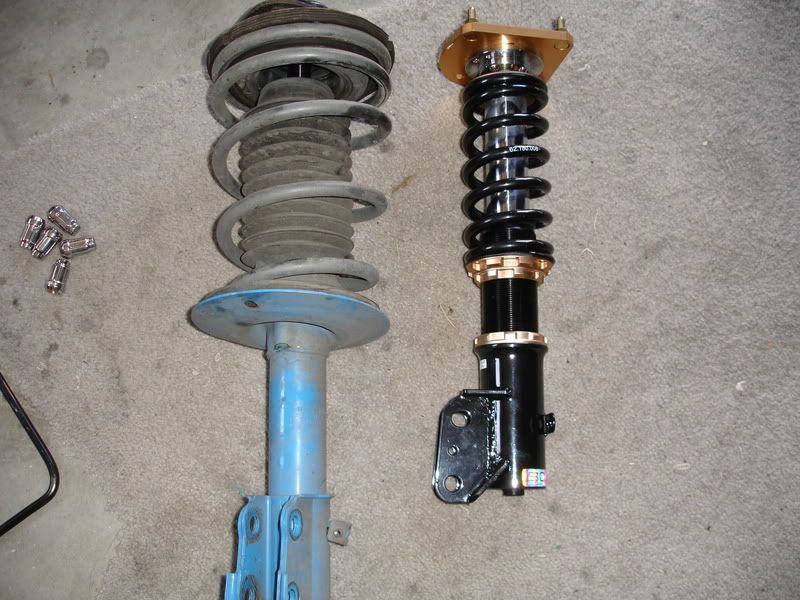
7. Place the old strut/spring assembly on the ground next to the coilover unit marked "Front-Right", or "Front-Left", based on the strut you removed (if you couldn't figure that one out on your own, you are now the slave for the day). Compare the two to ensure they match, and were assembled and labeled correctly.
G. Slide the new coilover in place the same way the old unit was removed.
Have your slave guide the top of the strut in place by guiding the studs into the holes in the strut tower.
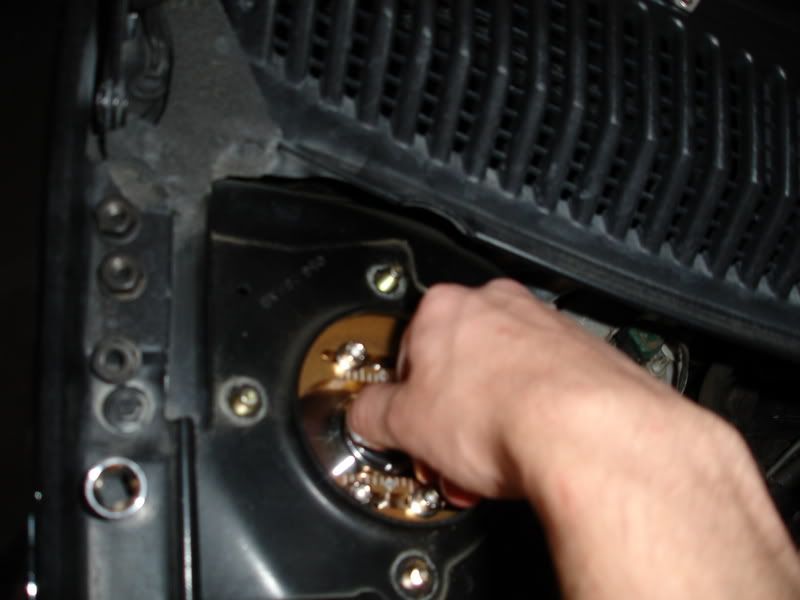
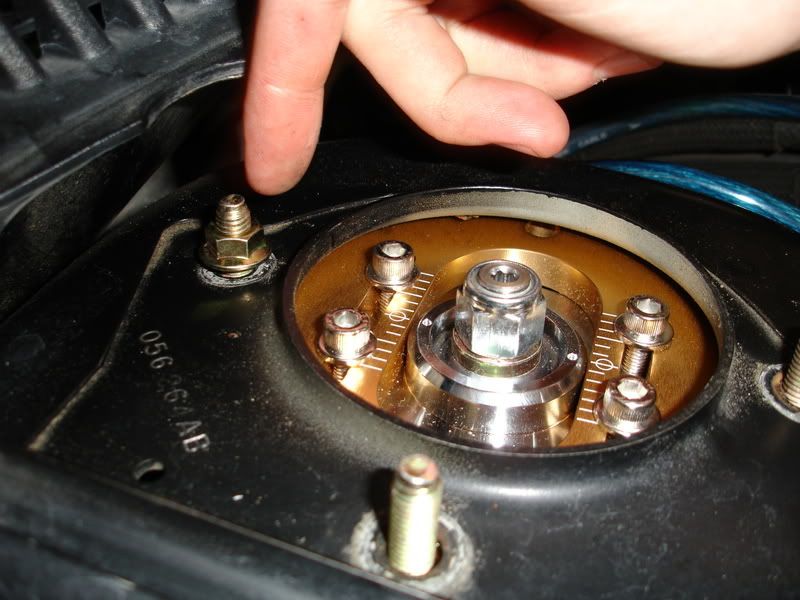
When all three studs are through the holes, have him thread on the new hardware onto the studs. Do not tighten them down at this point.
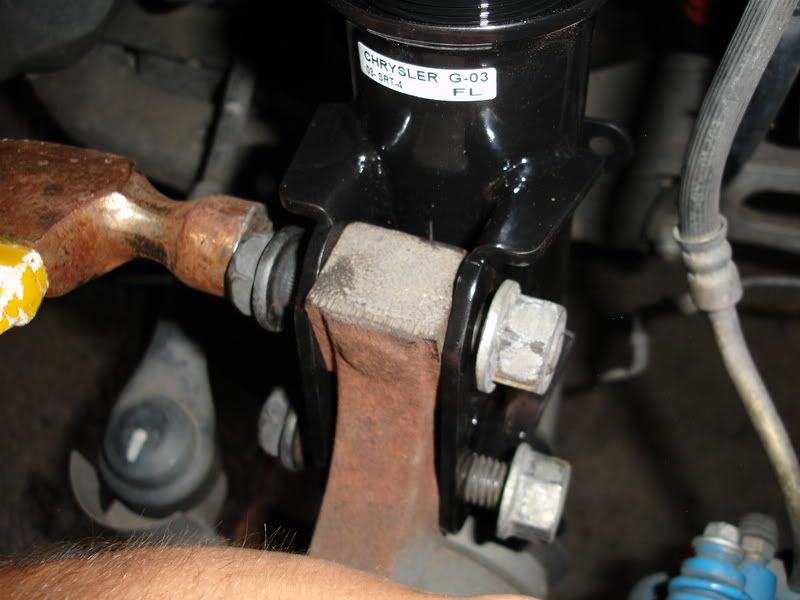
9. Guide the knuckle into the coilover body bracket. Slide a bolt in the lower hole to hold it in place. Be carefull while manipulating the knuckle into place that you don't inadvertantly pull the axle out of the transmission.......that would be bad.
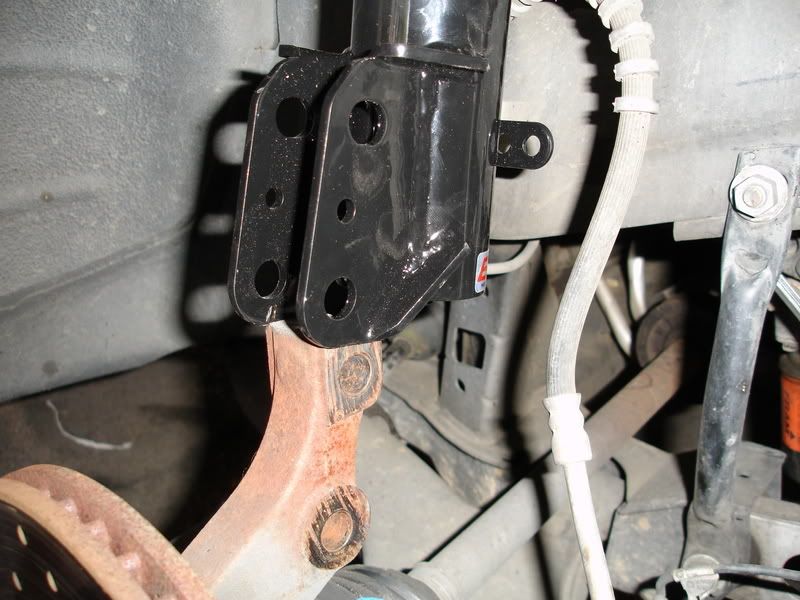
I. Push the knuckle towards the car to align the upper hole so you can place the bolt through it, do not force it to heavily as you can damage the threads and turn your smile upside down.
11. Grab your trusty mallet/hammer (or your slaves head), and gently tap the knuckle bolts a couple millimeters into the knuckle.
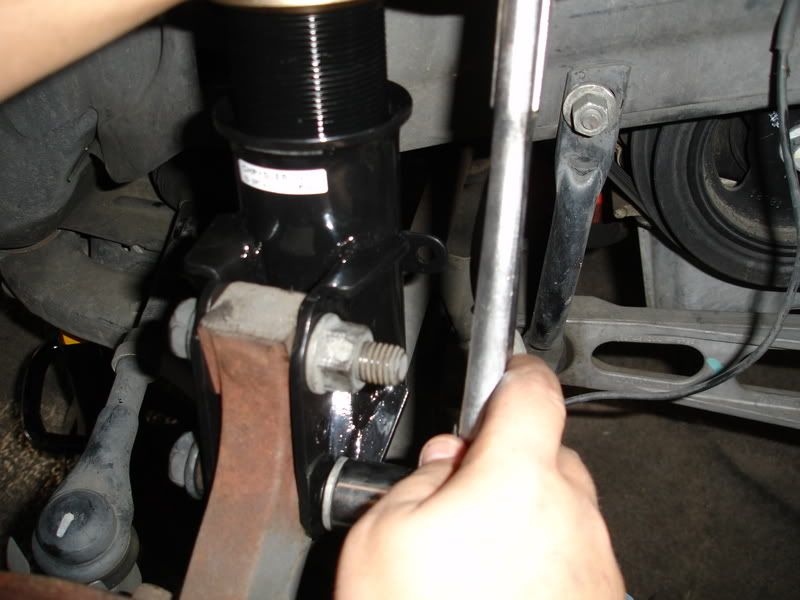
Once they are tight, thread the nuts onto the bolts. Tighten them down snugly with your 21mm socket and 1/2" drive ratchet, do not overtighten as you will be finishing the tightening with a torque wrench to the manufacturers specs (in the case of the Neon, 80 pounds).
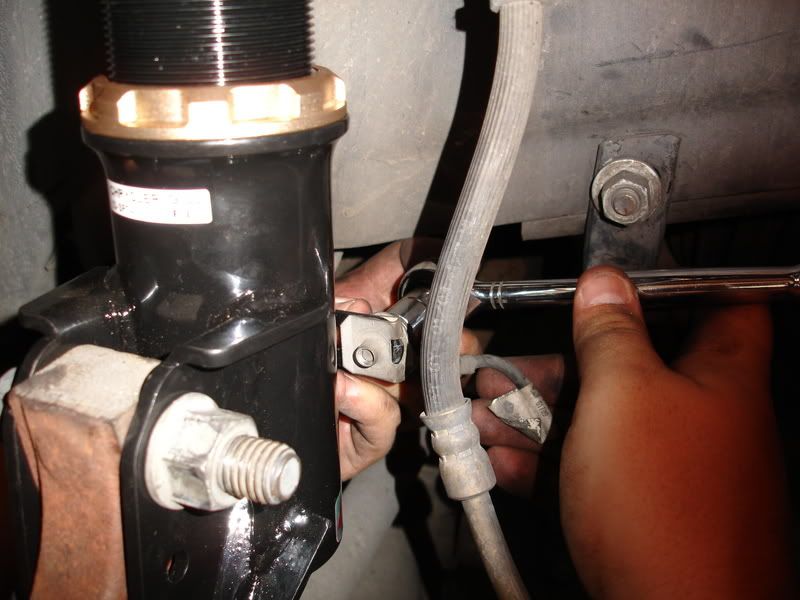
K. Put the static ground strap onto the coilover on the bracket that is in the same place as it was from the factory (convenient).
13. Tighten the three upper strut mount bolts on top of the strut tower. Simply tighten them down snugly, then another half turn, no gorilla tightening here as you run the risk of doing damage.
M. Inspect the bolts, clips, or fasteners that you may have removed or loosend on your particular application to make sure they are not loose.
15. Place your wheel/tire back onto your car, and tighten them down to the manufacturers specs. Now is a great time to ensure your new suspension has plenty of clearence from your wheel and tire.
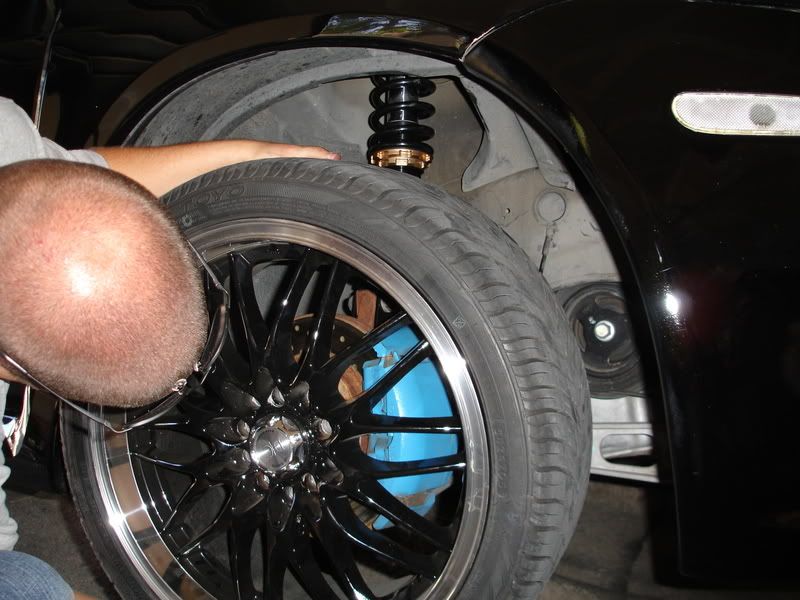
O. Jack up the car to remove your jack stands, lower the car back onto the ground and check clearence again. If everything clears you are good to go!
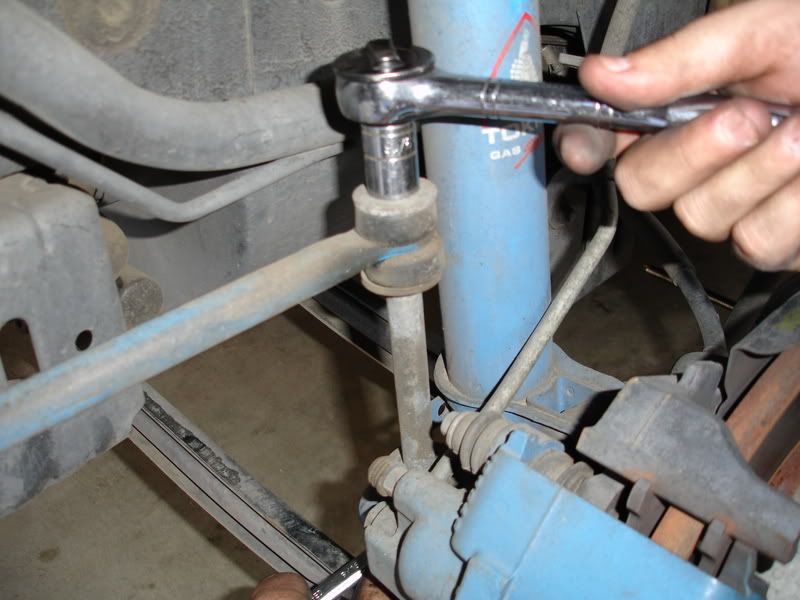
17. The rear removal and replacement is identical with the exception of the sway bar end links on the strut body. Here you will need your pair of 13mm box end wrenches, one on either end to remove the bolt from the end links. Reinstall the same way.
Now is the time where you need to do some math and measuring (refer to your dog to do the math). You need to decide how much lower (or higher if your car was hammered) you would like the car to sit. Take your measurements from after your install, and subtract or add the amount of raising or lowering you wish to do from your before measurements on your slaves forehead. Because the BC Sports coilovers are independantly adjustable from spring preload (we'll go over that stuff in another issue), it is VERY simple to adjust the height without guessing how much to move the bracket on the coilover. Simply get the measurements (plus or minus) for each corner of the car that the brackets must be moved from the difference of the befores and afters (or the desired amount). Then lift the car enough to remove the wheels, remove the lover bracket that connects to the knuckle, and loosen the lock ring on the lower part of the coilover. Raise or lower it to the desired location of your height, and twist the lower bracket until it is in the correct position with your measurement. Turn the lock ring against the bracket, and use the supplied lock-ring wrench to lock it against the lower bracket. Bolt everything back up and reap the benefits of the PERFECT stance.
These coilovers are a breakthrough in design and function, the strut shaft is inverted, or mounted similar to motorcycle shocks. This innovative design does wonders for precise suspension feel, as well as completely housing the strut shaft and seal away from the elements. Our test drive netted a MUCH better feel over bumps as it wasn't teeth jarring, yet still had a firm, solid feel. Upon taking some well known twisties, the car now exhuberated a strong desire to stay flat and direct, the car now feels as if it is a point and shoot machine, it is able to sustain high speeds through corners without the need to trail brake to get the car to stay in a straight line through the corner. On the highest of its 32 levels of daming adjustment, it was rail-tight, overly stiff for daily driving, but perfect for dog-legging on a race track. We will be driving this car at next years SEMA show to test out the suspensions' longevity and durability, as well as seeing how it handles itself on a real racetrack.
On setting 15, it is nice and soft, yet the spring rates and valving still feel very under control and precise. On thier lowest setting, we would take grandma to church on sundays, and she would love it! But then, she would drag us by our ears into the confessional to fess up the the holes in our slaves head.
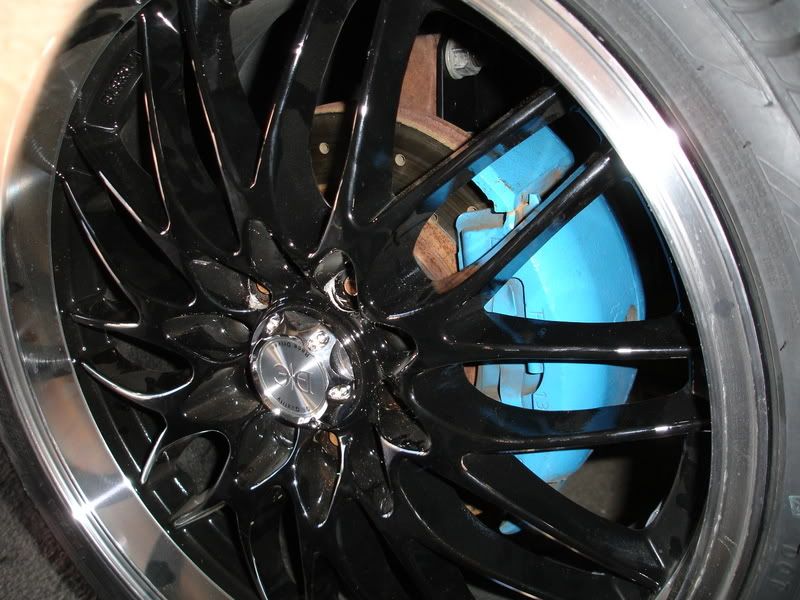
The composition of these coilovers would obviously hold up to the harsh winter months with a cleaning every now and then. The anodized gold aluminum lock rings and top hat look great behind the wheels, and the powdercoated black body will take abuse.
Overall, install took a little over 2 hours, and that was with stopping for pictures. So the average tuner should be able to do this in under 2 hours.


 Sam-I-Am