TOOLS NEEDED:
*Hammers
*Torch (Mapp gas at the very least)
*Air Compressor
*1/2" Impact gun
1/2" + 3/8" ratchets
Various sockets (10-13-15-18-21-22mm and more)
Various socket extensions
A few combo end wrenches and a 12" crescent wrench
Small and large pry bars
1/2" Torque wrench
Ball joint press (or hydraulic press if possible)
Jack and stands
Vice grips and various pliers
*Are optional tools
STEP 1
Raise vehicle and support on jack stands. Access to a lift would prove very useful. Remove wheel and tire assemblies and set aside.
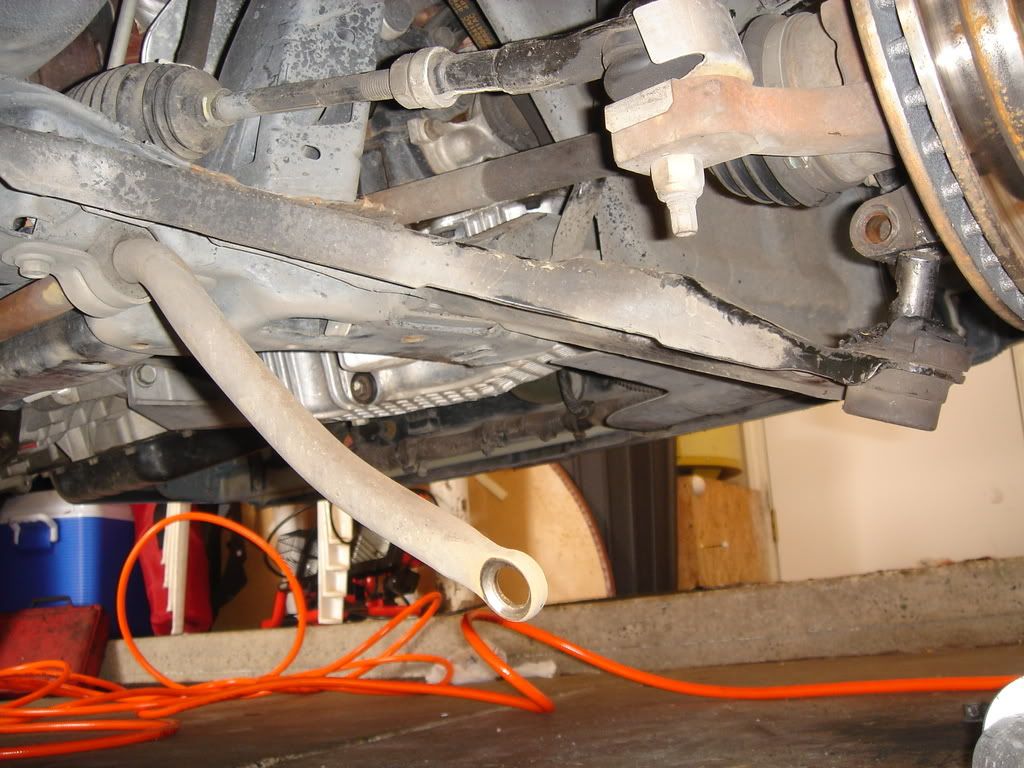
STEP 2
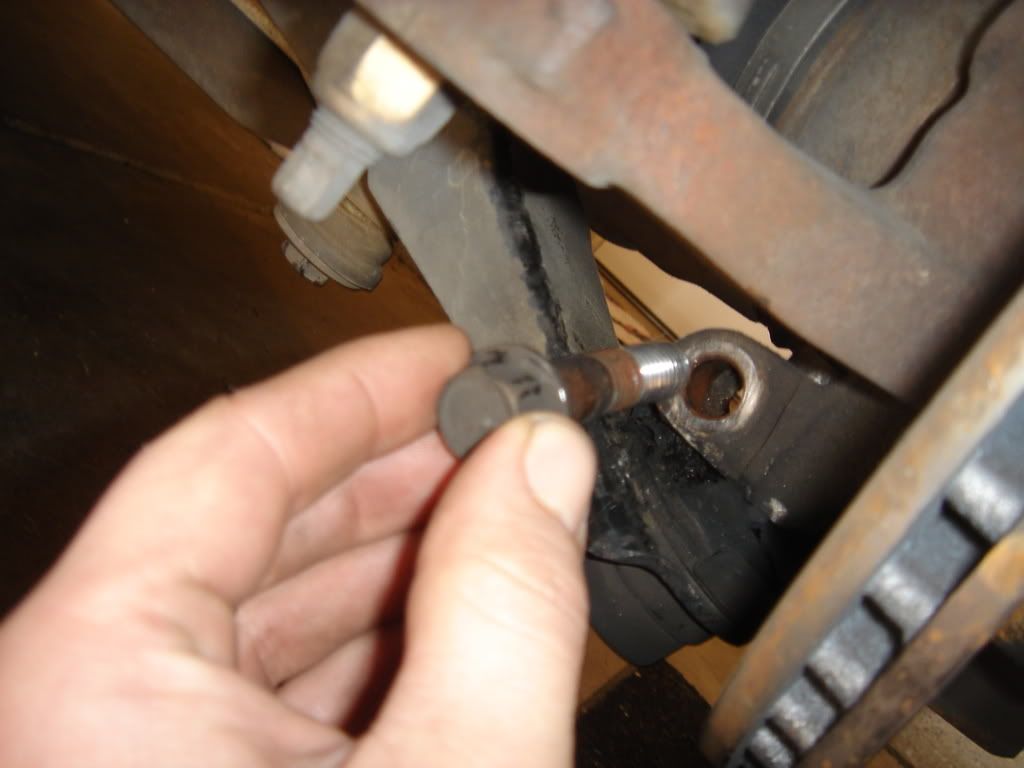
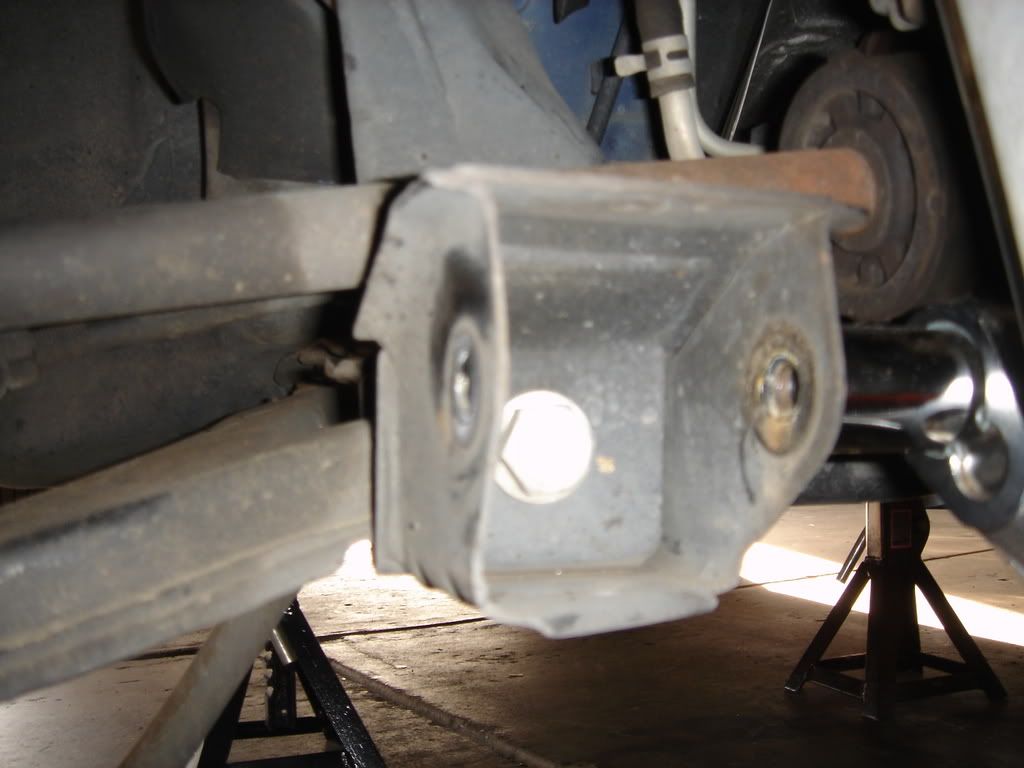
Remove pinch-bolt attaching ball joint to the steering knuckle. May require a bit of force to remove, don't be afraid to beat on it since we're replacing it anyway. A pry bar works well and does the least damage.
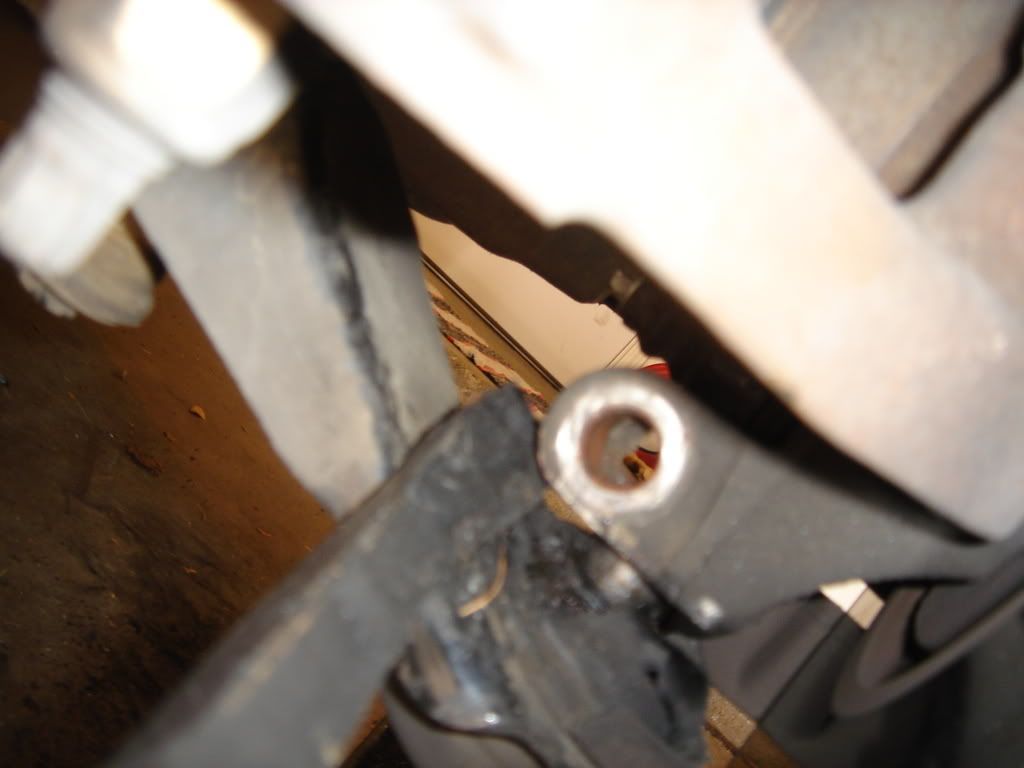
The pinch-bolt bore:
Pry like this:
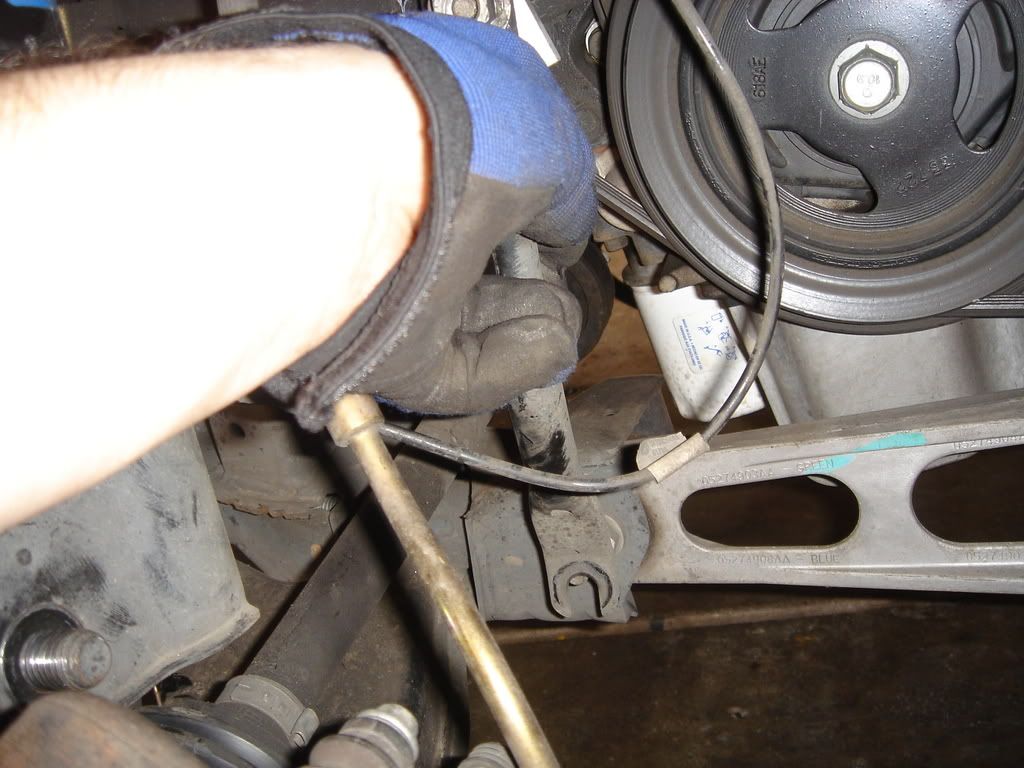
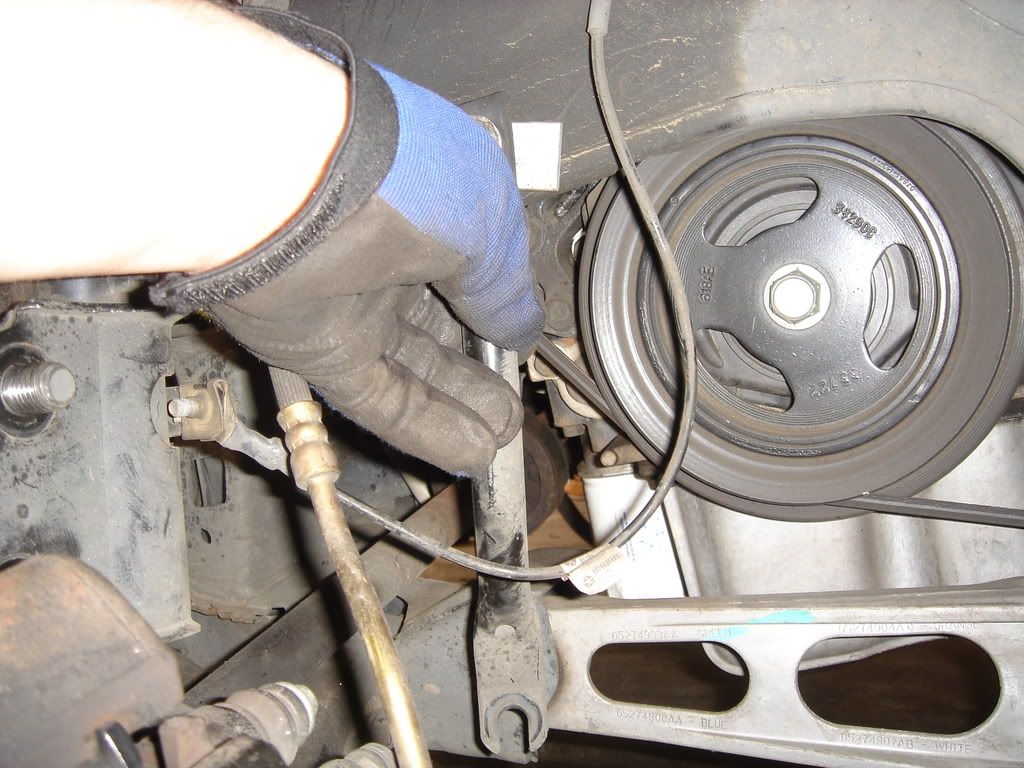
STEP 3
Once the control arm is separated from the knuckle, we need to remove it from the vehicle. Start by removing the stabilizer bar end-links. Grab the upper threaded nut with a pair of vicegrips or athe correct wrench, and use a 15mm socket on the bottom. The impact gun makes this much easier. Be sure to reassemble the endlinks before setting them aside, this way they're easier to reinstall later. Swing the bar down and out of the way, allowing the control arms to move more freely.
STEP 4
Remove the plastic belt shield by removing the three 10mm fastners. Set aside. Now remove the pencil strut, held on by two 15mm bolts. Keep the bolts and washers intact and set aside.
STEP 5
Now remove the engine torque strut. The rear bolt is deep and may require the use of a wrench to remove. I didnt have a deep socket in that size in my home-box, so I had to do it the hard way. The front bolt is much easier to get to (18mm I believe). Keep all hardware and set aside.
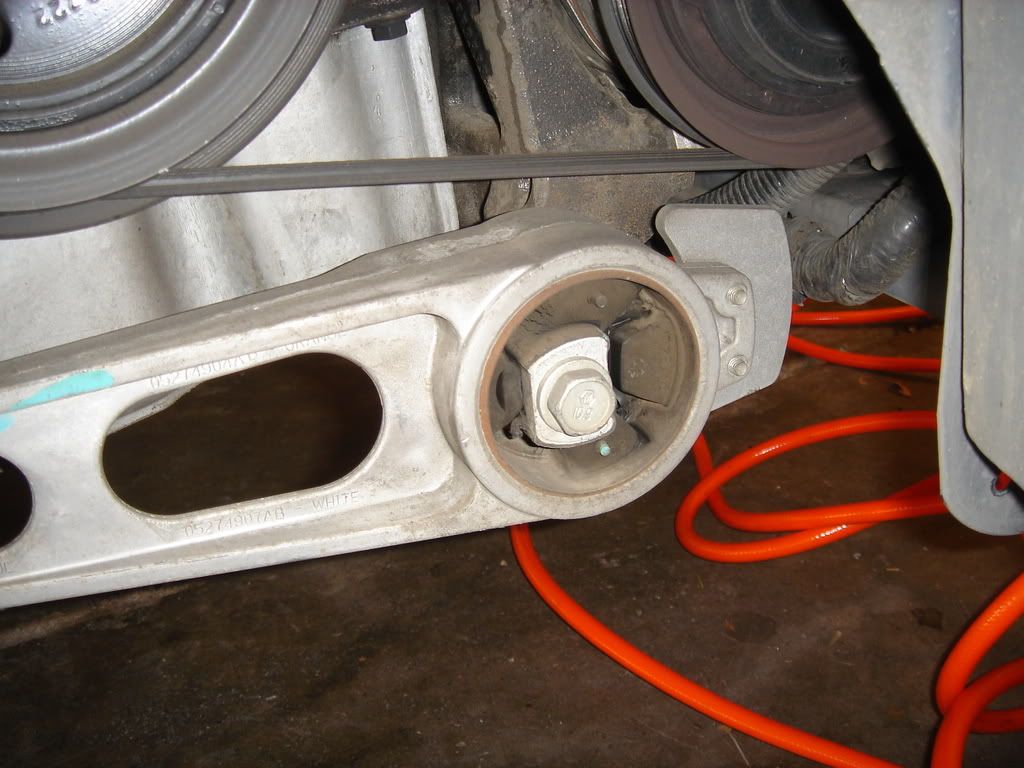
STEP 6
Time to remove the lower control arm. Use a 22mm socket to remove the bolt holding the front part of the LCA to the frame. A 15/16" works well for the rear. Air is your friend here, these are very tight and very large bolts.
Front:
Rear:

Removed:
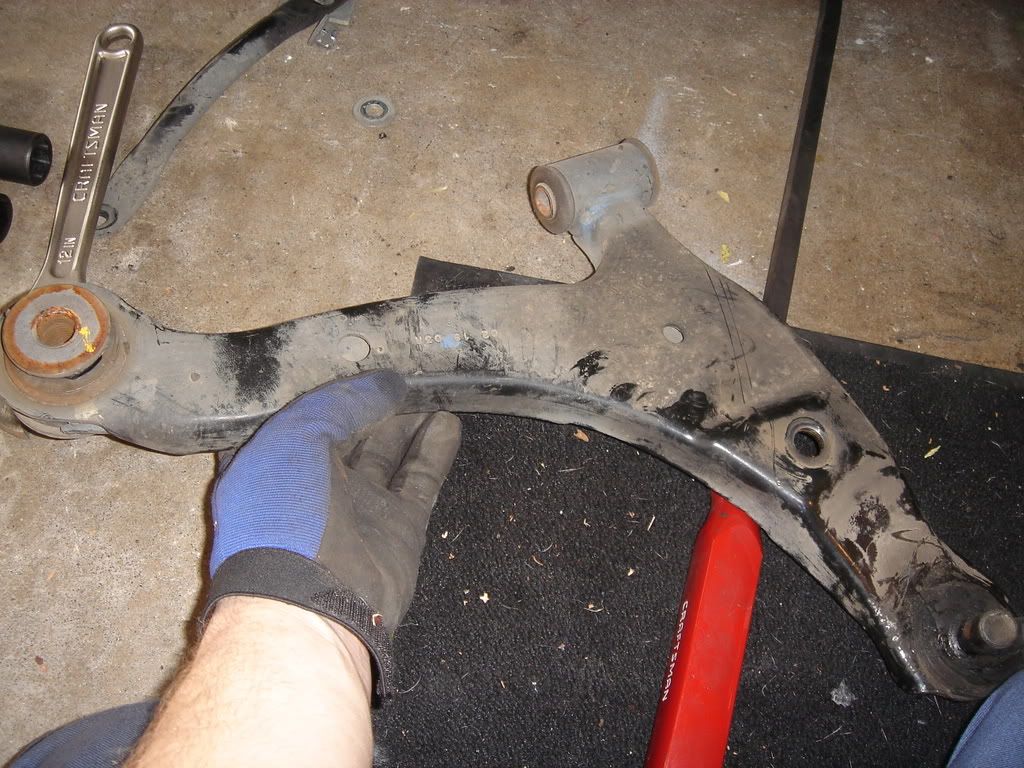
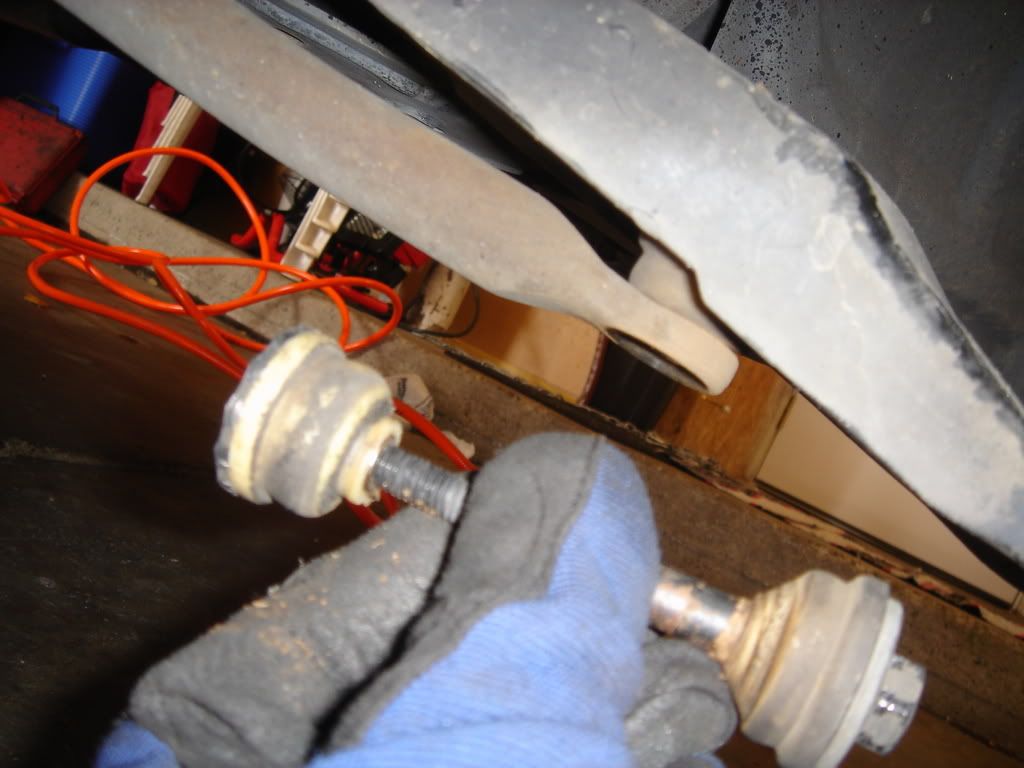
Some pics of the bad ball joint still installed:
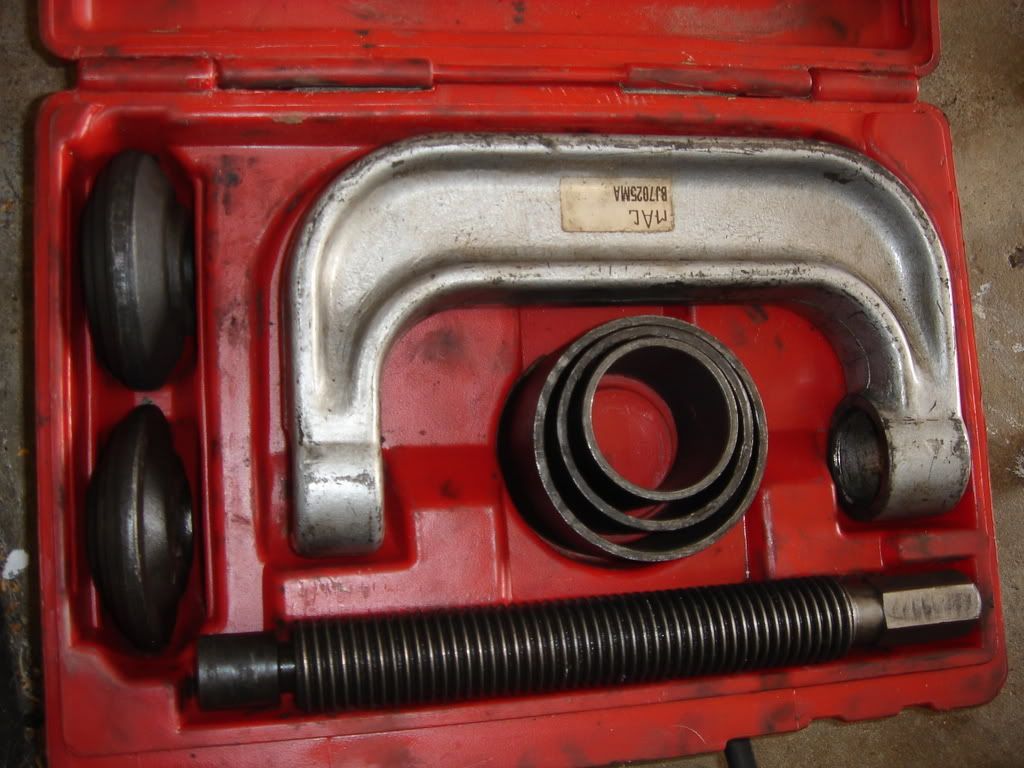
STEP 7
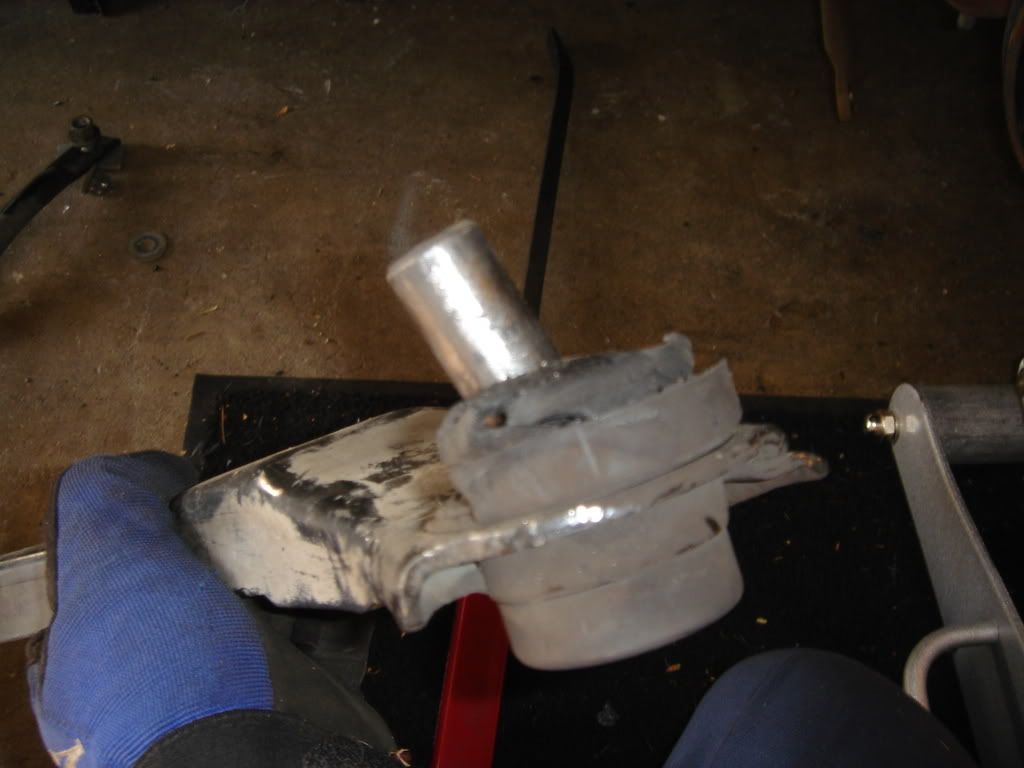
Alright, time for the fun part. Set up your ball joint press so that the lower cup is big enough to recieve the whole joint. Find a way to support the control arm to be as level to the ground (or bench) as possible. Assemble the upper portion of the press to put equal force on the joint. Be sure to position the joint in the LCA so that it is as straight-up as possible. A hammer works well here. Press the ball joint out through the bottom of the LCA and into the reciever cup. If you use air on the press, keep the level down, and be sure to apply anti-sieze to the threads to prevent binding. Keep it as straight as possible when hitting it.
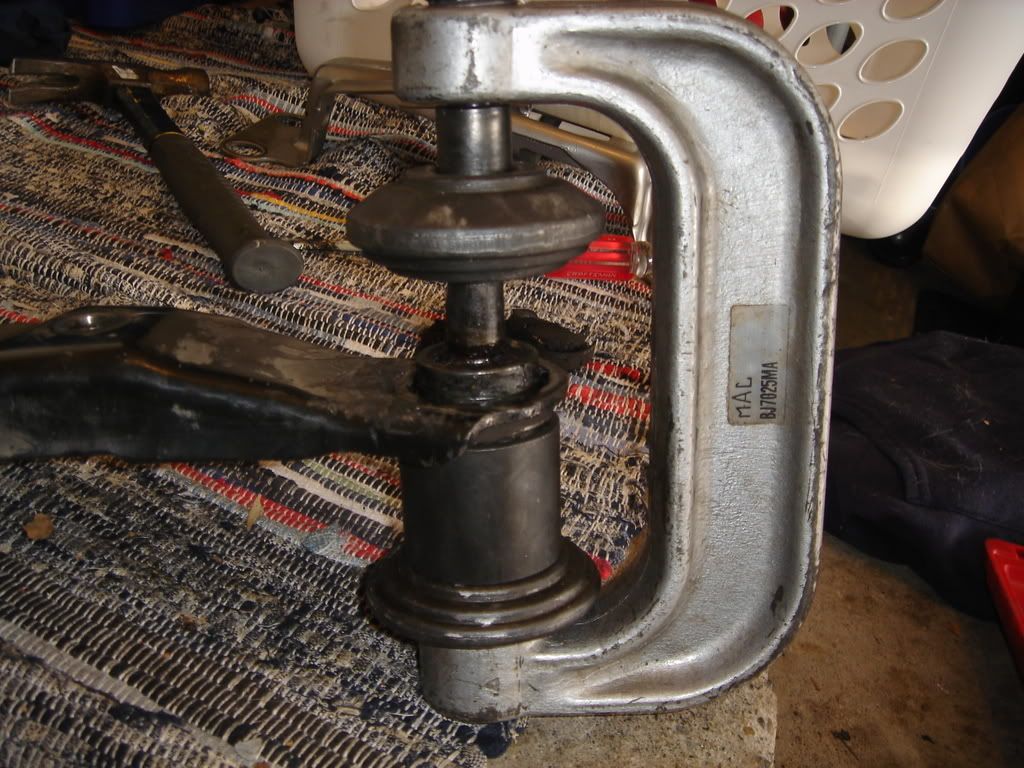
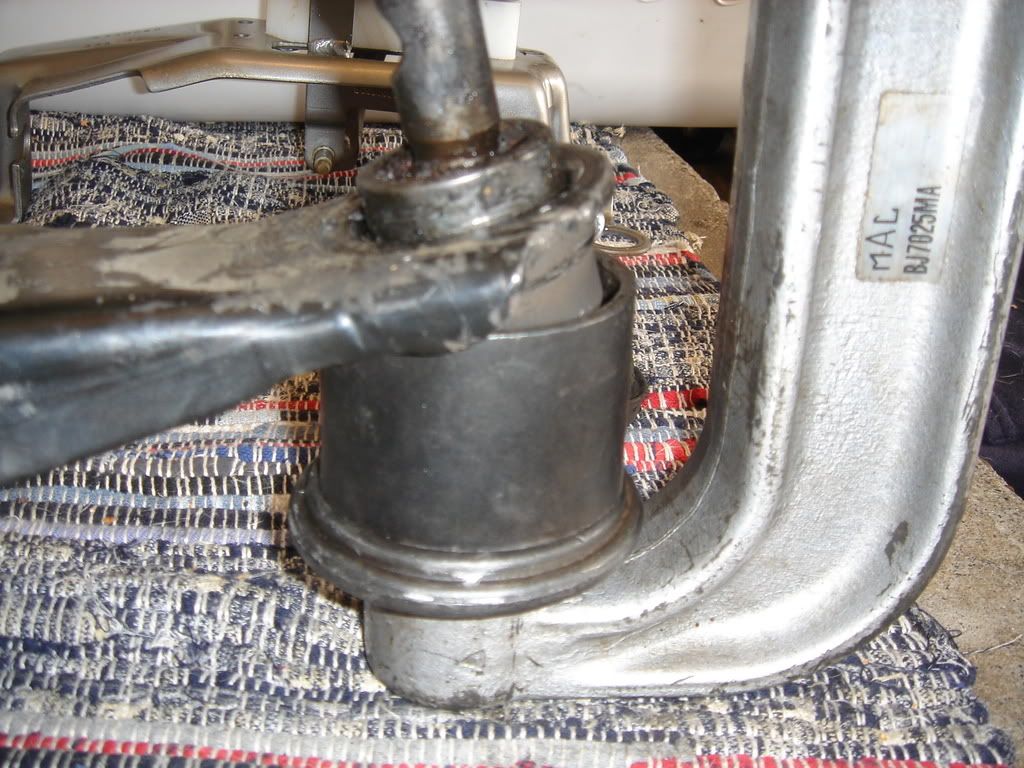
Once the joint is out, clean the bore in the LCA and be sure it is in decent shape to accept a new ball joint. Assemble the press to basically do the reverse (LCA is now upside down) and press the new ball joint in. *** Be very careful not to apply uneven pressure to the joint. Keep it straight. Do not over tighten it; it is fully pressed in once the joint is flush with the LCA bore.
***Be sure to get the pinch bolt bore in the ball joint facing the inside of the LCA. It should be as straight as possible. Adjustment can be made on some ball joints after install if the top of the joint uses a hex. Otherwise, get it right the first time.
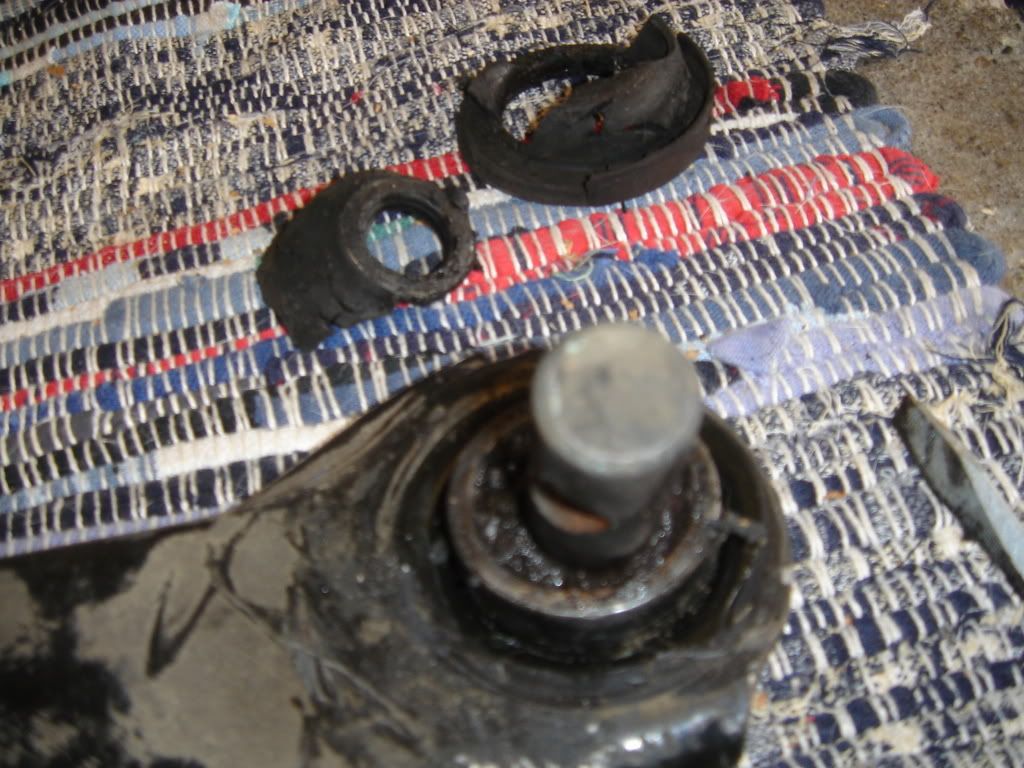
Once pressed in, slide a new grease boot over the ball joint and pop it over the lower portion of the joint. Apply multi-purpose high temp grease in the zirc fitting until it comes out the top of the joint. Wipe of the excess and install a non-serviceable zirc fitting in its place. The LCA is ready for reinstallation.
STEP 8
Install the LCA back into the frame. Reinstall both bolts The front bolt needs 120 ft lbs while the rear calls for 170 ft lbs. Torque them and move on.
Use of a torch may be required for this portion. You need to install the ball joint into the knuckle. The bore of the knuckle is VERY tight around the head of the ball joint. I tried hammering, heating, prying, nothing seemed to work. Finally I ended up using a small flathead screwdriver to pry to the slit in the knuckle open, allowing the knuckle to be forced over the joint. I supported the LCA with a jack, which basically created a ghetto vice of sorts. Worked like a charm. The hard part is over. Now install the pinch-bolt and tighten down to hold the ball joint into the knuckle.
STEP 9
Reinstall the torque strut. See FSM for aligment specs, or PM me for them. Reinstall pencil strut and the finally the belt-guard. Last but not least, reinstall the stabilizer bar endlinks back onto the LCA and tighten. If you removed anything else, now is a good time to put it back together. I removed the knuckle-to-strut bolts to get some extra movement out of the knuckle, but it might not have been necessary for some people. Get everything tightened up and reinstall the wheel/tire assemblies. You're done!
Special thanks to my Dad for letting me attempt this one his Neon.
Thanks also to my buddy Mike K at work for the press, and Shane for the air-powered grease gun.
Credit for the majority of the procedures goes to my trusty FSM.