How-To: Front Wheel Bearing

Post Reply
quicksilvr
Former Moderator
Posts: 3244
Joined: Fri Jul 30, 2004 7:19 pm
Location: St. Joseph, MO
Contact:

How-To: Front Wheel Bearing

Post by quicksilvr » Thu Jun 16, 2011 4:55 pm

It's a long story, better left for another time, but I found myself in the situation of needing to separate the hub from the knuckle on the front right corner of my 2001 R/T. Without using any special tools, the only way to do this is to replace the wheel bearing as well, because you'll either outright destroy the old bearing, or at least weaken/damage it. Mine got destroyed. But it was due for a change....when the wheel was off the car, I could wiggle the hub face by hand. Granted the bearing wasn't making any bad growling sounds, and the car drove fine, but it still had play in it.


So, before you even get started doing this job, here's what you'll need for sure:
-A press
-Some random flat stock for aligning and pressing everything
-Some BIG sockets to choose from
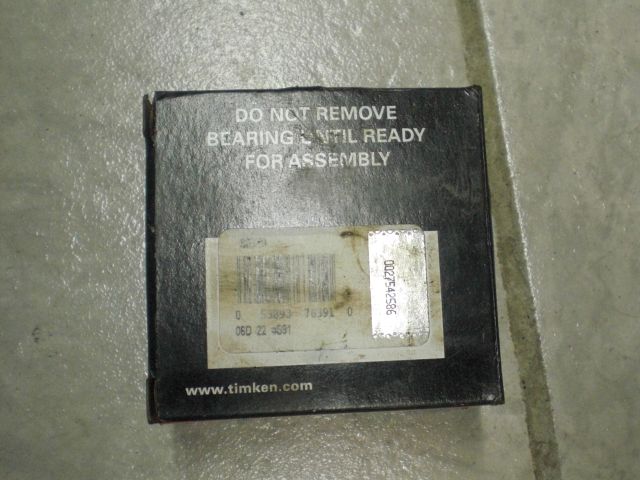
-Replacement wheel bearing. I got mine from Advance Auto for $50. It is a "National" brand bearing.

These tools are not 100% required, but they make it 100% easier. :)

-Impact wrench
-Big pickle fork
-Cutting torch


Also
You'll probably ruin your old ball joint seal when prying the ball joint out of the knuckle. A new ball joint seal is cheap, and you should go ahead and get a zerk fitting for the old ball joint if it's still a OEM original ball joint. OEM's have a little nut screwed in to the grease joint, but you can replace it with a zerk very easily. That way, you can just ruin the old seal and not have to try to be careful with it. Then install a new seal, install a zerk fitting and grease the joint. Wa-la. The Part Number is 4656464AA.


Step 1: Jack up the front of the car and remove the wheel where you're working.

Step 2: Remove the brake caliper. There are two 10mm bolts holding it on, and they are very easy to take out. Once the caliper is off, use some wire to hang it up out of the way...don't let it hang on the brake line!

Step 3: Remove the rotor. Sometimes they pull right off, other times they are rusted in place. A little persuasion with a mallet always does the trick.

Step 4: Remove both sway bar endlinks and rotate the swaybar down and out of the way. To take the endlinks off, you need to grab the top of the link with some big vise-grips, and then hit the lower bolt head with your impact wrench. This is the one place where the impact wrench is nice, because you're holding the top with vise-grips...not a wrench.

Step 5: Remove the tie rod end. Simpley take the nut off the bottom, and hammer it up out of the hole.

Step 6: Remove the ball joint. Take the nut off the bolt, then hammer the bolt out. The ball joint has a groove in it where the bolt sits, so the bolt has to come all the way out, you can't just loosen it and expect to pry it down. Once the bolt is out, you need to pry the lower control arm down away from the knuckle. A big pickle fork comes in VERY handy here. Don't worry about ruining the ball joint seal/boot. Just replace it. :)

Step 7: Remove the cotter pin and keeper for the axle nut. Then remove the axle nut.

Step 8: Push the axle out of the hub.

Step 9: Remove the strut bolts, then remove the knuckle/hub assembly from the car.

---------------------------------------------------


Now you've got your parts to work on. I had all the wheel studs out of the hub for this job, so that's why you won't see them in any pictures.

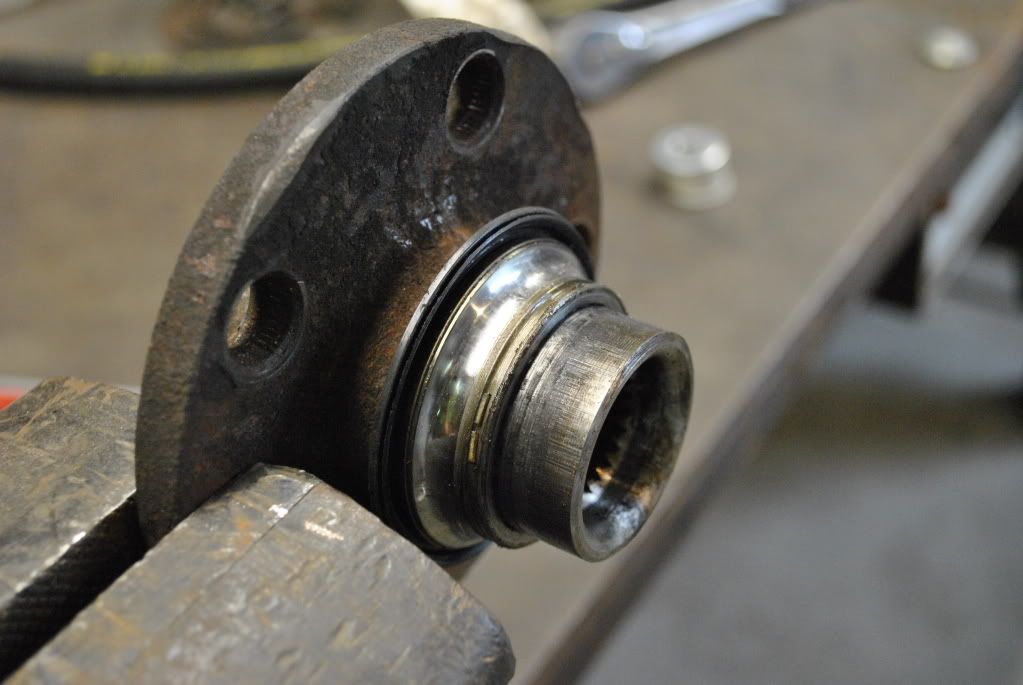
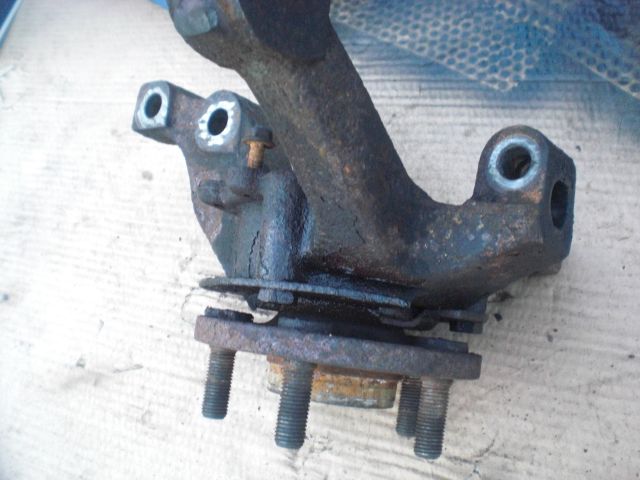
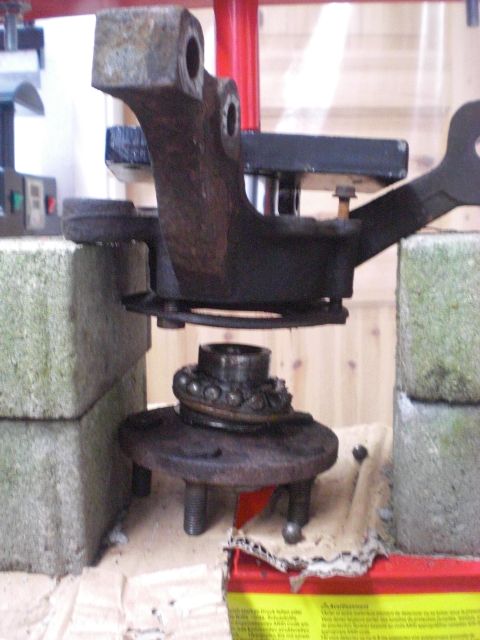
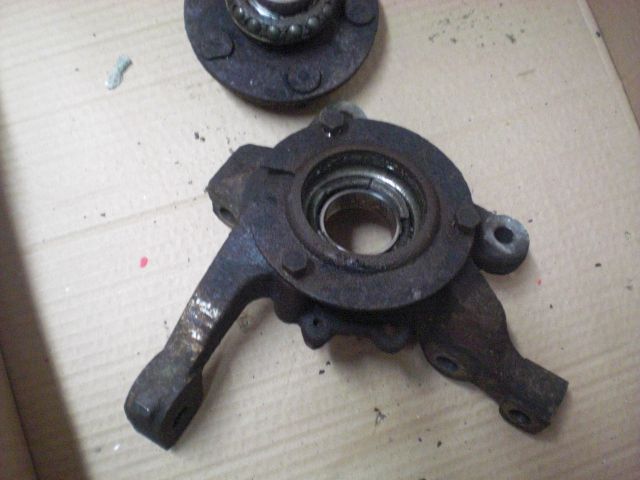
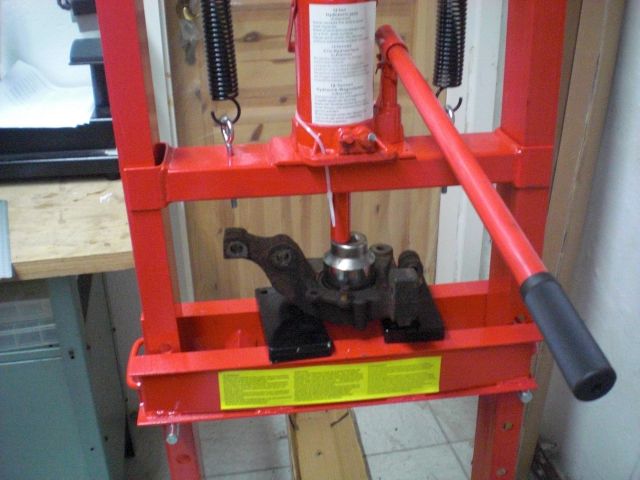
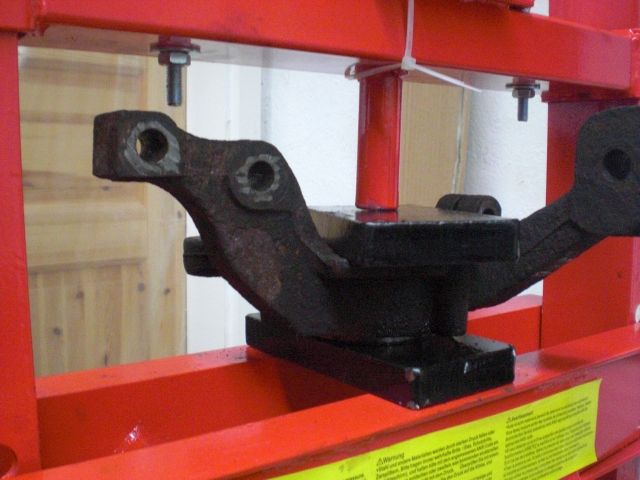
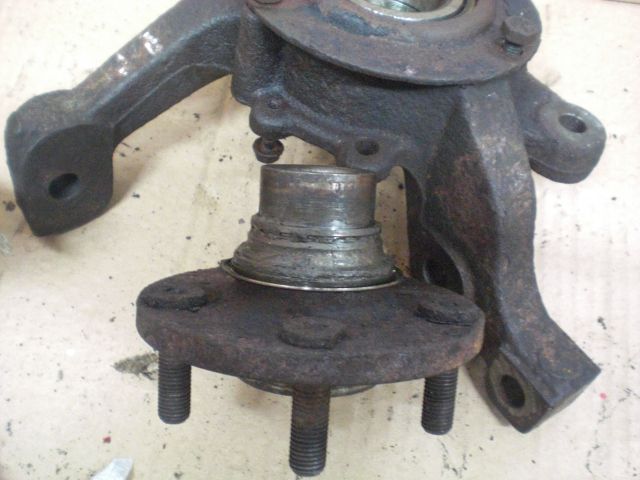
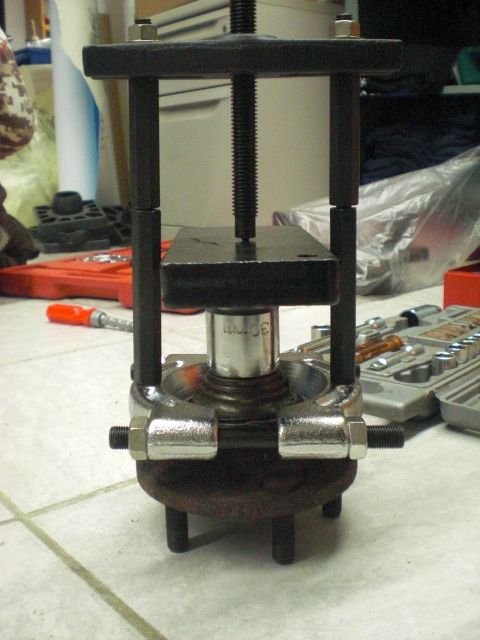
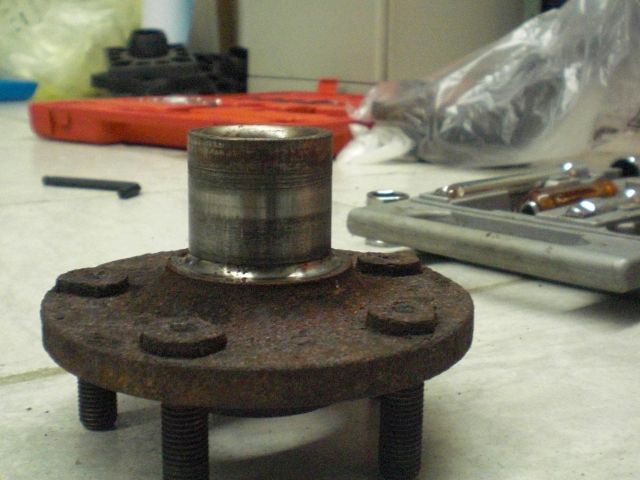
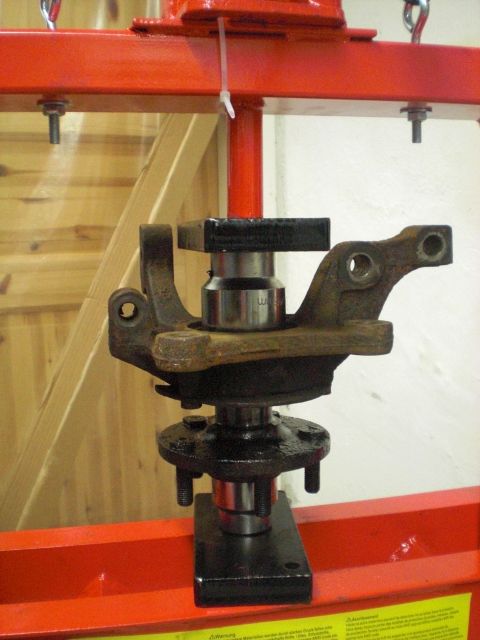
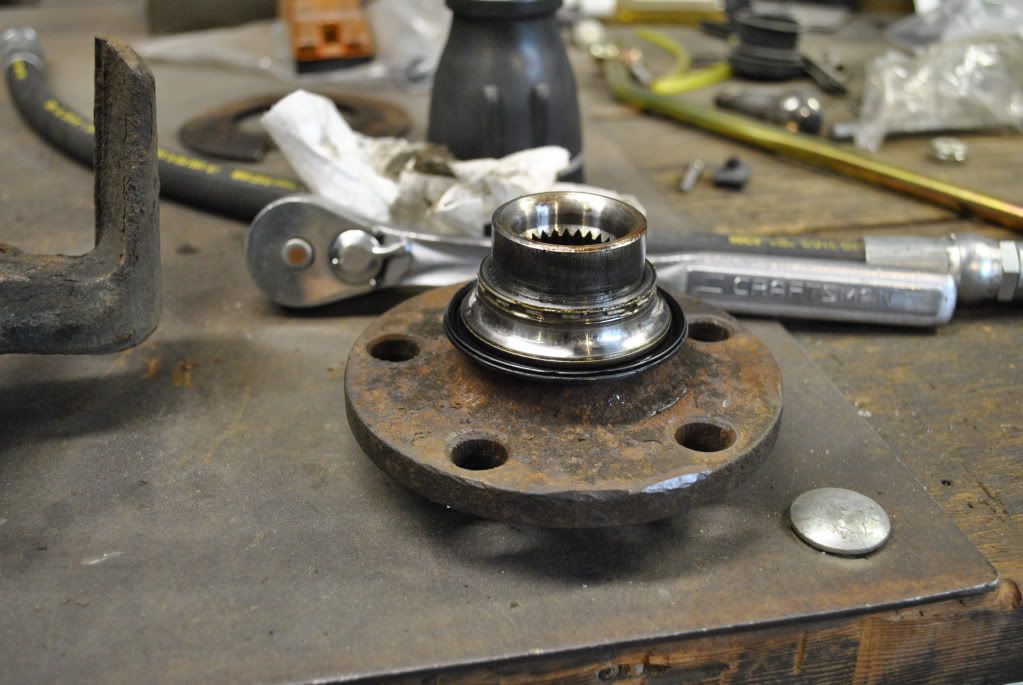
-Set your knuckle under your press, and use a socket that is the same size as the inner splined part of the hub. You don't want to be pushing on the inner race of the bearing, just the splined hub spindle. The goal is to press the hub out of the bearing...however, the bearing will come apart long before the hub will press out of it. So, start pressing, and pretty easily the hub will come falling out (be ready to catch it)...however it'll still have part of the bearing on it.

In the pictures, you can see part of the bearing still stuck on the hub.
Image

Image

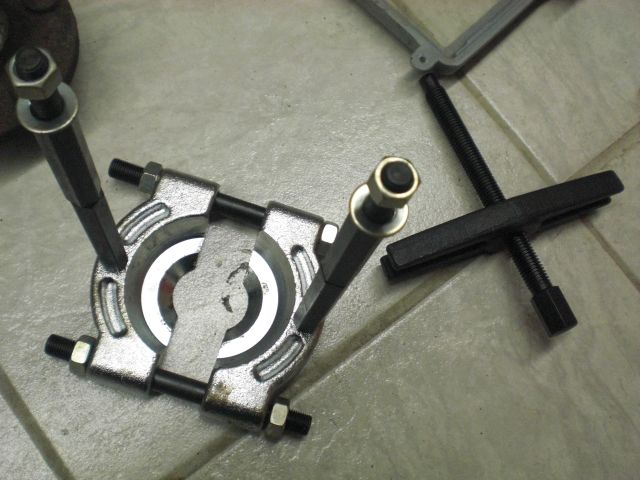
We used a torch, heated the bearing piece, and then pulled it right off. If you don't have a torch, you'll have to get more creative. Anyway, get the hub cleaned up.


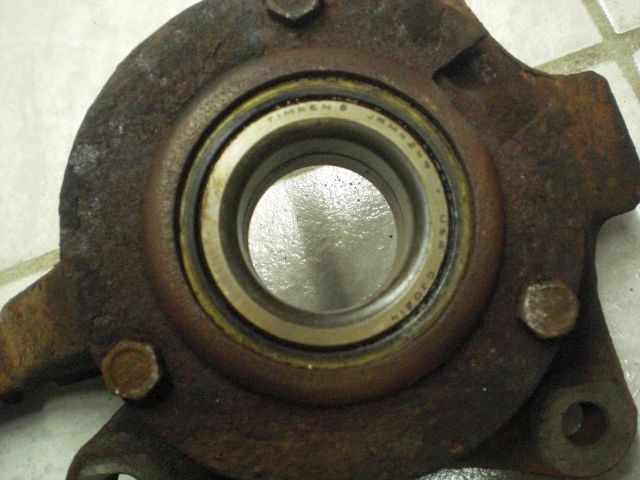
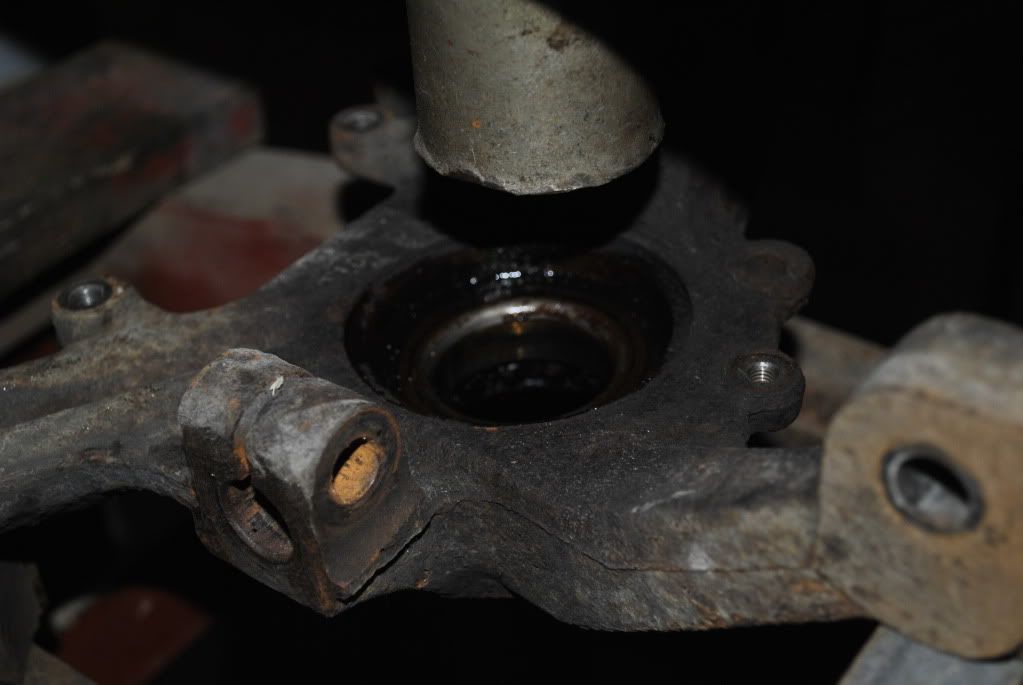
-Now take the three bearing retainer ring bolts out and remove the retainer ring. You're left with MOST of the bearing still stuck in the knuckle. Flip the knuckle over, and press the rest of the bearing out.

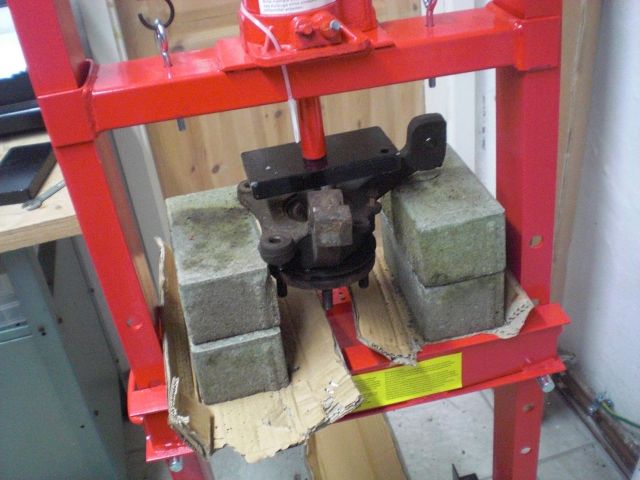
Getting ready to press the broken bearing out of the knuckle...
Image


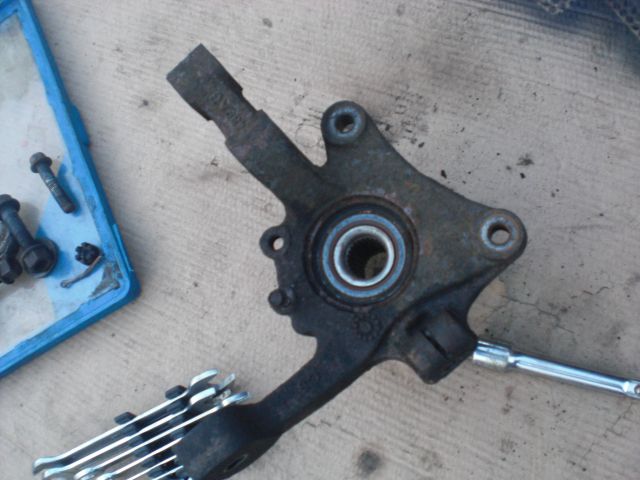
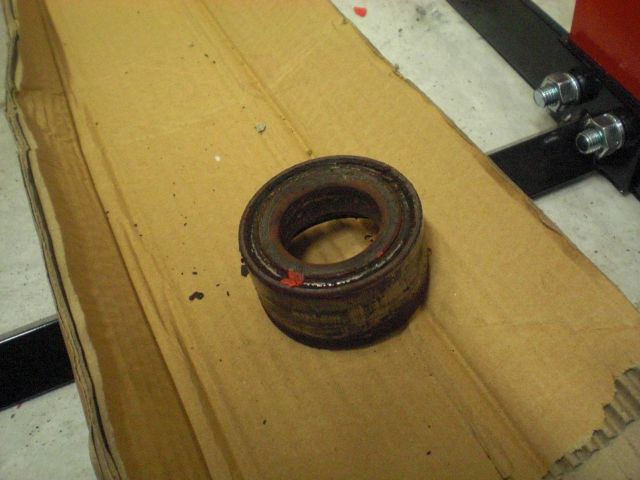
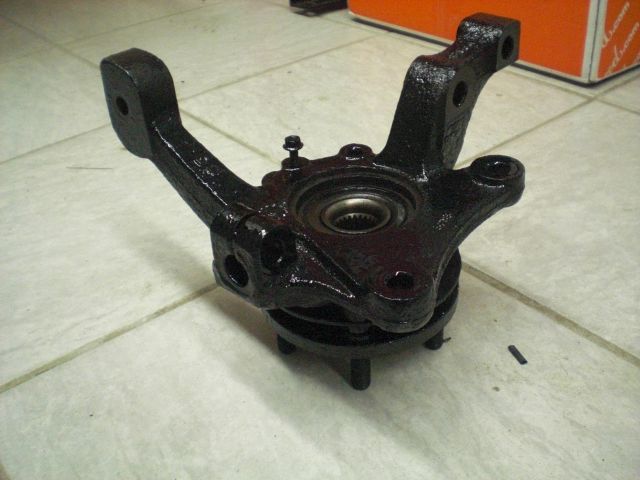
Now your knuckle should look like this...
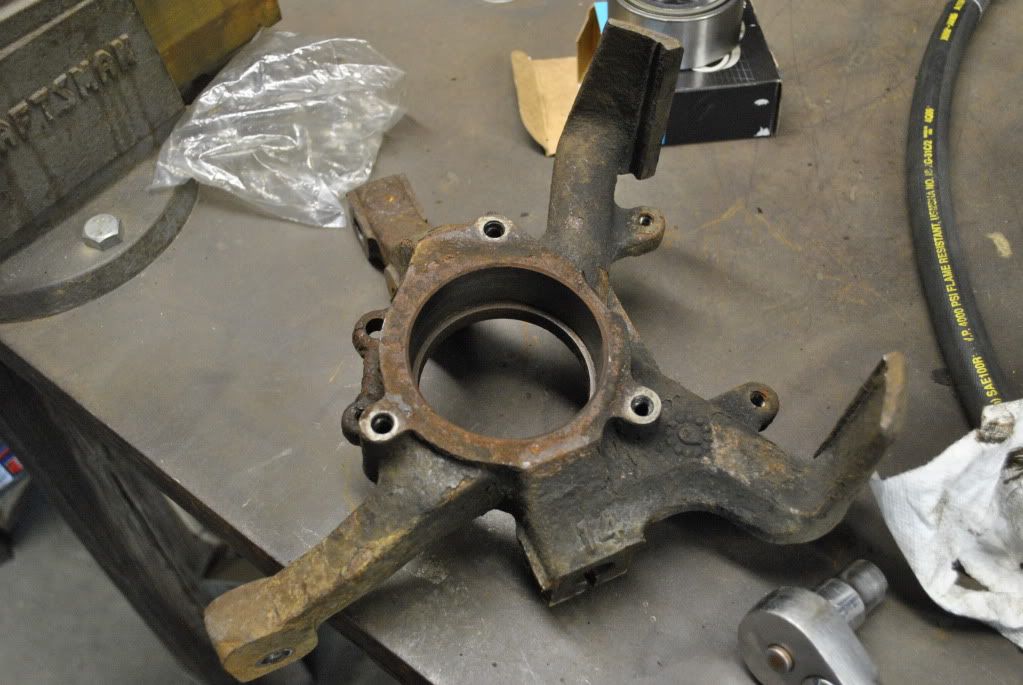
Image


-Support the knuckle on the press, making sure it's level in all directions. Set your new bearing in, and using some flat bar stock, push the new bearing into the knuckle. Make sure whatever you use to push it in with spans the entire bearing and distributes the load evenly.

New bearing pressed into knuckle....
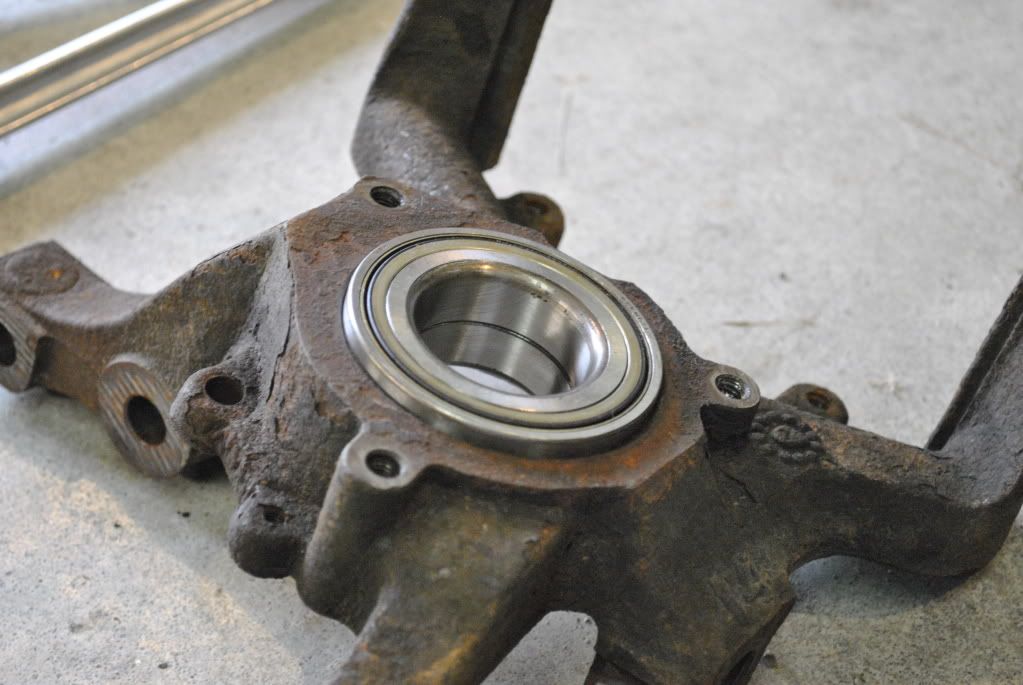
Image


-Re-install the bearing retainer ring and bolts. I cleaned the threads up and used some blue loc-tite when I reinstalled the bolts.

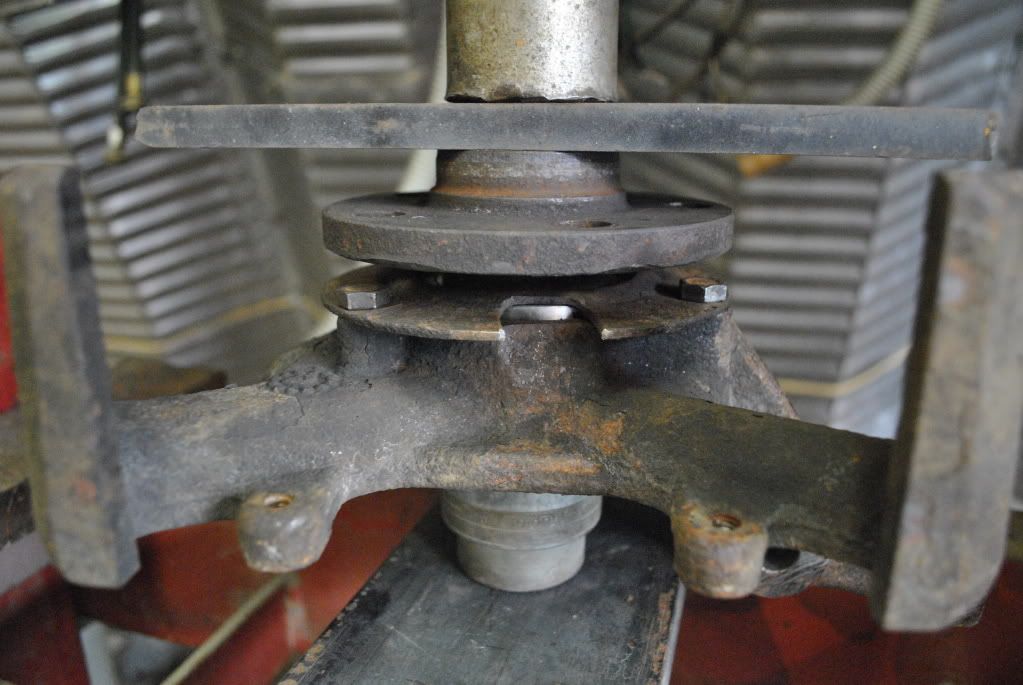
-Now you are ready to press the hub into the new bearing. There are TWO keys to this: 1) support the inner race of the bearing with a socket... and 2) make sure everything is square and level on the press.

I also put some grease on the hub to make it press easier. If you're using a socket to support the inner race of the bearing, the socket walls are thin enough that you'll basically JUST be supporting the inner race. Which is totally fine, but you just have to make sure you are squarely supporting that inner race, or else you'll tear the bearing apart.


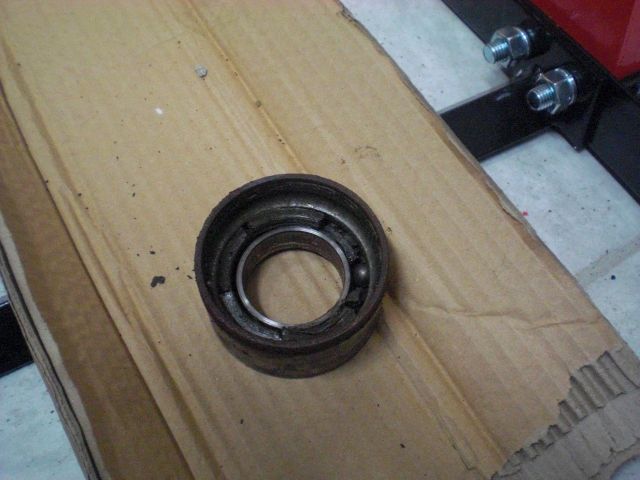
Hub pressed into bearing....
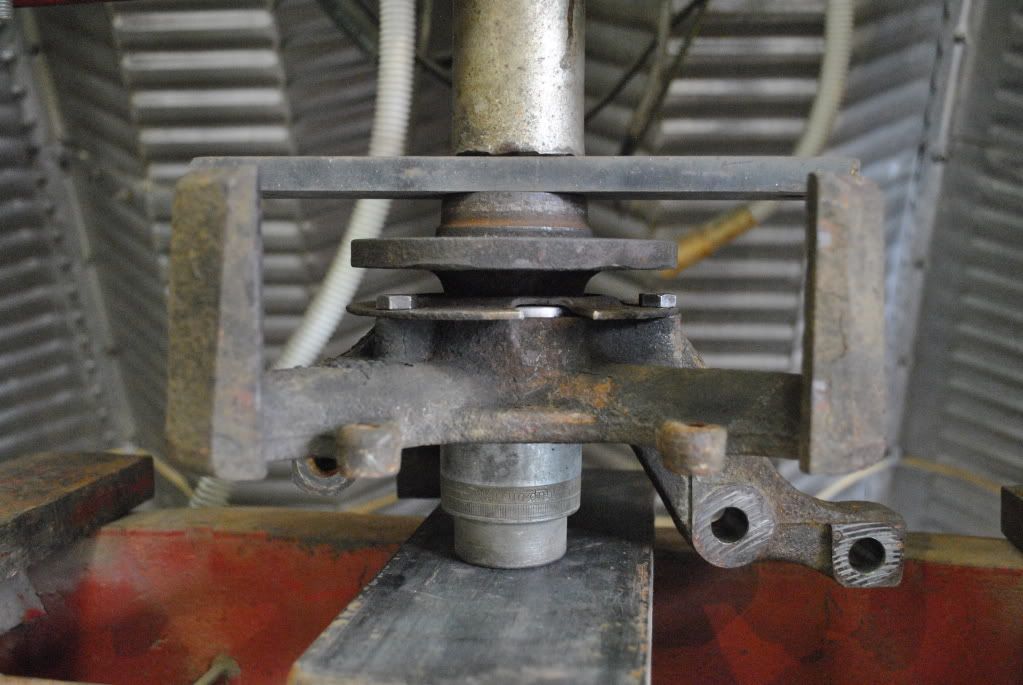
Image

You can see the shiny part of the new bearing under the retaining ring.
Image


You're done! :rockon: =D> \:D/


Now go re-install everything and get a front end alignment. I can recommend checking your tie rod end when you do this, and replace if necessary before you get your alignment.
Last edited by quicksilvr on Fri Jun 17, 2011 12:31 pm, edited 2 times in total.
-Dave
Image
2001 Dodge Neon R/T

User avatar
Danteneon
Former Moderator
Posts: 9591
Joined: Thu Dec 20, 2007 5:13 pm
Location: Manassas, VA

Post by Danteneon » Thu Jun 16, 2011 5:34 pm

Nice write-up :thumbup:

I will add this...be sure to align the bearing retainer plate with the notch in the same direction as it came off. That is an access hole should you ever need to press out a wheel stud. If you forget, the notch faces towards the caliper. This is the same for SRTs as well.
If I could just figure out how to meld the Outback and the Neon into one car...

Image

quicksilvr
Former Moderator
Posts: 3244
Joined: Fri Jul 30, 2004 7:19 pm
Location: St. Joseph, MO
Contact:

Post by quicksilvr » Thu Jun 16, 2011 6:04 pm

^Yes indeed. When you are putting the retainer plate on, it's pretty obvious where the notch needs to go, so just pay attention and you'll get it.
-Dave
Image
2001 Dodge Neon R/T

User avatar
TurboVanDan
2GN Member
Posts: 122
Joined: Sun Feb 11, 2007 2:16 am
Location: Savannah MO

Post by TurboVanDan » Tue Jun 21, 2011 5:52 pm

It would be neat if there was a view of picture number 3 that was a wider shot showing how we leveled the knuckle for pushing the old bearing out. Is there a wider view of that still on your camera...??
-Dan
Image
~2002 Dodge Neon Turbo~2002 Dodge Dakota Sport V8~2003 Dodge Durango SLT V8~1964 Plymouth Fury 2-door Hardtop 383 4-speed

quicksilvr
Former Moderator
Posts: 3244
Joined: Fri Jul 30, 2004 7:19 pm
Location: St. Joseph, MO
Contact:

Post by quicksilvr » Tue Jun 21, 2011 6:22 pm

Nope, I didn't take one.

Basically, the two arms that hold the brake caliper were on the press, and the tie rod end arm was supported with some flat stock set on edge (about 2.5" tall). We needed a couple washers under one of the brake caliper arms to make the whole thing completely level.
-Dave
Image
2001 Dodge Neon R/T

wickedgood4684
2GN Member
Posts: 312
Joined: Sat Aug 14, 2010 5:30 pm
Location: Lisbon Falls, ME

Post by wickedgood4684 » Tue Jun 21, 2011 8:36 pm

if you got some coin to drop I'd recommend one of these.

Image

On the car wheel bearing puller. Pull and press the bearing without removing the hub from the car. No alignment required
Image
SRT-4 Challenge series
Season 1 Champion: gotheframe/tim and corey
Season 2 Champion: Greasydeuce/Dmonday
NTCC
Winter Series:
Drivers Chamion: Neon Nick/Squat BIG
Team Champions: Team Acura: miniMench & wicked221
Rookie of the year: Patriot 01/xxPATRIOT 01xx

steamer1227
2GN Member
Posts: 259
Joined: Tue Jan 12, 2010 10:01 am
Location: Pocono's , Pa

Post by steamer1227 » Tue Jun 21, 2011 11:58 pm

I used this set at my brothers shop a few times. LOVE IT !!
Image

-STEPHEN- <HOW TO> <FEEDBACK>

quicksilvr
Former Moderator
Posts: 3244
Joined: Fri Jul 30, 2004 7:19 pm
Location: St. Joseph, MO
Contact:

Post by quicksilvr » Wed Jun 22, 2011 1:40 am

wickedgood4684 wrote:if you got some coin to drop I'd recommend one of these.

Image

On the car wheel bearing puller. Pull and press the bearing without removing the hub from the car. No alignment required

Yeah, I guess that would let you leave the knuckle on the car. (I assume you meant knuckle when you said "hub"......the hub HAS to come off to take the bearing out). But leaving the knuckle on would eliminate the alignment. Unless of course you replaced a tie rod end like I did anyway. lol
-Dave
Image
2001 Dodge Neon R/T

occasional demons
Junior Admin
Posts: 20306
Joined: Thu May 03, 2007 12:14 pm
Location: Ashland Ohio

Post by occasional demons » Wed Jun 22, 2011 7:31 am

You would still need to damn near remove the knuckle, to get the half shaft out of the way...
Bill
Olha Koba, a psychologist in Kyiv, said that “anger and hate in this situation is a normal reaction and important to validate.” But it is important to channel it into something useful, she said, such as making incendiary bombs out of empty bottles.
2000 Neon MTX swap with '02 R/T PCM
1999 neon coupe 2.4 swap
2021 Forester

quicksilvr
Former Moderator
Posts: 3244
Joined: Fri Jul 30, 2004 7:19 pm
Location: St. Joseph, MO
Contact:

Post by quicksilvr » Wed Jun 22, 2011 10:45 am

occasional demons wrote:You would still need to damn near remove the knuckle, to get the half shaft out of the way...
Very true. I'm not so sure that you can get the half shaft out of the bearing without removing either the ball joint, or the strut.


I guess the bottom line is that Chrysler didn't make these front wheel bearings easy to work on. :beatstick:
-Dave
Image
2001 Dodge Neon R/T

wickedgood4684
2GN Member
Posts: 312
Joined: Sat Aug 14, 2010 5:30 pm
Location: Lisbon Falls, ME

Post by wickedgood4684 » Wed Jun 22, 2011 11:57 am

quicksilvr wrote:
wickedgood4684 wrote:if you got some coin to drop I'd recommend one of these.

Image

On the car wheel bearing puller. Pull and press the bearing without removing the hub from the car. No alignment required

Yeah, I guess that would let you leave the knuckle on the car. (I assume you meant knuckle when you said "hub"......the hub HAS to come off to take the bearing out). But leaving the knuckle on would eliminate the alignment. Unless of course you replaced a tie rod end like I did anyway. lol
Ha, yeah I meant knuckle. A good friend of mine and I were able to replace both front wheel bearing on my 1gn in a short afternoon. It took me 2hours to do the drivers side(I had never done one) and took my friend 30 min to replace the passengers side. I did not have any tie rod problems. But in your case everything you did made sense.

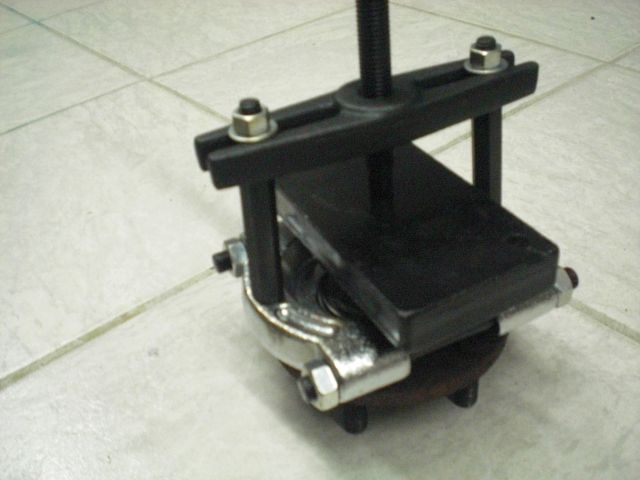
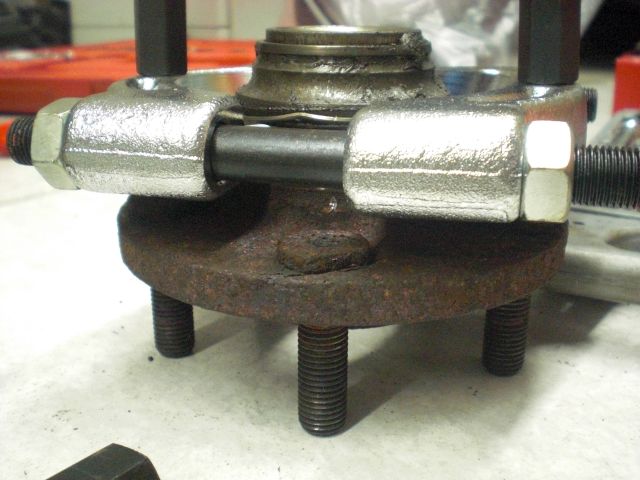
Used this to remove the hub BTW
Image
Image
SRT-4 Challenge series
Season 1 Champion: gotheframe/tim and corey
Season 2 Champion: Greasydeuce/Dmonday
NTCC
Winter Series:
Drivers Chamion: Neon Nick/Squat BIG
Team Champions: Team Acura: miniMench & wicked221
Rookie of the year: Patriot 01/xxPATRIOT 01xx

User avatar
Gnuserup
2GN Member
Posts: 661
Joined: Sun Jun 28, 2009 3:06 pm
Location: Germany

Post by Gnuserup » Sun Nov 23, 2014 1:25 pm

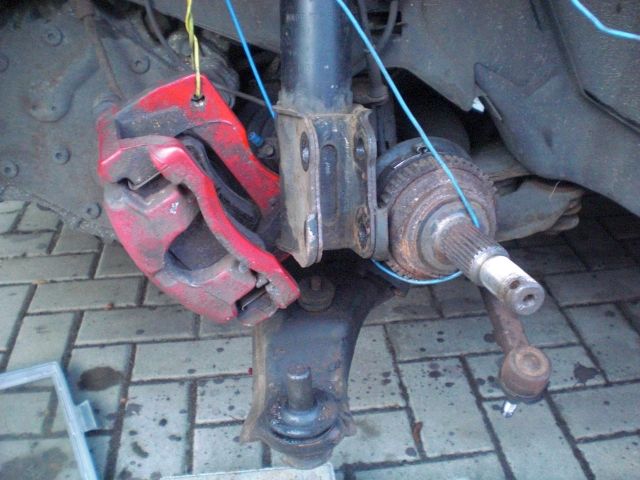
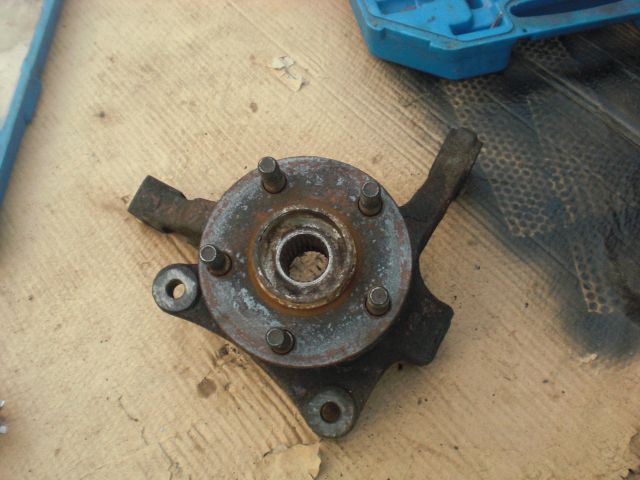
not finished yet, but still add some pictures of my work today...:


Image

Image

Image

Image

Image

Image

Image

Image

Image

Image

Image

Image

I´m actually waiting for the needed pullertool for the rest of the inner bearing which was left on the hub and will see :D
a neon - what else ?

User avatar
Gnuserup
2GN Member
Posts: 661
Joined: Sun Jun 28, 2009 3:06 pm
Location: Germany

Post by Gnuserup » Wed Nov 26, 2014 3:11 am

finished - a few more pictures


Image

Image

Image

Image

Image

Image

Image

Image

Image
a neon - what else ?

Post Reply

Return to “HT Chassis”