No it's not... not at all... Honda headlights pop open easily, neon headlights do not... I'm not being an ass, you're just making a generalization that is incorrect.MrAngry wrote:Hey let's be an ass, I've had 3 neons in my day and still own one, its all the same dude.
How To: blackhousing stock headlights
-
sidepipe87

- 2009 Silver Contributor
- Posts: 9516
- Joined: Fri May 30, 2008 5:35 pm
- Location: Pittsburgh, PA
- Contact:

To be completely honest, the neon headlight was easier then the toyota headlight, it also doesn't help that the toyota headlight is 3 feet long. What started as me agreeing with a person saying the housing can be successfully baked and taking apart, turned into some argument that you already lost, goodnight sir!

-
sidepipe87
- 2009 Silver Contributor
- Posts: 9516
- Joined: Fri May 30, 2008 5:35 pm
- Location: Pittsburgh, PA
- Contact:
My OEM headlights were able to easily & safely come apart with a heat gun. Now, I've also taken apart many headlights this way and have experience...so I cannot speak for the general public. I will not be held responsible for any damage occurred here on out following this How-To pictorial. Also, note that I use a heat gun - a hand-held tool as opposed to the "baking" method - whereas I am in control over the heating process.
Tools/Parts Required:
1) OEM / Aftermarket Head Lamp Assembly
2) Professional grade heat gun (I have also seen others use good quality hair dryers, with success.)
3) Two (2), or more if desired, flat head screw drivers.
4) One (1) Phillips screw driver
Step 1: It is always best to choose a corner of the head lamp. Begin by applying heat to the area with three or four medium-paced passes. This will soften the silicone to allow one of the flat head screw drivers to be inserted between the housing and the lens. Apply upward pressure on the screw driver, thus separating the two and stretching the silicone. Apply one or two passes of heat directly over the silicone, until the silicone fully separates down the middle (to the lens and the plastic housing). Keeping your original flat head screw driver in place, continue to slowly & carefully work your way around the head lamp assembly, using the 2nd flat head screw driver as a pry tool. Continue the heating first, separating second process until the lens is fully detached from the head lamp housing.
Step 2: Remove the OEM chrome trim from the plastic lens. This trim just lays inside of the lens with two Phillips style screws. Use your Phillips screw driver to remove the two (2) screws, and lastly, slide the chrome trim from the lens.
Step 3: Remove the (dangling) bulb cover (if Retrofitting a projector) from the chrome reflector housing. NOTE: Please do not bend, twist, yank, etc. on this piece as it will be require for re-installation if the return of factory lighting is desired in the future. There is a tab that can be depressed with the flat head screw driver, and the bulb reflector can then be pulled out safely.
Step 4: Lastly, remove the OEM silicone from the housing and lens. This process can be achieved by using the heat first, pry second method. Do one small section at a time and be patient. This will allow for a more-than-adequate deep lip around the housing for a wonderful seal during the re-assembly process. This step is important, as a good, clean seal will protect the modified headlamp from future moisture/condensation, damage, separation, breakage, etc.
Step 5: Modify the head lamp as desired.
Step 6: Clean the clear plastic lens carefully. This can be done by just a simple window cleanser (Invisible Glass, Windex, etc.) for not so dirty lens', or a headlamp restoration kit may be in store requiring wet sanding & polish.
Step 7: Re-assemble the inner trim to the plastic lens with the two Phillips screws.
Step 8: Generously apply a healthy coating of RTV silicone (preferably black or gray) located at a local auto parts store, to the deep lip of the black plastic housing created during step 4.
Step 9: Affix together the clear plastic lens with the black plastic headlamp assembly and apply steady pressure. Ensuring that the outer edge of the lens is submerged in silicone, a clamp may be applied to provide continuous pressure until the silicone is fully dried (Please refer to the manufacturer's information regarding drying time).
Step 10: Re-install the headlamp to the vehicle and enjoy!!
In the end, no kittens were hurt during the making of this pictorial
- Ben -
Last edited by 03SXTGUY on Mon May 16, 2011 10:52 pm, edited 5 times in total.
Great write up !!03SXTGUY wrote:My OEM headlights were able to easily & safely come apart with a heat gun. Now, I've also taken apart many headlights this way and have experience...so I can't speak for it being safe & easy for the general public. Also, note that I use a heat gun - I never use the "bake" method where I cannot be in control over the process.
Clean out as much of the old silicone as possible, to ensure you have a nice deep space to fill with new silicone for a nice tight seal to prevent future moisture/condensation, damage, breakage, etc.
Again, heat first, then clean with your flathead. Ensure to remove the silicone from your screw driver before it cools & dries or else you will condemn your screw driver basically useless after 3 or 4 passes lol
In the end, no kittens were hurt during the making of this pictorial
And Thanks for the great pics, too !
I have a question. Since the heat gun method worked so well for the headlamps, I wonder this would work for the rear tail lamp housings, too.....
- Nick
-1998 2-dr SOHC MTX= 57mm TB; Maddog STS
-2000 Ply.LX w/MTX = Maddog STS; CAI; 2.5 exh.; 60mm T/B
-2001 ATX w/Syked PCM + Magnum header
-2001 ACR w/SRT T/B bored out to 55mm
Official "I'm Going to Drive My Neon till it Dies" Club #000009
-2000 Ply.LX w/MTX = Maddog STS; CAI; 2.5 exh.; 60mm T/B
-2001 ATX w/Syked PCM + Magnum header
-2001 ACR w/SRT T/B bored out to 55mm
Official "I'm Going to Drive My Neon till it Dies" Club #000009
Nick, here you go bud - I modified the original post to a "real" how-toNickKo wrote: Great write up !!
And Thanks for the great pics, too !
I have a question. Since the heat gun method worked so well for the headlamps, I wonder this would work for the rear tail lamp housings, too.....
- Nick
- Ben -
P.S. Regarding your question, I have never disassembled an OEM Dodge tail lamp, so I am unfamiliar with the quality of silicone used on them. However, yes, I would imagine through my experience with other tail lamps, that this method would successfully work as long as the person was careful & took his/her time.
(FYI)
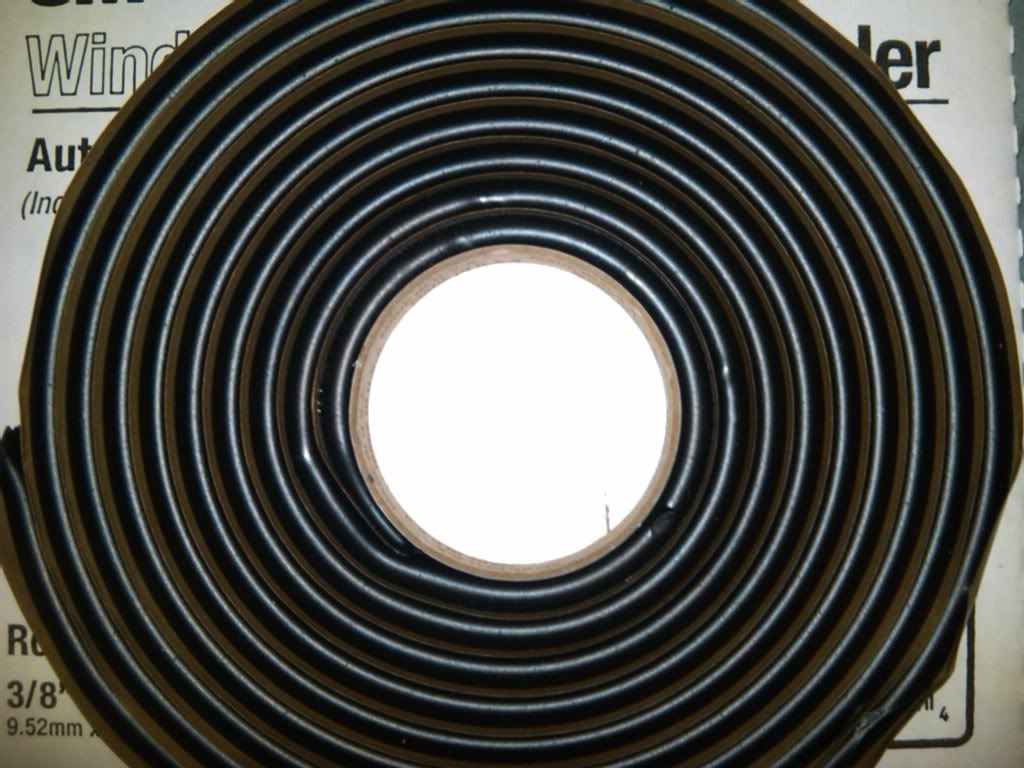
For those interested in resealing with the highly recommended butyl tape, the OEM Nissan brand is the #1 recommended brand through my research - it can be purchased at a local Nissan dealership for approximately $30 (for what I read.)
However, in 2nd place, is the 3M Brand which is rated to be just as good as the OEM Nissan brand, and 1/2 price. It can be found at:
3M Windo-Weld Ribbon Sealer
Size / Length / Part Number:
NAPA Auto Parts:
1/4" / 15 Feet / MMM 08620
1/4" / 30 Feet / MMM 08625
3/8" / 15 Feet / MMM 08622
5/16" / 15 Feet / MMM 08611
Price varies between $9.49 - $21.49 (ea.)
Advance Auto Parts:
3/8" / 15 Feet / 08612 - $22.99 (ea.)
Last edited by 03SXTGUY on Tue May 17, 2011 11:08 am, edited 3 times in total.
03SXTGUY wrote:(FYI)
For those interested in resealing with the highly recommended butyl tape, the OEM Nissan brand is the #1 recommended brand through my research - it can be purchased at a local Nissan dealership for approximately $30 (for what I read.)
However, in 2nd place, is the 3M Brand which is rated to be just as good as the OEM Nissan brand, and 1/2 price. It can be found at:
NAPA Auto Parts:
3M Windo-Weld Ribbon Sealer
Size / Length / Part Number:
1/4" / 15 Feet / MMM 08620
1/4" / 30 Feet / MMM 08625
3/8" / 15 Feet / MMM 08622
5/16" / 15 Feet / MMM 08611
Price varies between $9.49 - $21.49 (ea.)
Awesome...... Thanks again.
- Nick
-1998 2-dr SOHC MTX= 57mm TB; Maddog STS
-2000 Ply.LX w/MTX = Maddog STS; CAI; 2.5 exh.; 60mm T/B
-2001 ATX w/Syked PCM + Magnum header
-2001 ACR w/SRT T/B bored out to 55mm
Official "I'm Going to Drive My Neon till it Dies" Club #000009
-2000 Ply.LX w/MTX = Maddog STS; CAI; 2.5 exh.; 60mm T/B
-2001 ATX w/Syked PCM + Magnum header
-2001 ACR w/SRT T/B bored out to 55mm
Official "I'm Going to Drive My Neon till it Dies" Club #000009


Has anyone blacked out an entire halogen headlight? Is the light output drastically reduced even if you leave the (dangling) reflective bulb cover as is?
Plan on retrofitting my headlights in the next month or so. But just curious as to how a blacked out halogen headlight would perform.
Plan on retrofitting my headlights in the next month or so. But just curious as to how a blacked out halogen headlight would perform.
Sorry My Car Doesn't Speak Japanese or German
This Is America and We Speak American
This Is America and We Speak American
-
occasional demons
- Junior Admin
- Posts: 20306
- Joined: Thu May 03, 2007 12:14 pm
- Location: Ashland Ohio
If you black out the reflector behind the bulb, it isn't going to put out much light at all.
If you convert to projectors, then it won't matter.
If you convert to projectors, then it won't matter.
Bill
1999 neon coupe 2.4 swap
2021 Forester
2000 Neon MTX swap with '02 R/T PCMOlha Koba, a psychologist in Kyiv, said that “anger and hate in this situation is a normal reaction and important to validate.” But it is important to channel it into something useful, she said, such as making incendiary bombs out of empty bottles.
1999 neon coupe 2.4 swap
2021 Forester
-
occasional demons
- Junior Admin
- Posts: 20306
- Joined: Thu May 03, 2007 12:14 pm
- Location: Ashland Ohio
Joined 2006, so I don't think that's an issue....Johny wrote:looking for that 50 post count..Jenni wrote:looks like someone is digging all those old threads out of the grave...
Bill
1999 neon coupe 2.4 swap
2021 Forester
2000 Neon MTX swap with '02 R/T PCMOlha Koba, a psychologist in Kyiv, said that “anger and hate in this situation is a normal reaction and important to validate.” But it is important to channel it into something useful, she said, such as making incendiary bombs out of empty bottles.
1999 neon coupe 2.4 swap
2021 Forester