How-To: Installing Oil Pressure and Volt Gauges

danman132x
2GN Member
Posts: 1075
Joined: Sun Oct 01, 2006 7:36 pm
Location: Crestview, FL

How-To: Installing Oil Pressure and Volt Gauges

Post by danman132x » Sun Mar 18, 2007 10:39 pm

How-To: Installing Electric Oil Pressure and Volt Gauges
___________________________________________________

basic tools needed:
16 or 18 gauge wire ( I used 16)
Wire cutters
Sharp pocket knife, or similar item
Female connectors
Some O-ended connectors
Haynes manual (optional for wiring diagrams)
Various Screwdrivers
Pliers or crimpers
Lighter
Heat Shrink Tubing
Scissors
Oil Pressure Gauge Socket
3/8 Tee Connector all females
3/8 to 3/8 connector
3/8 to 1/8 adaptor for sensor
Yellow Tefflon Tape
Time to do it right

___________________________________________________

First the A-Pillars need to be removed. Be careful, as I broke a clip on my passenger side one. They just snap off.

Next the dash needs to come off. Four screws total, 2 on the sides, and 2 in the vent on the top.

Remove the dash and set somewhere aside until ready to re-asssemble. I did not have the extra connector as mentioned in another post.
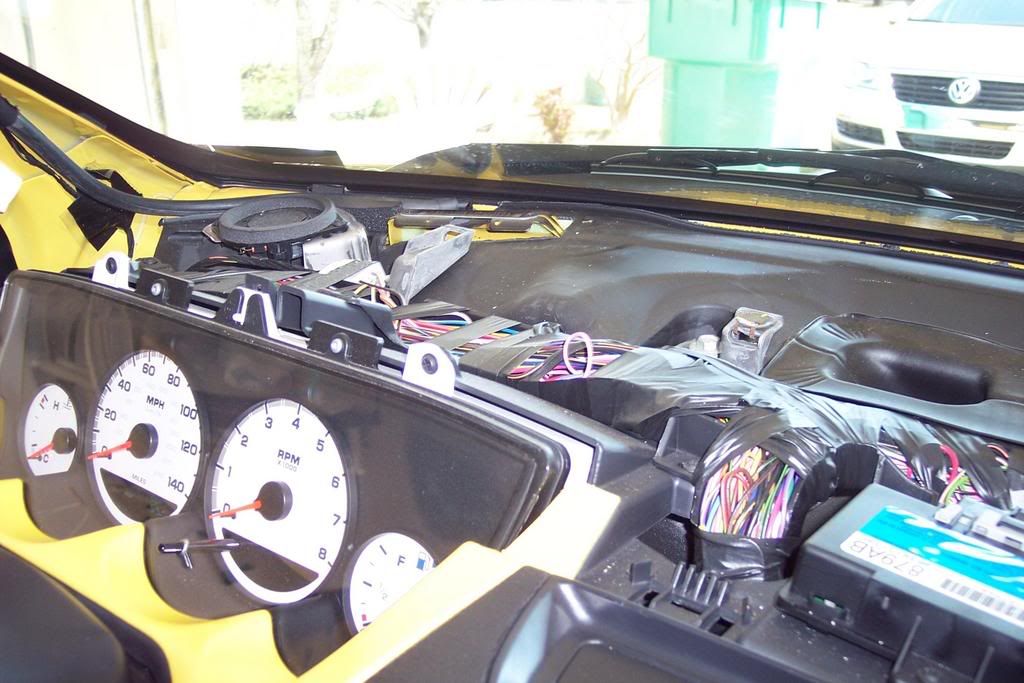
Image

The next few steps can be done in any orders, but is basically all wiring. I first measured and cut all my wires to correct lenghts and put the connectors on all of them.

I used heat shrink connectors from advance auto, and O-ended connectors.
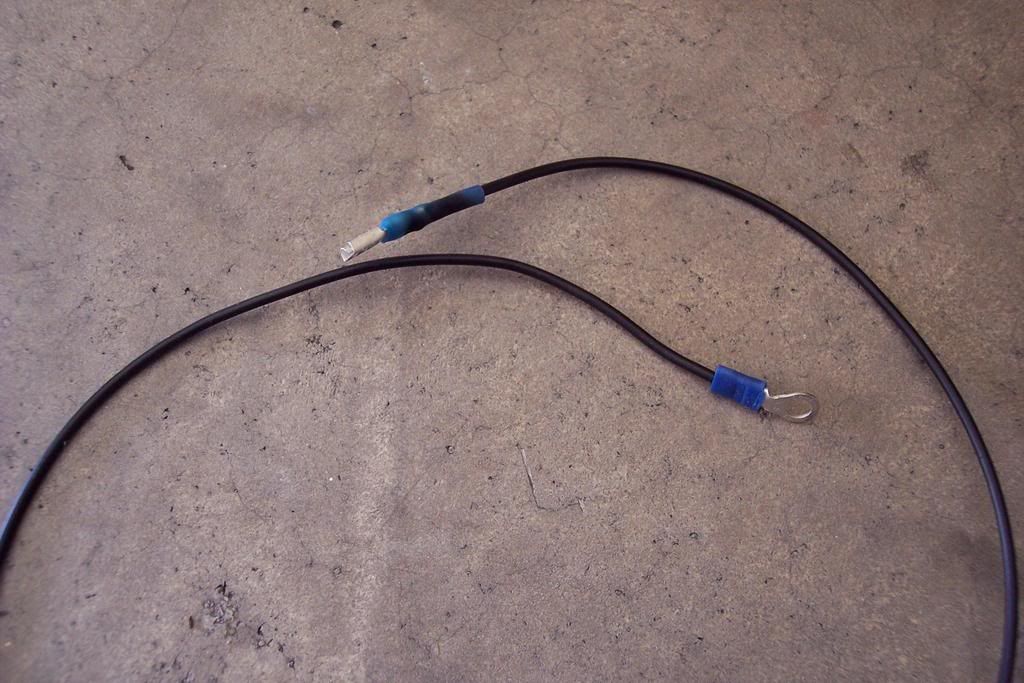
Image

I took some advice from the instructions and installed a 4 amp fuse on the ignition wire for both gauges.
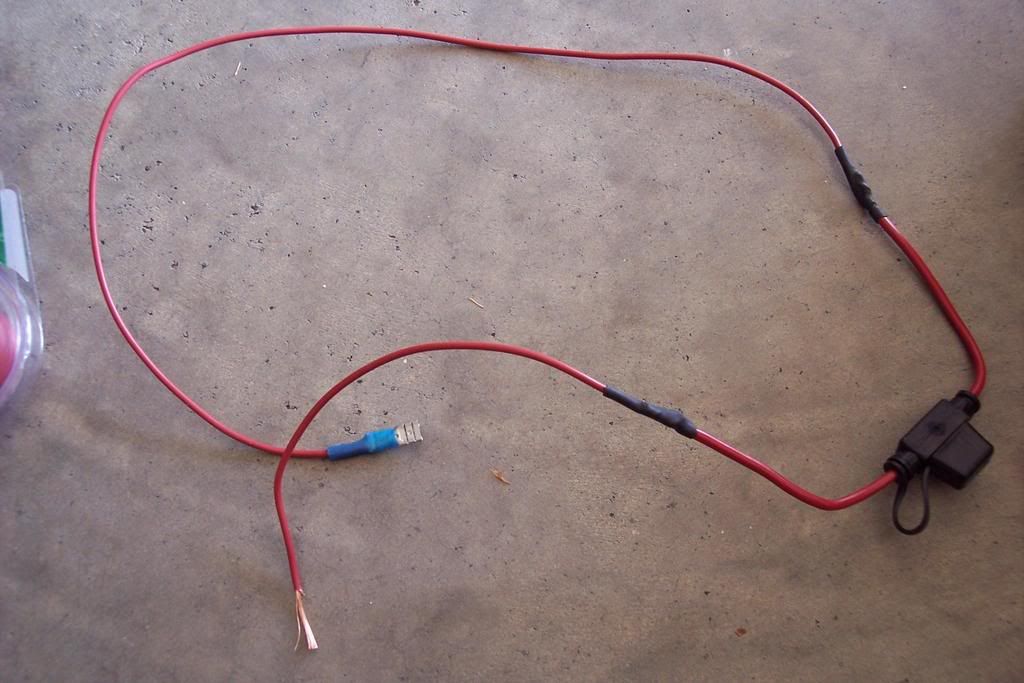
Image

For the gauge lighting, I tapped into the solid orange wire. This wire allows the gauges to be dimmed. (LED's will not dim as much, at least with my Phantom II gauges) I stripped the wire, but not actually severed it.
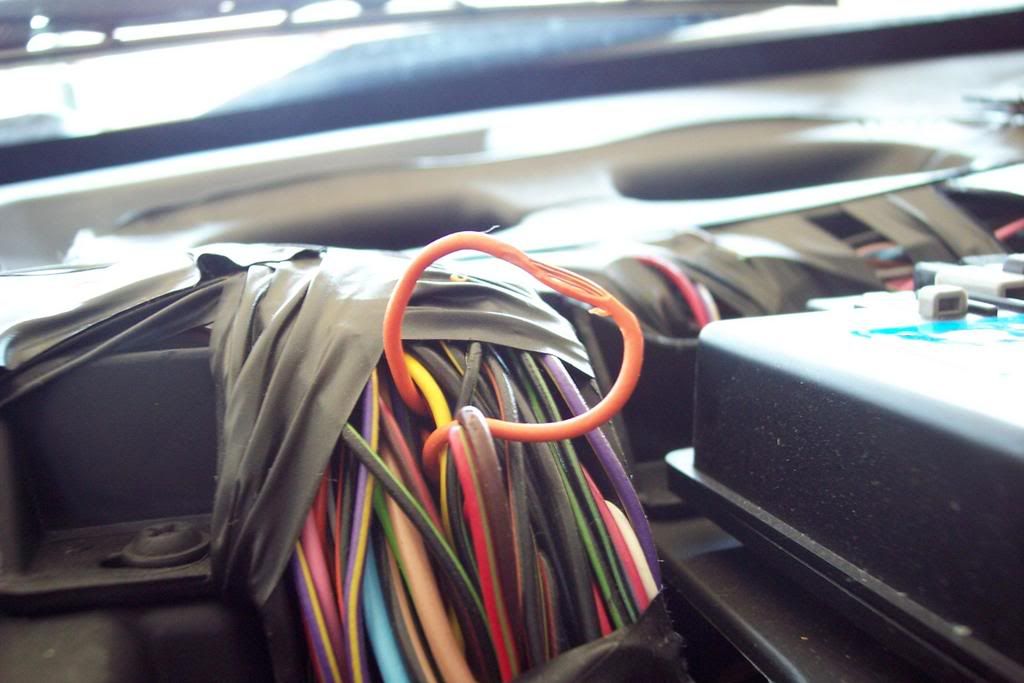
Image

I then wrapped the other wires around it.
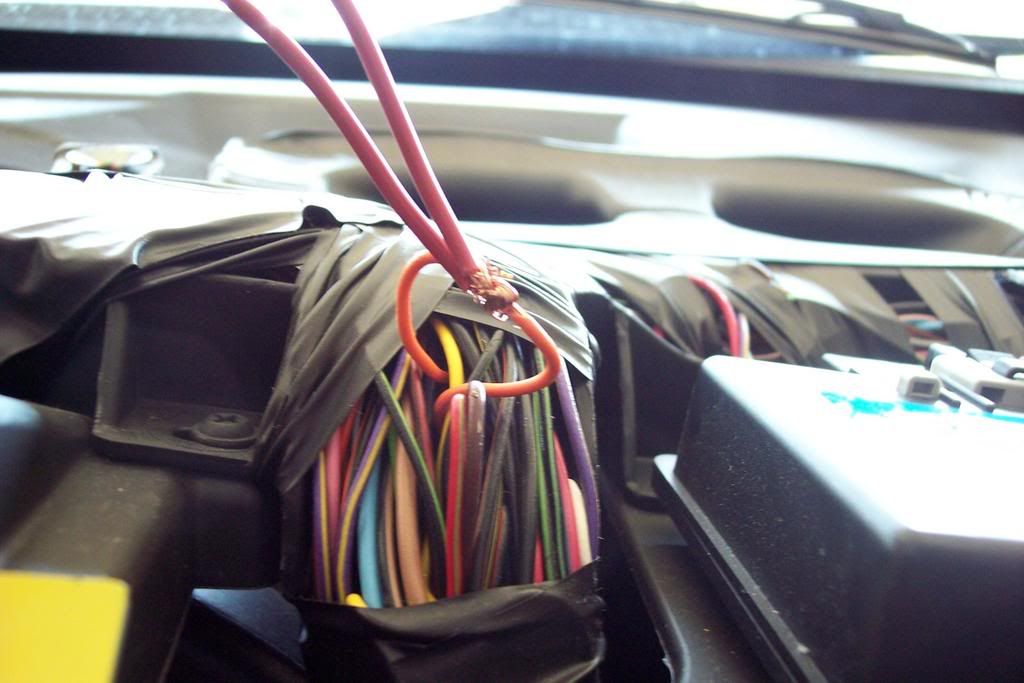
Image

For the oil pressure Ignition On power, I just tapped into the Yellow/Red wire on the top of the dash near the cluster.

For the volt gauge wire, I tapped into the cig. lighter wire, black/small red stripe. This was the closest actual voltage I could find. I tapped into 3 wires with my multimeter and those were all .10 volts lower than the cig. lighter wire. I had to run the wire all the way down to the cig. lighter because I could not find the wire anywhere else but down here (also can't seem to find the cig. lighter in the haynes wiring diagram)

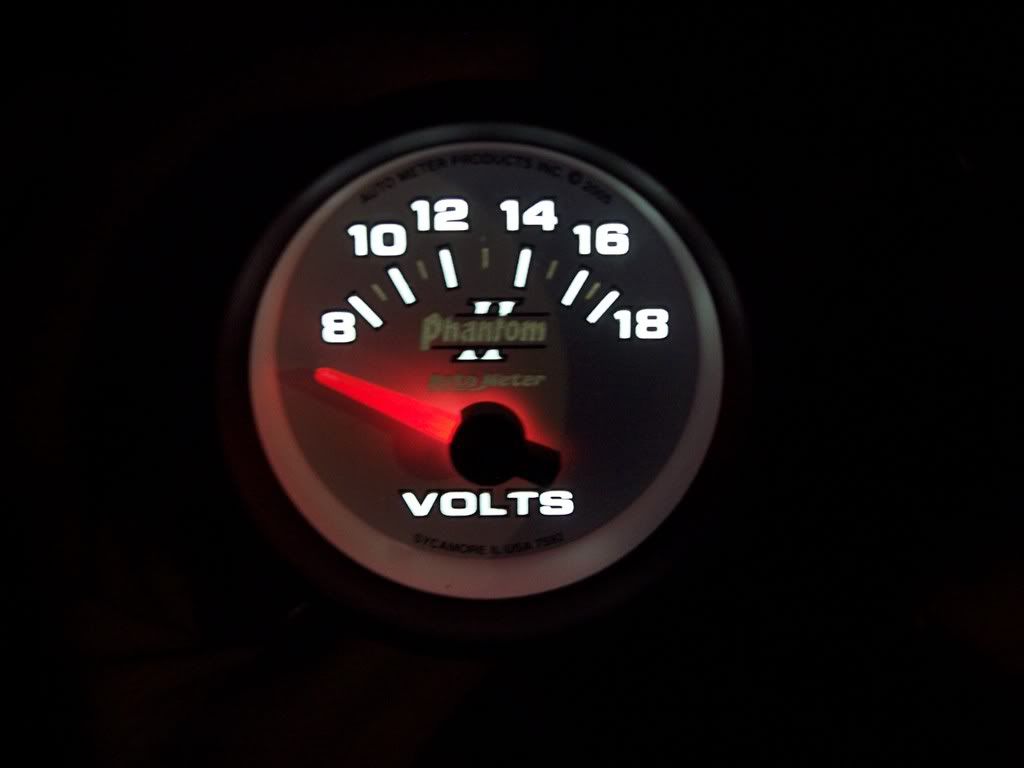
View from back of an electric Phantom II gauge
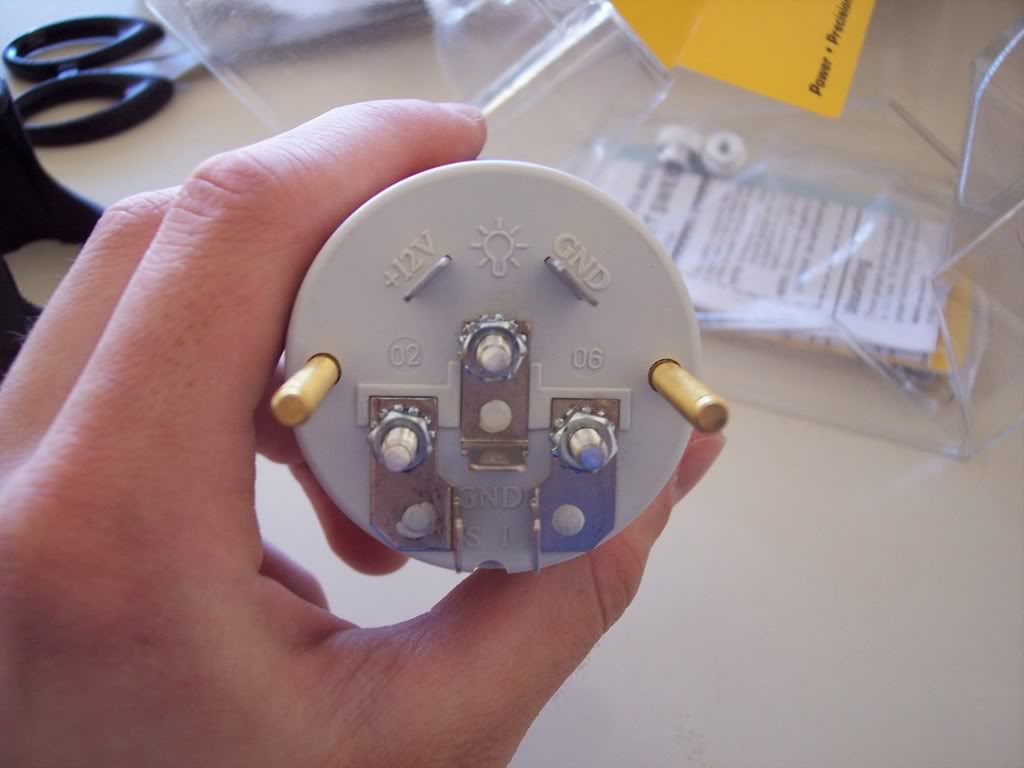
Image
GND for ground, I for Ignition, S for the sender, and then the lighting.

Total I have
2 LED power cables
2 Ignition/Acc on power switches, one for the Oil gauge and one for volts
4 grounds, one for each of the gauges, and the other 2 for the LED lighting grounds (or actual lightbulb)
1 Sender cable to the engine compartment to hook up to the aftermarket oil pressure sender

Lots of wires
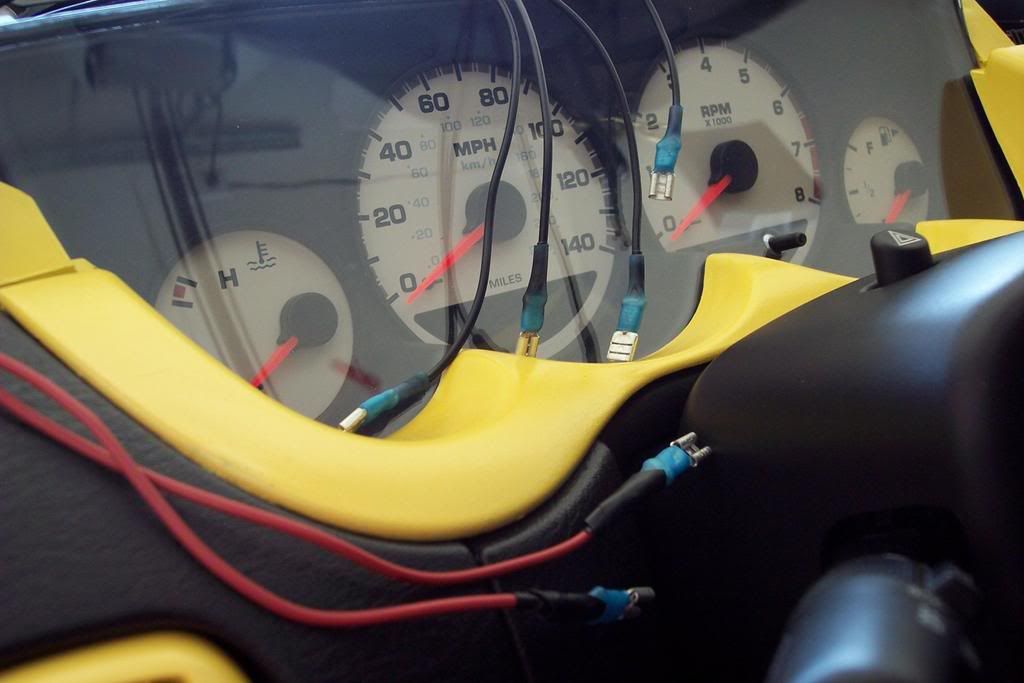
Image

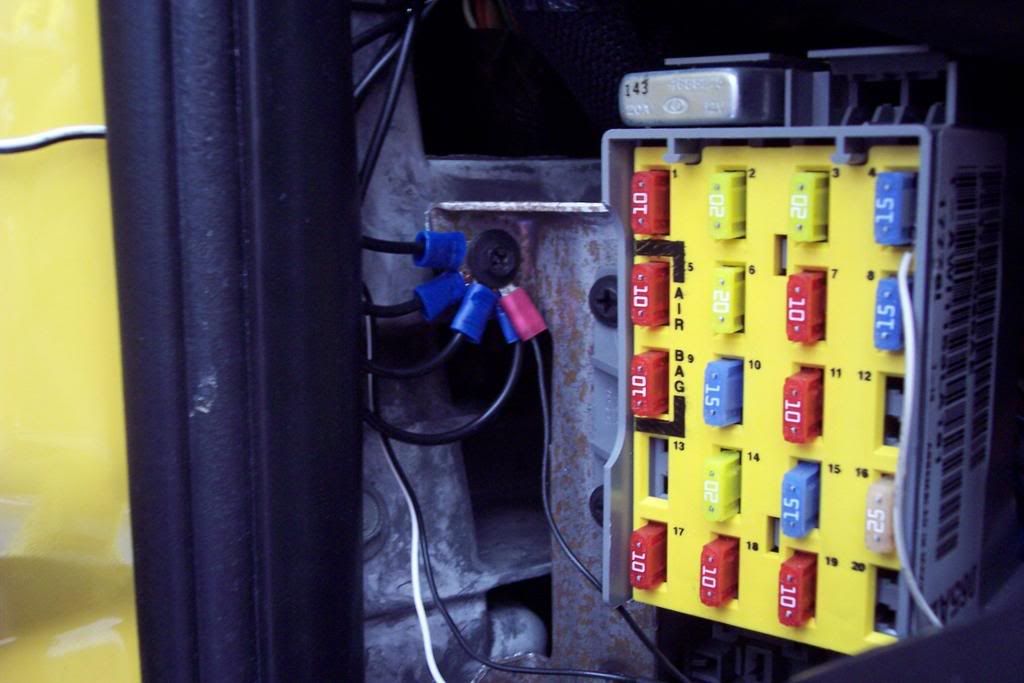
Picture of where I hooked up the grounds by the fuse box
Image

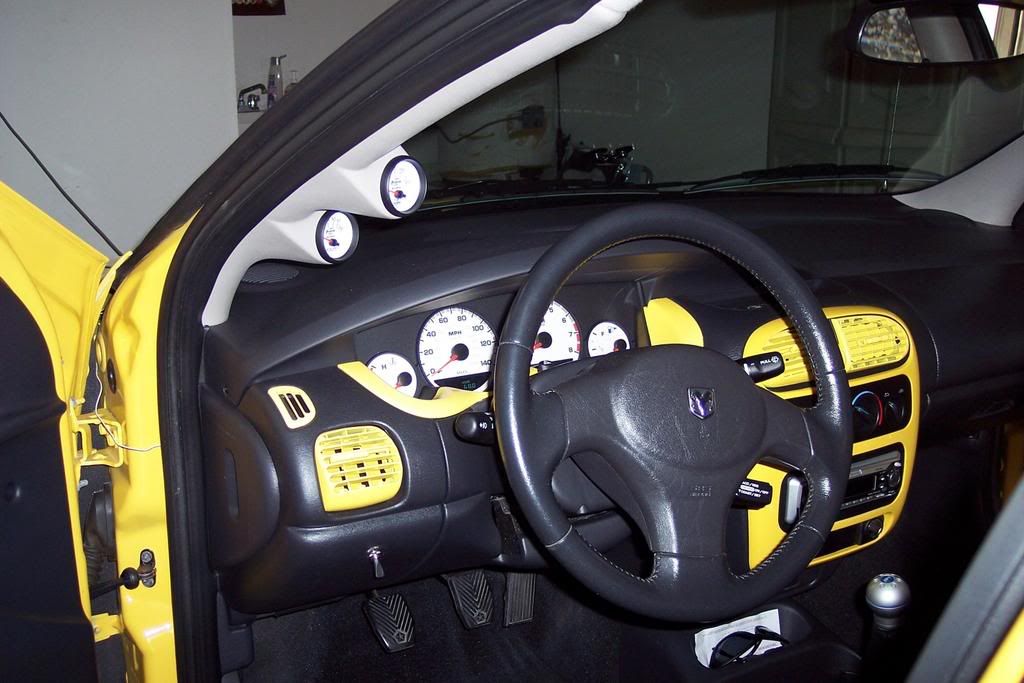
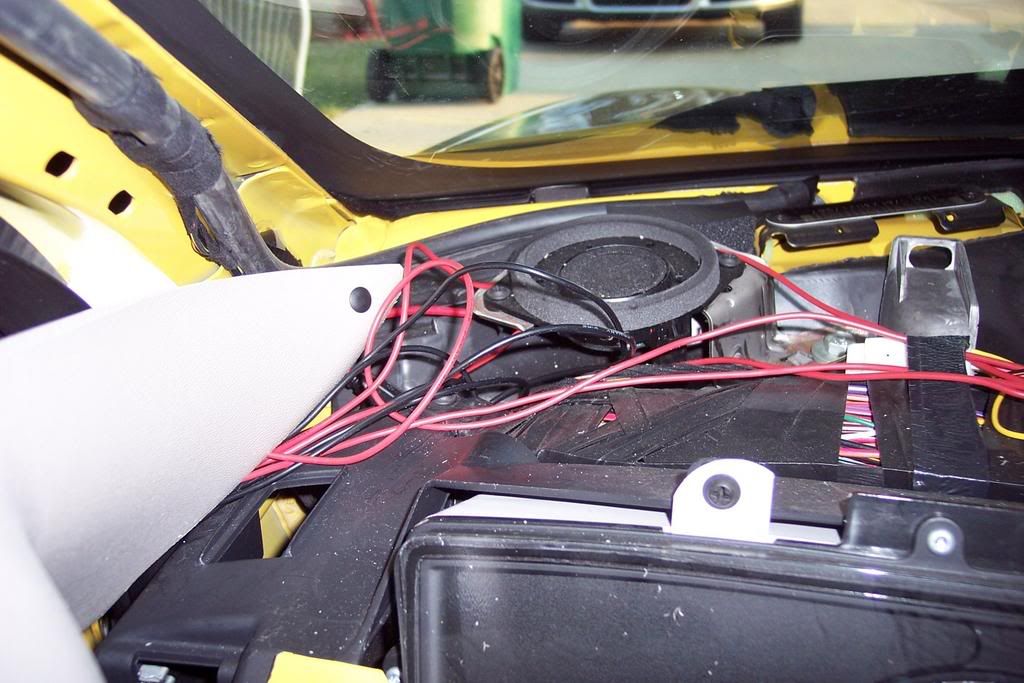
Cleaned up a lil bit, and wires into the pillars once put together. They pull a lil tighter and nicer. Just make sure you have a little slack to work with. (doesn't look "clean" in pics, but wiring is held together and underelectrical tape in stock harness)
Image


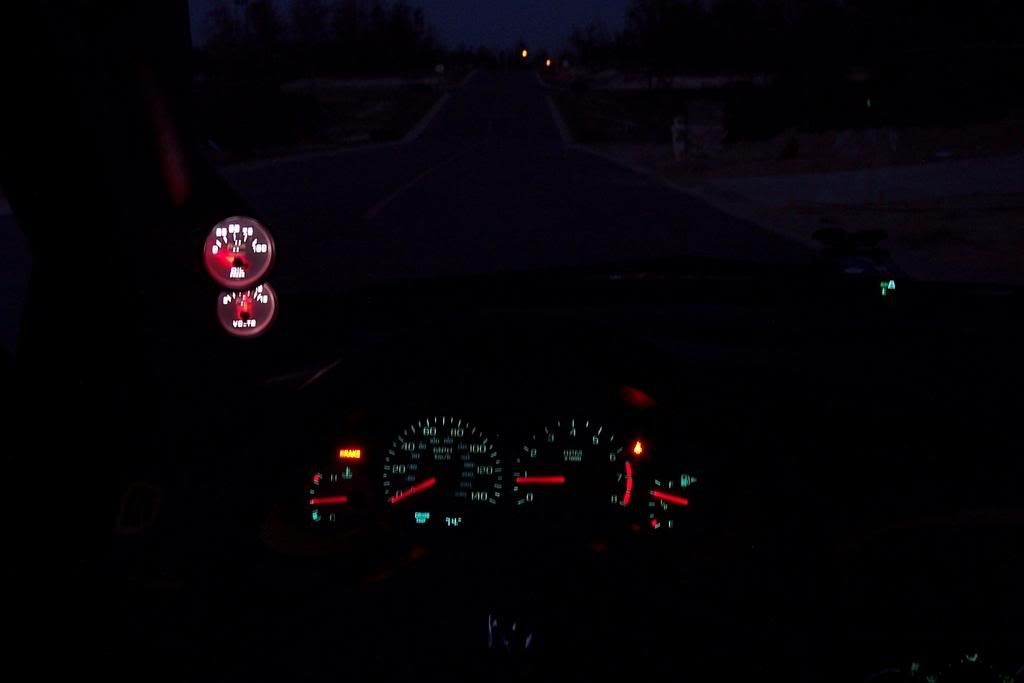
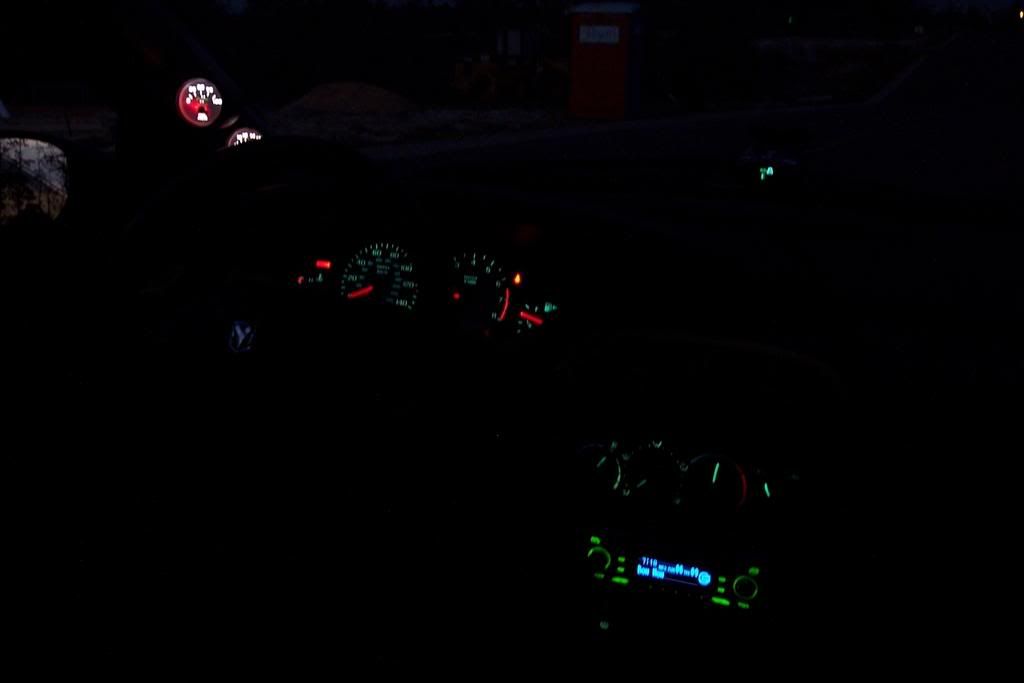
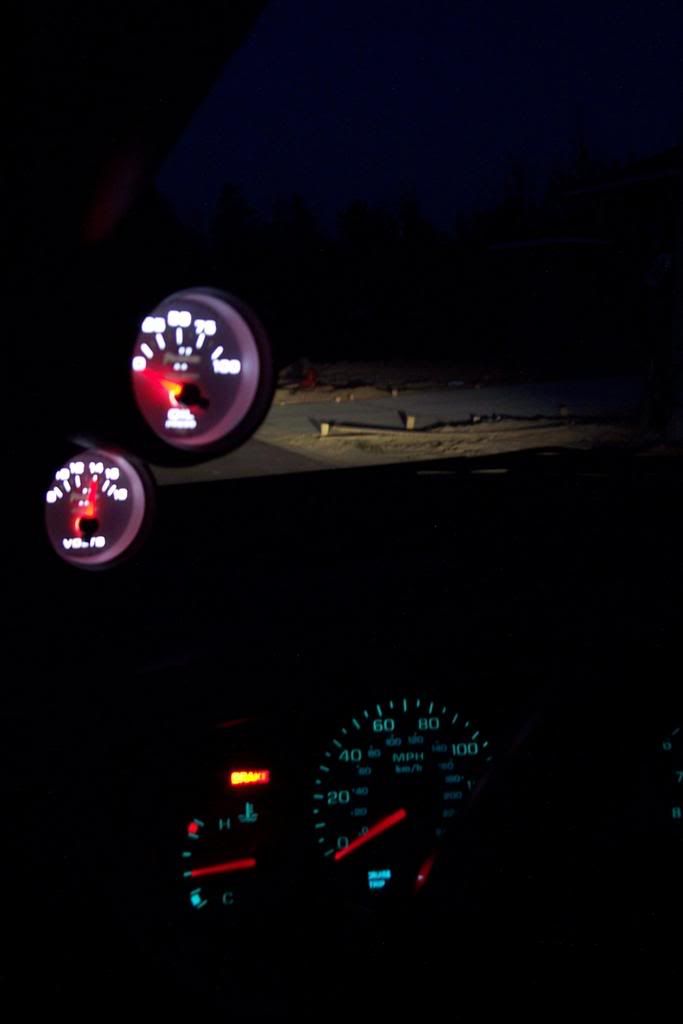
Gauge lit up
Image

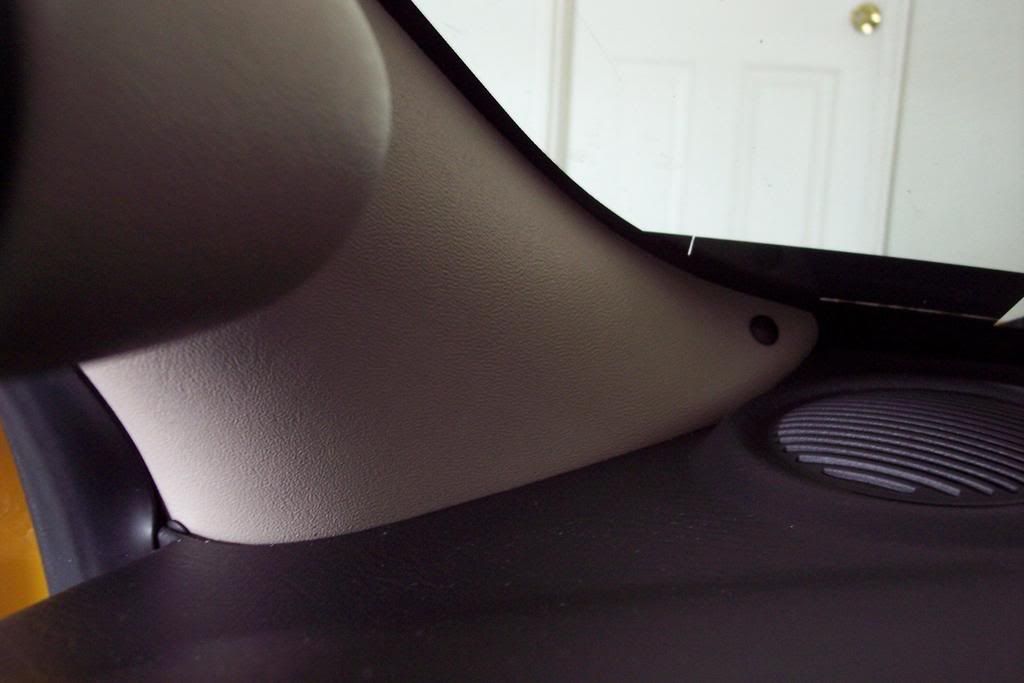
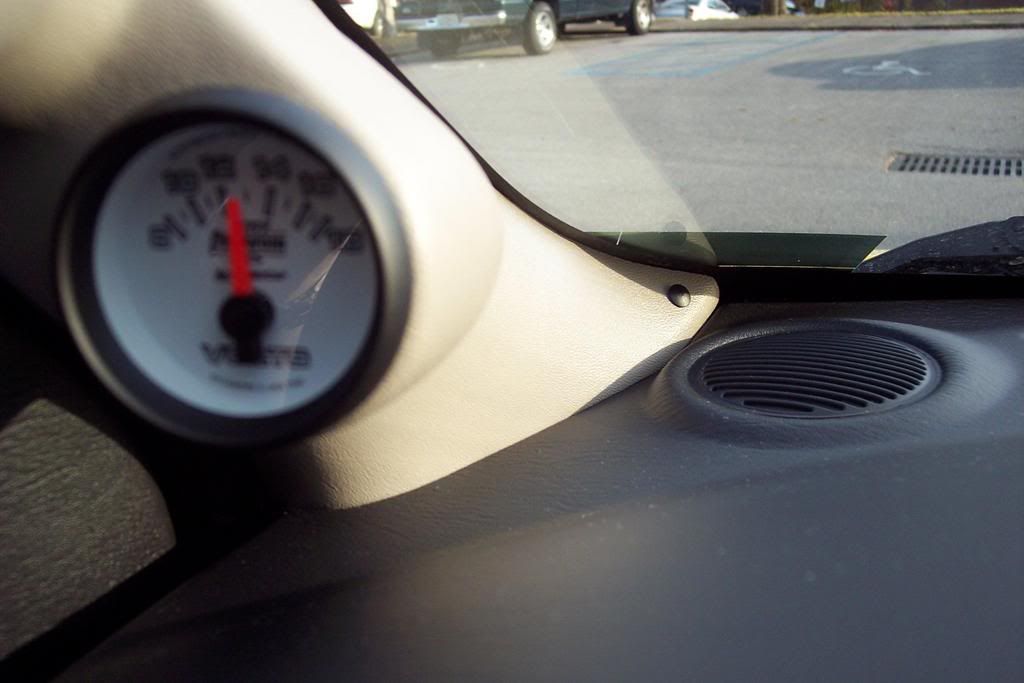
Here you can see 2 of the 4 small platic buttons that old the pillar pod in place. The other two are at the top.
Image

Another view to show how flush it fits
Image

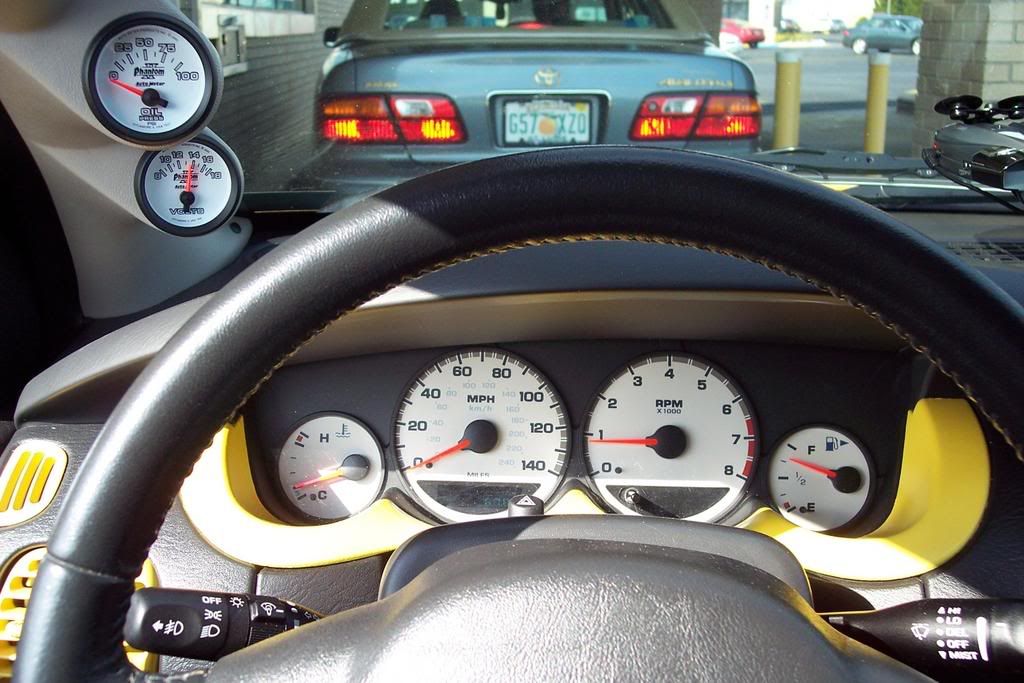
Misc pictures of install. Note my oil gauge sender is not hooked up in these pictures.
Image

Image

Image

Image

Image

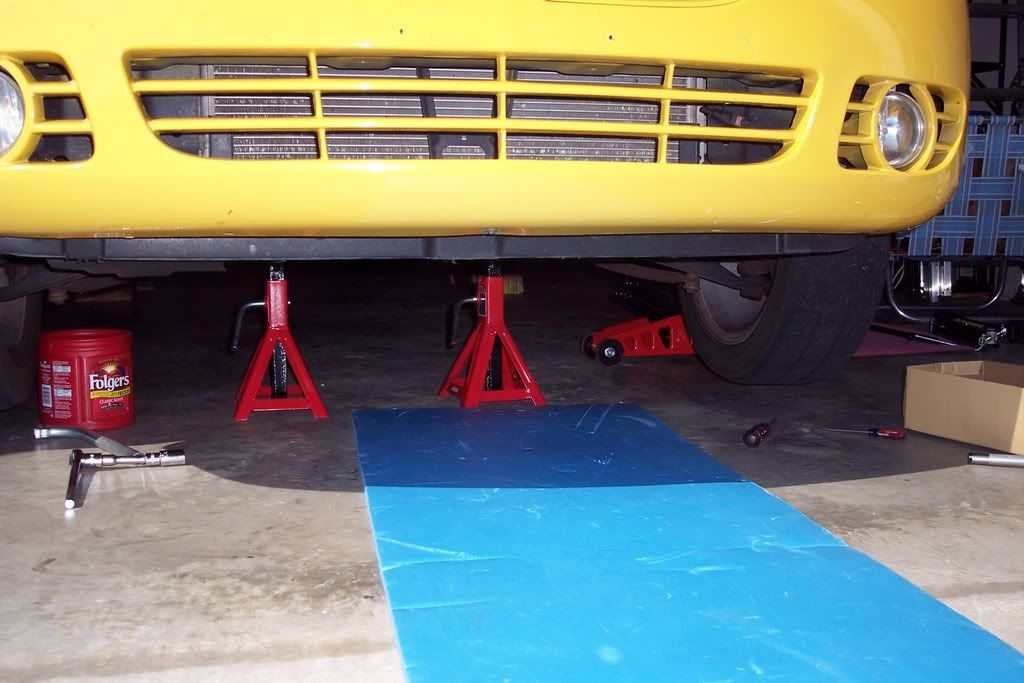
Car raised
Image
(Folgers was to catch the "cup" of oil that come out when you pull the sensor. To bad mine was only a small dribble)


The wire for the oil pressure sender runs through a grommet in the firewall with all the other wires.

The stock oil sender has a green plug on it (on my 03)

Installing the sender can be a pain. It's not rocket science, but the location makes it hard. First I made sure all my connections are very tight and wrapped with tefflon tape. All of my connections have at least 3 loops.

The first 3/8 to 3/8 I wrapped both sides and screwed it in the block, very tight.
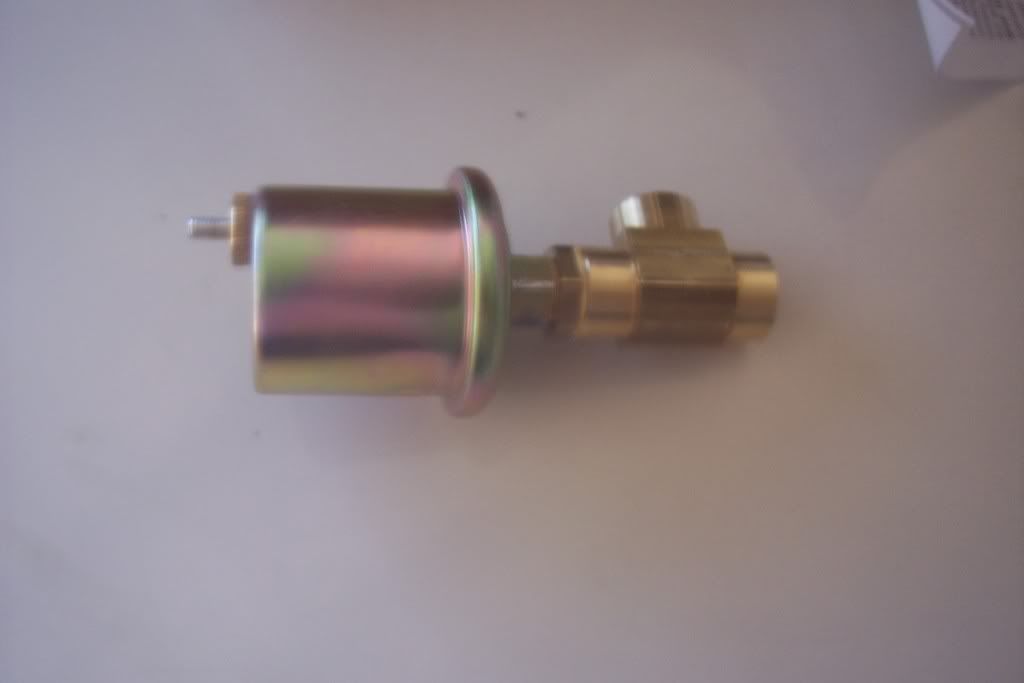
Next I connected the aftermarket sender to the tee fitting. If you do not do this, it will be extremely hard to tighten the Tee to the 3/8 to 3/8 adaptor. Reason for doing this is to use the sender to screw in the Tee.
Image

I then screwed the tee in along with the sender, using the sender to turn it.
Now for the hard part. Getting the Tee facing straight up, you need to put in the stock sensor. First get it as tight as possible with your hand. The you NEED to get an open end wrench big enough and tighten it more. If you don't, you have a high risk of a leak. (talking up to 100 lbs of pressure here) It took me 2 hours just for this one sensor to get it very tight. (had to use adjustible wrench, pain, and also phone ringing about 10 times while under the car. lol)

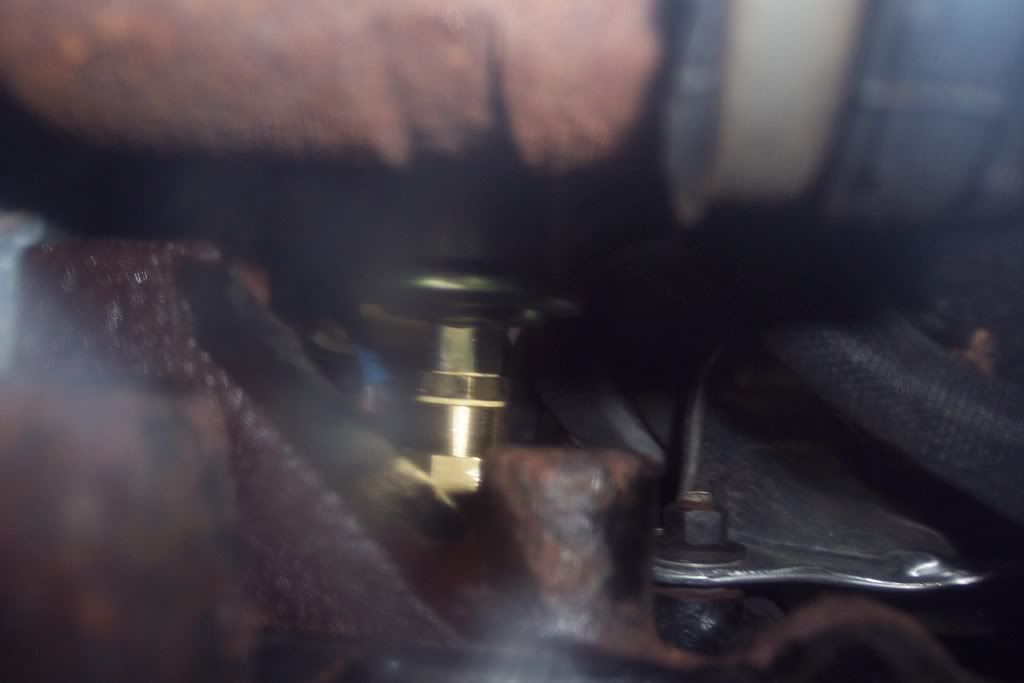
Picture of sender assembled on block, best I could get.
Image

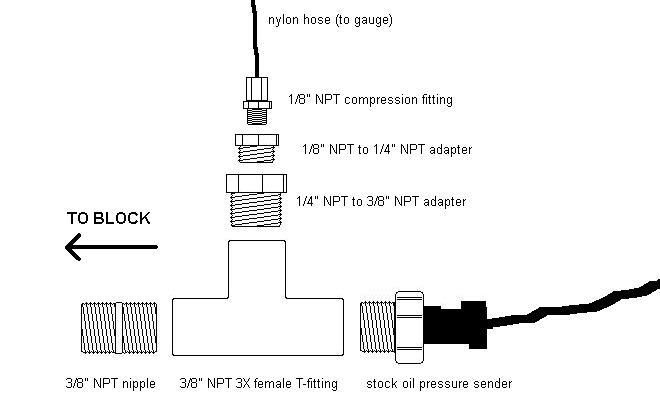
Here is a picture, but instead of the hose going out at the top, the stock sender goes there, and the aftermarket straight out.
NOTE: Not my picture. Credit to Jonnymopar
Image

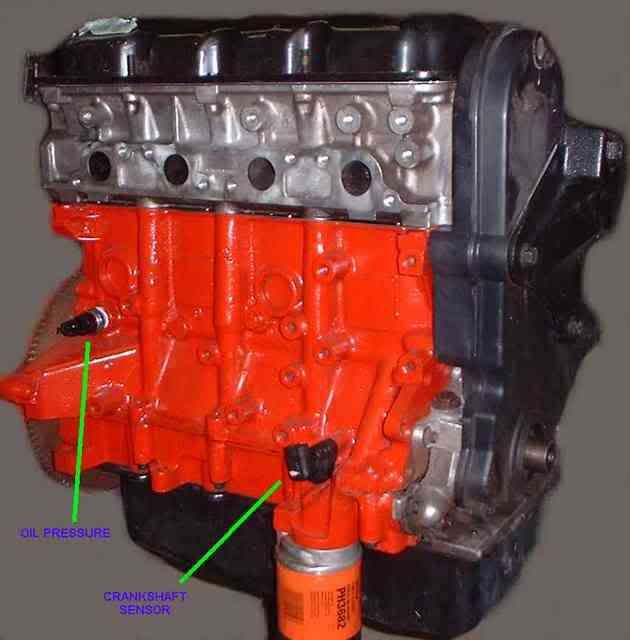
Location of sender:
NOTE: Not my picture. Credit to ???
Image


Once you take an actual look and attempt to tackle this job yourselfs, it really isnt that hard. I have taken advice from the site though which helped out some :thumbup: Hope this helps you.

Last edited by danman132x on Fri Sep 19, 2008 2:45 am, edited 6 times in total.
2003 Dodge Neon R/T

Image

http://myspace.com/danman132x

racer12306
Junior Admin
Posts: 16126
Joined: Sun Oct 24, 2004 8:53 pm
Location: Baltimore, MD
Contact:

Post by racer12306 » Sun Mar 18, 2007 10:45 pm

looks pretty good. ill be doing my volt gauge tomorrow if i can get my stupid package from fedex, but more likely it will be on thursday.
-Frank
Member of Spork Racing
Forum issues: racer12306@2gn.org
Forum Behavior
Support your favorite forum, DONATE!

partyboy1122
2GN Member
Posts: 90
Joined: Sat Mar 03, 2007 9:15 pm

Post by partyboy1122 » Sun Mar 18, 2007 10:56 pm

Which color wire just controls the parking lights/headlights. I like driving around with my gauges really dark so I don't want to tap it to the dimming source. I don want to have my gauge light being able to be dimmed.

-Devil-
2GN Member
Posts: 682
Joined: Sun Dec 05, 2004 9:35 pm
Location: Louisiana

Post by -Devil- » Mon Mar 19, 2007 12:03 am

on the full pillar pod .. does it go on top of exsisting pillar? or in place of? .. and if it is in place of .... does it have the mounting tabs needed?

User avatar
spencersummerfield
2GN Member
Posts: 399
Joined: Mon Sep 11, 2006 12:02 pm
Location: London, Ontario

Post by spencersummerfield » Mon Mar 19, 2007 12:36 am

i believe it goes on top of the existing and you dril small holes threw both and black tabs hold it on like a cover.
that way it colour matchs the interior... at least thats how mine worked/
2008 Audi A3 - 6 Speed, 2.0T S Line


Image

User avatar
BlackRoseRacing
2009 Platinum Contributor
Posts: 12737
Joined: Sat Dec 25, 2004 8:58 am

Post by BlackRoseRacing » Mon Mar 19, 2007 4:20 am

Great detail, keep it up and this topic will be moved over to the How To section :)

-Devil-
2GN Member
Posts: 682
Joined: Sun Dec 05, 2004 9:35 pm
Location: Louisiana

Post by -Devil- » Mon Mar 19, 2007 7:46 am

spencersummerfield wrote:i believe it goes on top of the existing and you dril small holes threw both and black tabs hold it on like a cover.
that way it colour matchs the interior... at least thats how mine worked/
ah thanks ... been wondering how they fasten ... got a bunch of guages lying around ... but never ordered the cover because when i call about it ... no one can tell me how it mounts up and when someone does a how-to .. they never include pics about it.

danman132x
2GN Member
Posts: 1075
Joined: Sun Oct 01, 2006 7:36 pm
Location: Crestview, FL

Post by danman132x » Mon Mar 19, 2007 8:56 am

I will be editiing it a little before. A couple of more pictures and some more wording detail. I did it last night just before bed, so I know I can improve a few points. Thanks

The full pod pillar is overtop of the factory one. It does not have the clips to hold it in place, but it holds up very well.
2003 Dodge Neon R/T

Image

http://myspace.com/danman132x

-Devil-
2GN Member
Posts: 682
Joined: Sun Dec 05, 2004 9:35 pm
Location: Louisiana

Post by -Devil- » Mon Mar 19, 2007 9:09 am

danman132x wrote:The full pod pillar is overtop of the factory one. It does not have the clips to hold it in place, but it holds up very well.
how did you fasten yours to the stock peice?

User avatar
jonnymopar
Junior Admin
Posts: 3039
Joined: Sat Nov 19, 2005 7:49 pm
Location: Southeastern MA

Post by jonnymopar » Mon Mar 19, 2007 12:38 pm

Phantom II gauges look the best!
Image
Jon J.

2003 Neon SXT - new home, new owner. Thanks for everything, old friend.
1989 Daytona ES - 2.4L/A555 swapped

Official "I'm Going To Drive My Neon Until Jerry Buys It" Club Member #11

User avatar
03sxt
Former Jr. Admin
Posts: 11389
Joined: Wed May 11, 2005 10:53 am
Location: Conneaut, Ohio
Contact:

Post by 03sxt » Mon Mar 19, 2007 4:24 pm

jonnymopar wrote:Phantom II gauges look the best!
:withstupid:

danman132x
2GN Member
Posts: 1075
Joined: Sun Oct 01, 2006 7:36 pm
Location: Crestview, FL

Post by danman132x » Mon Mar 19, 2007 9:44 pm

Post pretty much finalized. It's hard to take pictures from under the engine, but when I get around to installing the sender, I will definetly try an take some pictures.
2003 Dodge Neon R/T

Image

http://myspace.com/danman132x

danman132x
2GN Member
Posts: 1075
Joined: Sun Oct 01, 2006 7:36 pm
Location: Crestview, FL

Post by danman132x » Sat Mar 24, 2007 8:39 pm

Final Update. Couple more pictures added along with some installation information. Thanks for the feedback guys.
2003 Dodge Neon R/T

Image

http://myspace.com/danman132x

User avatar
jonnymopar
Junior Admin
Posts: 3039
Joined: Sat Nov 19, 2005 7:49 pm
Location: Southeastern MA

Post by jonnymopar » Sun Mar 25, 2007 4:18 am

Credit to jonnymopar for the wonderful Microsoft Paint drawing of the sender installation. :)
Image
Jon J.

2003 Neon SXT - new home, new owner. Thanks for everything, old friend.
1989 Daytona ES - 2.4L/A555 swapped

Official "I'm Going To Drive My Neon Until Jerry Buys It" Club Member #11

User avatar
Supermanneon
2GN Member
Posts: 297
Joined: Wed Mar 28, 2007 4:23 am

Post by Supermanneon » Sun Apr 08, 2007 6:06 pm

Prolly missed reading it but i really looked though this whole post....4th picture down is the illumination wire?? for the lights..Like i just got a reactive volt gauge and i have a oil pressure gauge on its way and if thats the illumination wire i just tape into that??

danman132x
2GN Member
Posts: 1075
Joined: Sun Oct 01, 2006 7:36 pm
Location: Crestview, FL

Post by danman132x » Sun Apr 08, 2007 6:13 pm

Yes, the orange wire is the illumination wire I tapped into.
2003 Dodge Neon R/T

Image

http://myspace.com/danman132x

User avatar
Supermanneon
2GN Member
Posts: 297
Joined: Wed Mar 28, 2007 4:23 am

Post by Supermanneon » Sun Apr 08, 2007 6:51 pm

Wow thanks for the super quick reply!! :thumbup:

User avatar
Supermanneon
2GN Member
Posts: 297
Joined: Wed Mar 28, 2007 4:23 am

Post by Supermanneon » Sat Apr 14, 2007 7:31 pm

I got my guages install and everything..but i have 1 gripe...their reactive gauges and they have multi colors you can pick from...but for some reason it doesnt save when i turn the car off..everytime i turn it on i have to set them. Whats wrong??
2001 Dodge Neon ATX
Image

User avatar
jonnymopar
Junior Admin
Posts: 3039
Joined: Sat Nov 19, 2005 7:49 pm
Location: Southeastern MA

Post by jonnymopar » Sat Apr 14, 2007 8:20 pm

Supermanneon wrote:I got my guages install and everything..but i have 1 gripe...their reactive gauges and they have multi colors you can pick from...but for some reason it doesnt save when i turn the car off..everytime i turn it on i have to set them. Whats wrong??
Do you have the wiring diagram from the gauge? There might be a need to run 12V to a battery source instead of an ignition-on source. Kinda like if you wired your radio memory to ignition. It would remember the stations as long as the key was on instead of all the time.
Image
Jon J.

2003 Neon SXT - new home, new owner. Thanks for everything, old friend.
1989 Daytona ES - 2.4L/A555 swapped

Official "I'm Going To Drive My Neon Until Jerry Buys It" Club Member #11

User avatar
Supermanneon
2GN Member
Posts: 297
Joined: Wed Mar 28, 2007 4:23 am

Post by Supermanneon » Sat Apr 14, 2007 8:41 pm

Didnt come with a very detailed instructions i just went by this How to..I know my oil gauge has 1yellow,1blue(sender)1 red, and 1 black...Volt has the same just not the sender..
2001 Dodge Neon ATX
Image

danman132x
2GN Member
Posts: 1075
Joined: Sun Oct 01, 2006 7:36 pm
Location: Crestview, FL

Post by danman132x » Sat Apr 14, 2007 8:43 pm

Like JonnyMopar said, if you want to keep the color the same, you have to wire it to a constant source. When the power is cut, you loose the preset. Basically like the radio. If you cut the power, all your stations are gone. The wire I used is a switched source (dash lights etc)

I'm not familiar with your brand of gauges though.
2003 Dodge Neon R/T

Image

http://myspace.com/danman132x

dreds420
2GN Member
Posts: 74
Joined: Thu Jun 21, 2007 1:43 am
Location: austin, tx

Post by dreds420 » Thu Aug 23, 2007 5:03 pm

will the water temp work if i do it like the oil psi ??

danman132x
2GN Member
Posts: 1075
Joined: Sun Oct 01, 2006 7:36 pm
Location: Crestview, FL

Post by danman132x » Fri Aug 24, 2007 3:19 pm

It should work for water temp. You just need to place the sensor in a coolant line of course
2003 Dodge Neon R/T

Image

http://myspace.com/danman132x

danman132x
2GN Member
Posts: 1075
Joined: Sun Oct 01, 2006 7:36 pm
Location: Crestview, FL

Post by danman132x » Sat Sep 22, 2007 8:58 pm

Video of the oil pressure gauge in action. I know, really late, but it shows that an electrical gauge is responsive. Everything still working great with my set-up too :)

http://youtube.com/watch?v=l2Pi7ewwd_U
2003 Dodge Neon R/T

Image

http://myspace.com/danman132x

User avatar
Diablo0
2GN.org Owner/Admin
Posts: 12576
Joined: Thu Apr 15, 2004 11:20 pm
Location: Greenville, SC
Contact:

Post by Diablo0 » Mon Sep 24, 2007 10:39 am

I'd also like to add since I dont' see it anywhere...

00-02 you don't HAVE to do the T-Fitting as you won't throw any codes and the oil light will not come on. Your oil light just won't come on if you get low on oil and by then you're probably screwed already since the pressure drop has to get pretty damn low in order for the light to kick on.

03+ you will need to do the T-Fitting since without hte stock sender you will throw a code for it not being there and possibly run into limp mode.
-Jason
Black '02 Neon R/T | White '02 Neon R/T - SRT-4 Engine Swap
Image
^^^ no, that isn't what I look like haha
Try not to become a man of success but rather to become a man of value. - Albert Einstein

Izero
2GN Member
Posts: 600
Joined: Wed Jun 27, 2007 2:12 pm

Post by Izero » Mon Sep 24, 2007 7:20 pm

wait wait wait.... im buying an electric oil Pressure gauge from prosportgauges.com...... would it still work if i did the T as i have a 2001 es.....? and i'd rather just keep the stock sender there just in case....
Image

User avatar
jonnymopar
Junior Admin
Posts: 3039
Joined: Sat Nov 19, 2005 7:49 pm
Location: Southeastern MA

Post by jonnymopar » Mon Sep 24, 2007 8:55 pm

Sure will. It doesn't matter whether you have a mechanical one or an electric one.

I wasn't even sure I needed the stock sender when I did mine, but I wanted to keep it there no matter what. It's kinda tight back there, but there's room.
Image
Jon J.

2003 Neon SXT - new home, new owner. Thanks for everything, old friend.
1989 Daytona ES - 2.4L/A555 swapped

Official "I'm Going To Drive My Neon Until Jerry Buys It" Club Member #11

Broken Glass
2GN Member
Posts: 426
Joined: Mon Feb 05, 2007 7:56 am
Contact:

Post by Broken Glass » Wed Sep 26, 2007 10:00 pm

the stock oil sender is a 3/8 in right? and will brass be strong enough? or should i do something stronger? i saw on the srt forums they used brass and it broke, but it was a different style set up

danman132x
2GN Member
Posts: 1075
Joined: Sun Oct 01, 2006 7:36 pm
Location: Crestview, FL

Post by danman132x » Wed Sep 26, 2007 10:13 pm

Stock should be 3/8 correct. Same as the Tee...

AFAIK for stock aplications, brass is good to use.
2003 Dodge Neon R/T

Image

http://myspace.com/danman132x

User avatar
jonnymopar
Junior Admin
Posts: 3039
Joined: Sat Nov 19, 2005 7:49 pm
Location: Southeastern MA

Post by jonnymopar » Thu Sep 27, 2007 2:24 pm

Trust me, you won't break brass unless you do it on purpose. Your oil pressure rarely, if ever, gets as high as 80psi. Brass pipe fittings are usually rated somewhere between 1000psi and 3000psi. If you read about someone breaking a brass pipe fitting, it's more than likely because they tightened it to a ridiculous degree.
Image
Jon J.

2003 Neon SXT - new home, new owner. Thanks for everything, old friend.
1989 Daytona ES - 2.4L/A555 swapped

Official "I'm Going To Drive My Neon Until Jerry Buys It" Club Member #11

Post Reply

Return to “HT Interior”