How-to: Repair Fog light switch

Post Reply
User avatar
silverneon
2GN Member
Posts: 75
Joined: Tue Aug 22, 2006 6:49 am
Location: The Netherlands
Contact:

How-to: Repair Fog light switch

Post by silverneon » Tue Sep 11, 2007 3:32 am

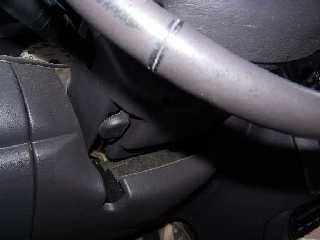
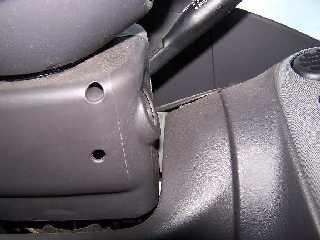
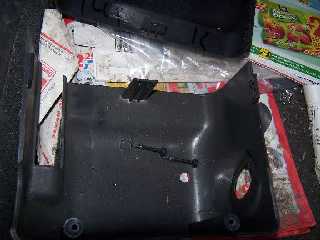
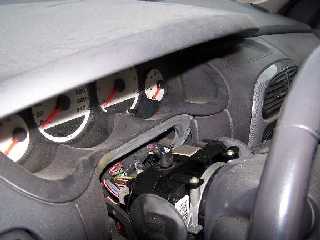
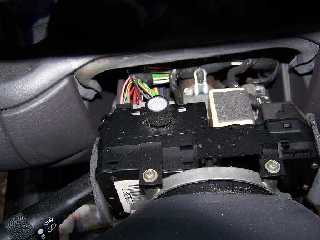
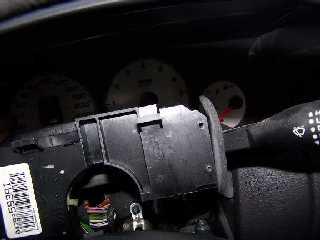
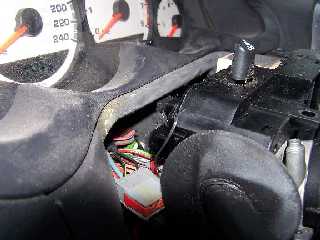
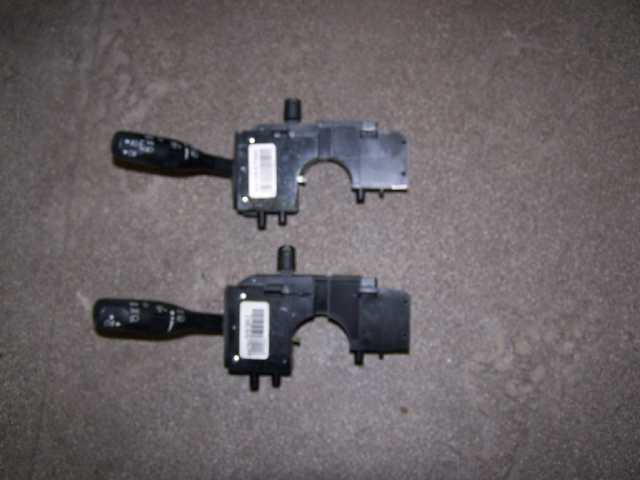
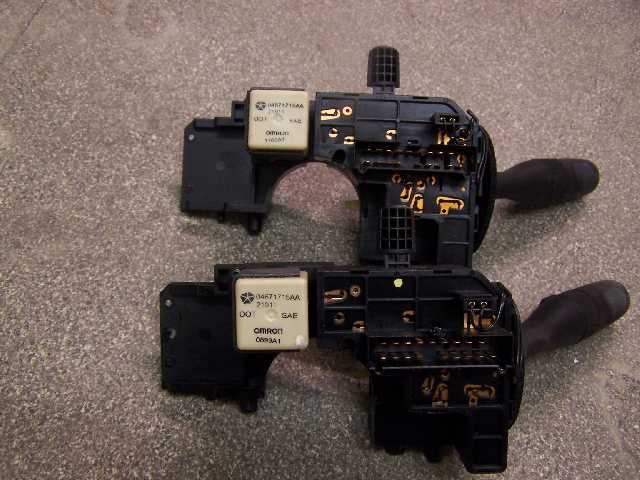
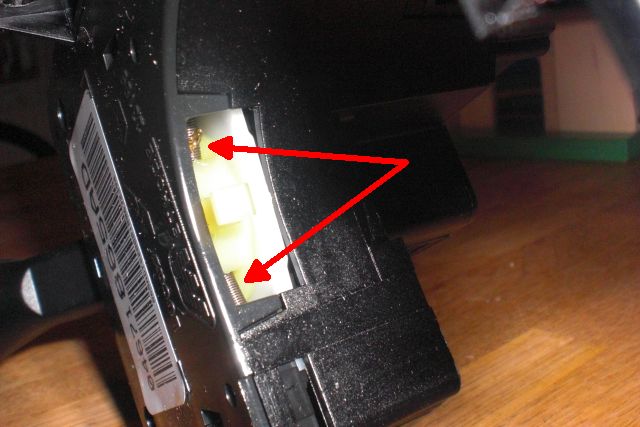
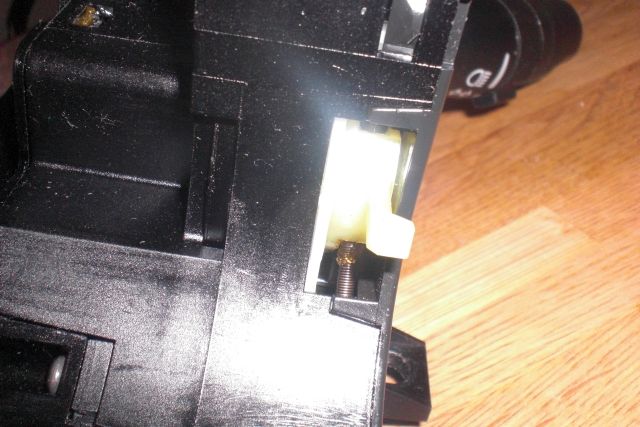
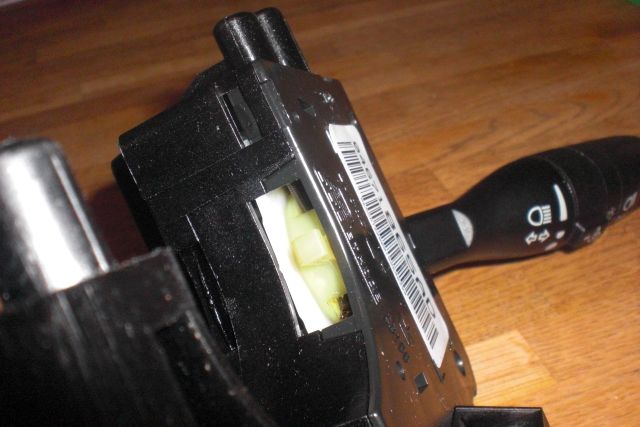
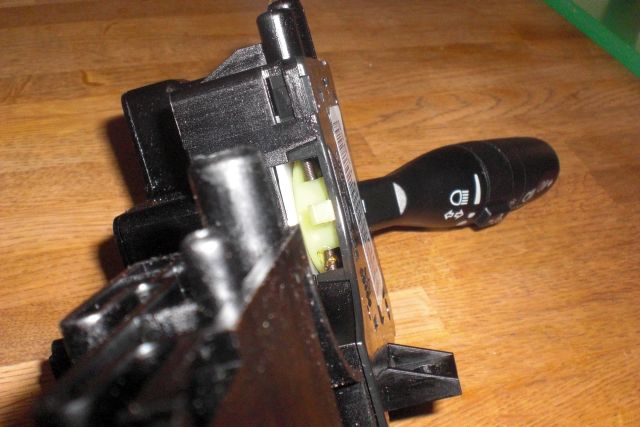
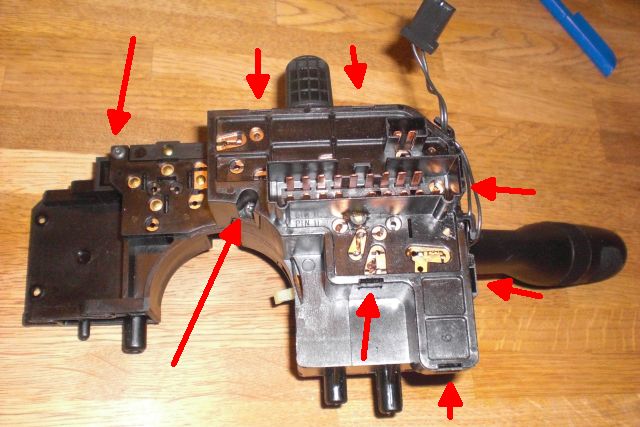
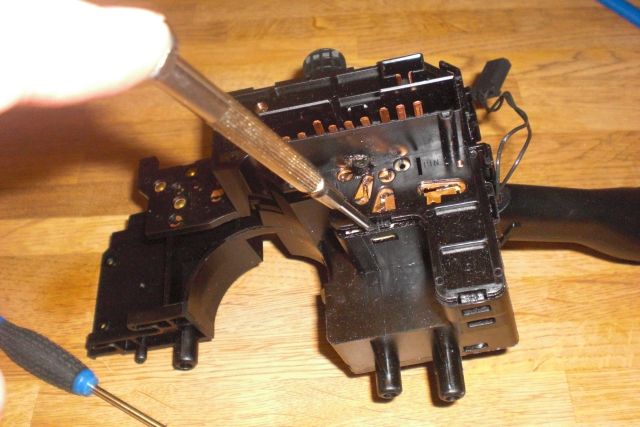
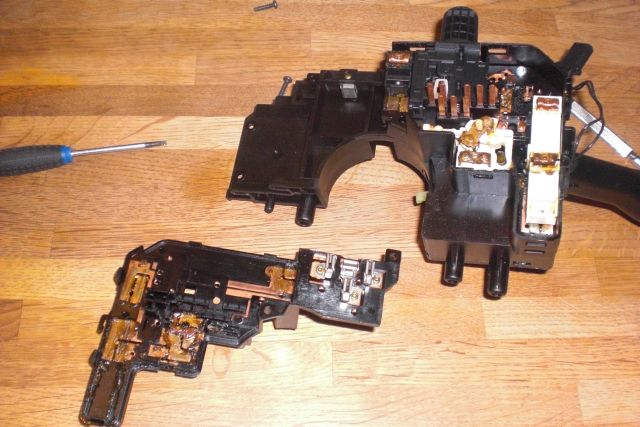
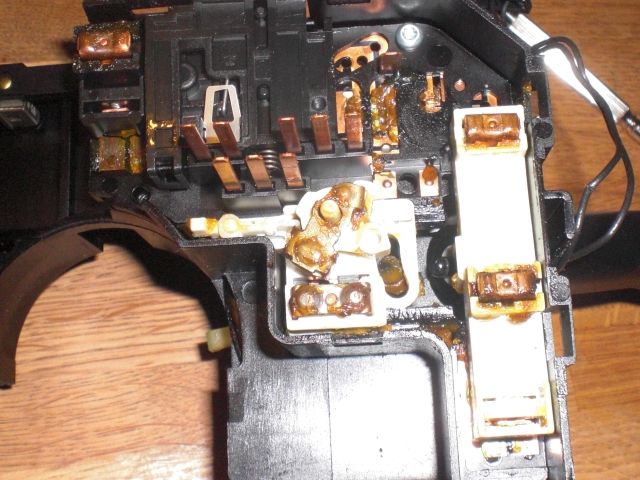
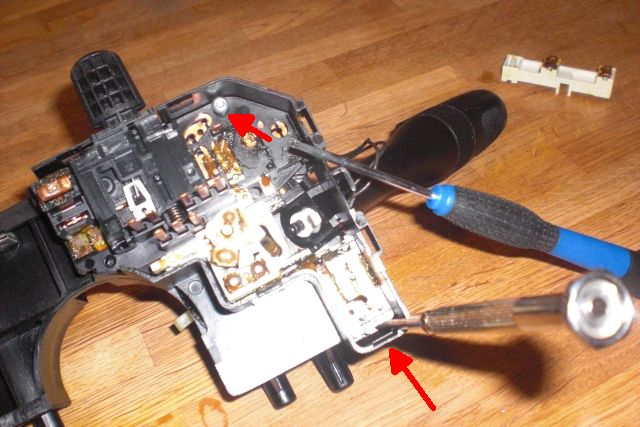
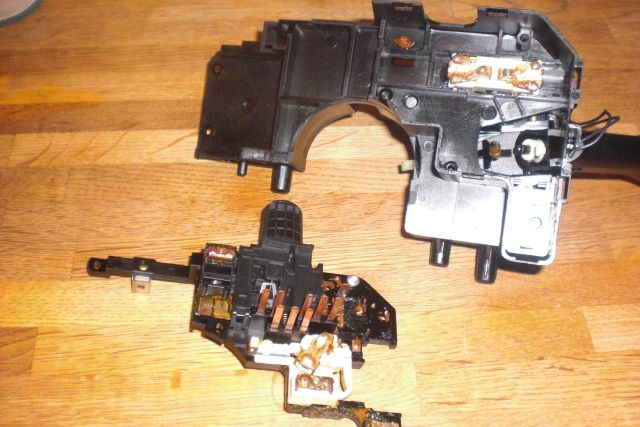
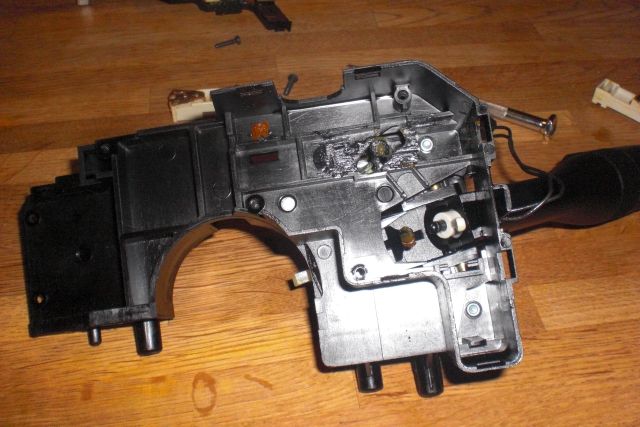
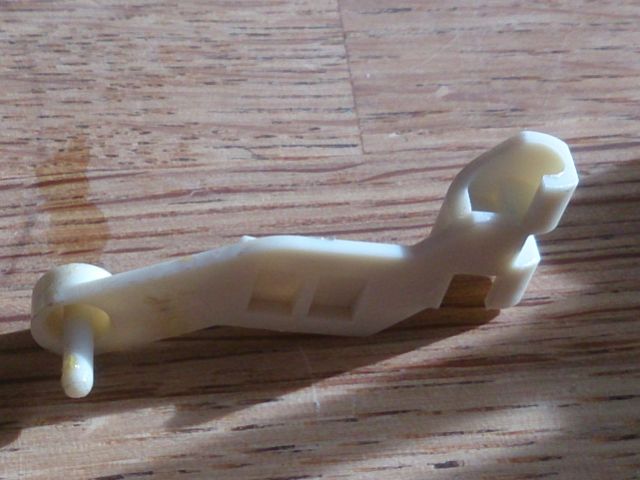
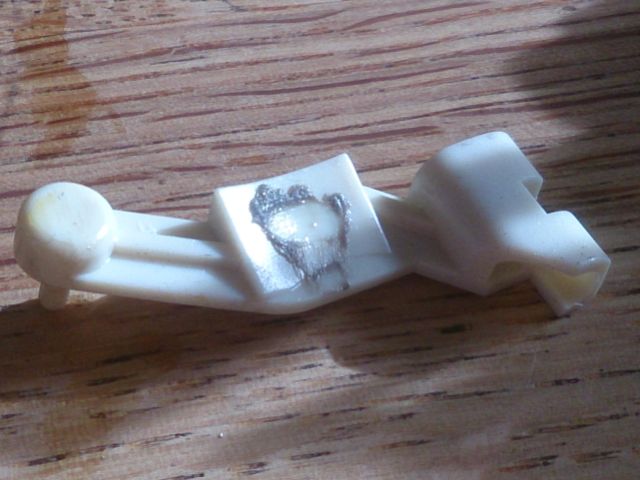
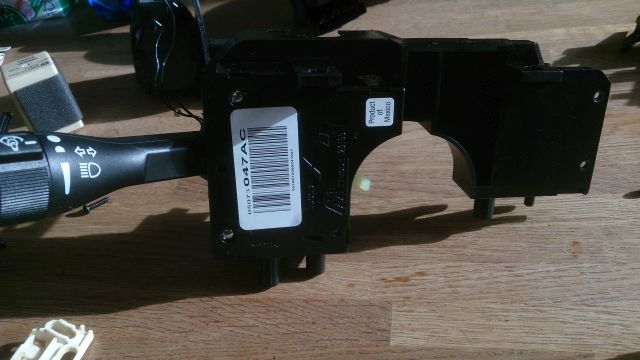
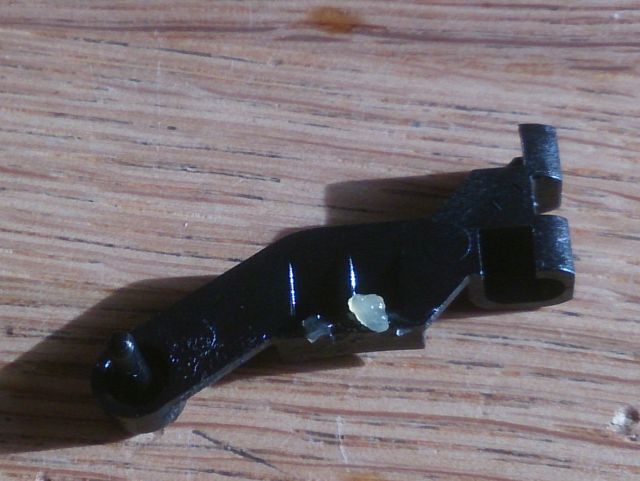
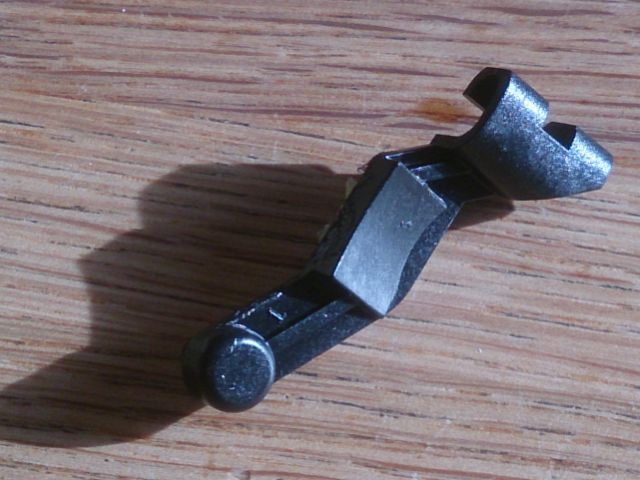
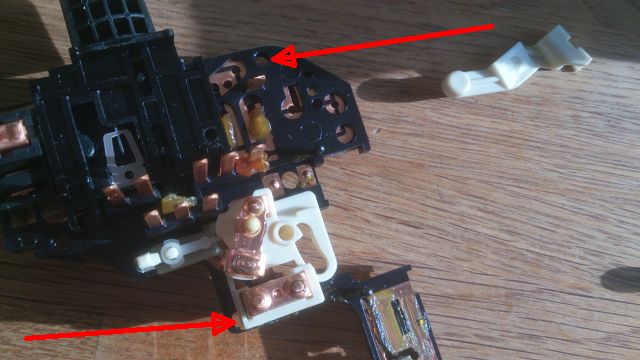
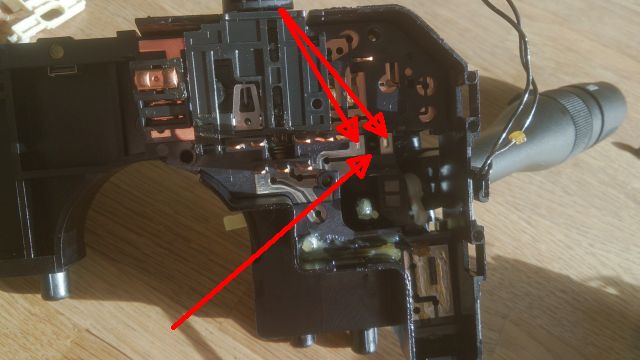
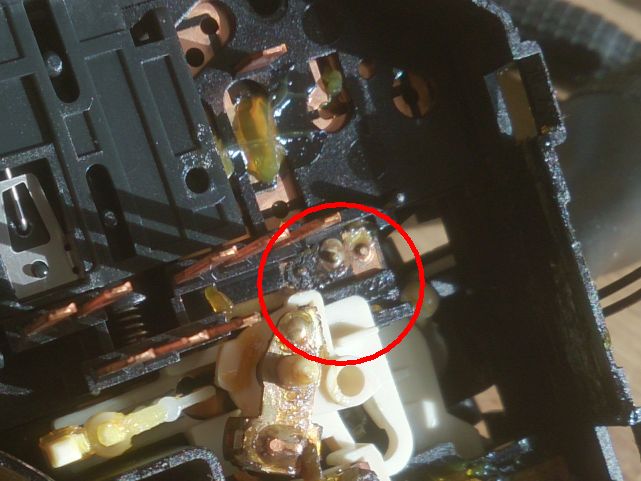
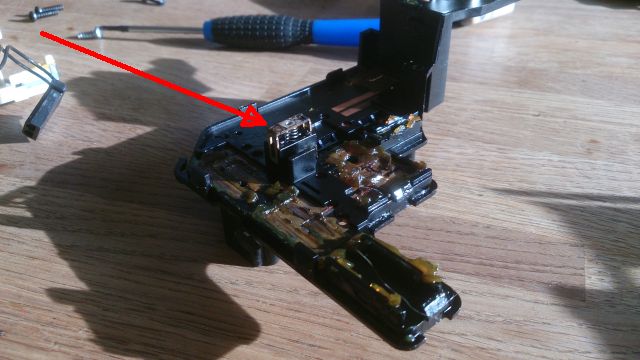
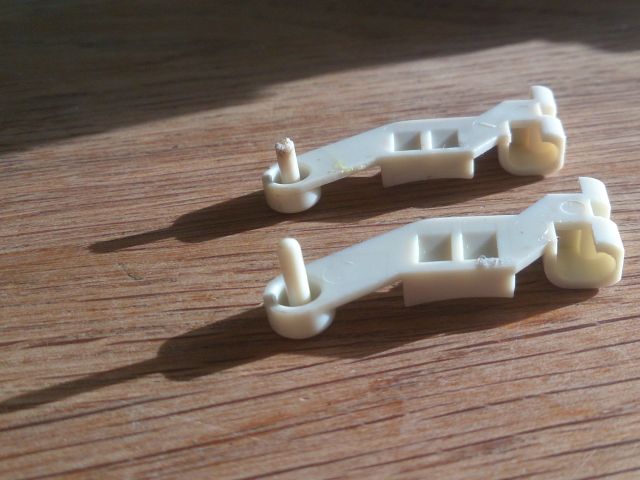
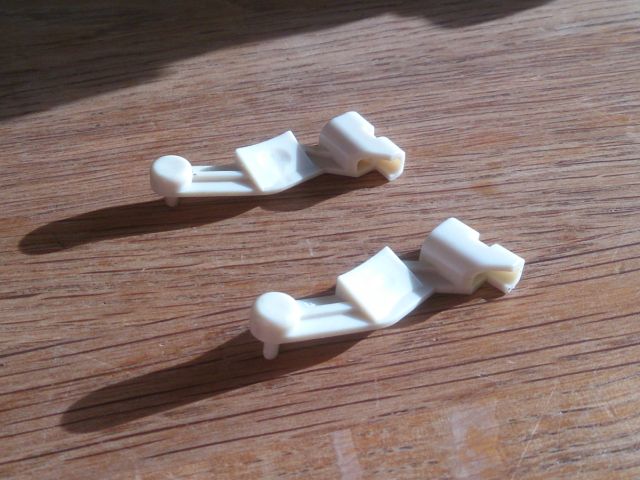
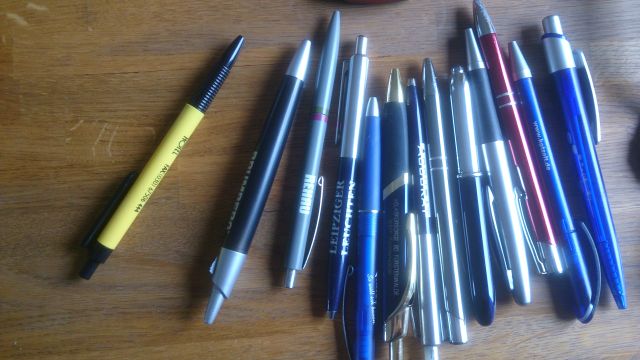
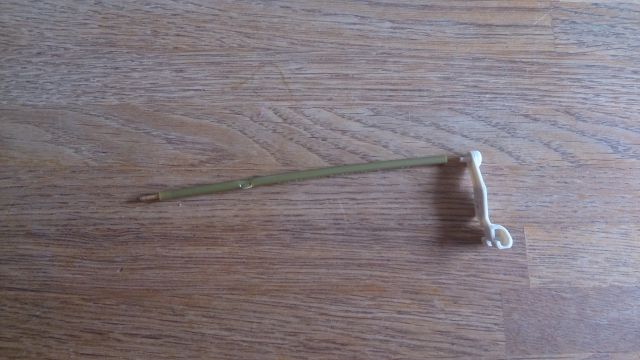
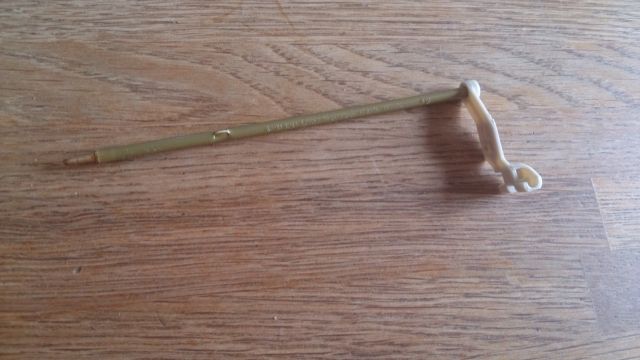
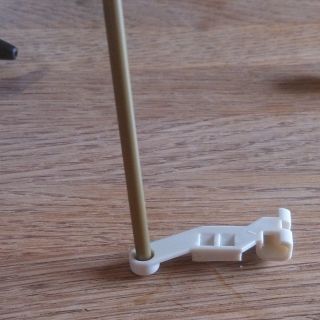
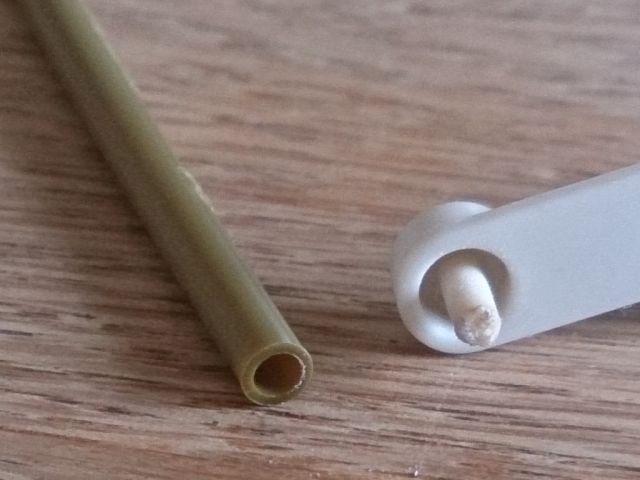
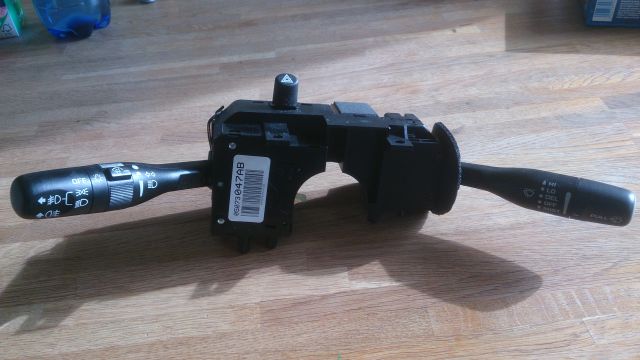
I had a problem whith my fog lights, they would not turn off anymore. The problem was in the fog light switch, inside is a plastic bit that had worn out, so it had to be extended. I've used a piece of plastic tube from a ballpen. To get the switch out of the car you have to unscrew 2 screws under the plastc where the switch is in, then you can take the top off. Under the top you see the switch, whitch is fixed with 2 screws on top, take them out and the 2 electric plugs (where the wires come in the switch) Sorry for my bad englisch (moderator may change the text) Then you can take the switch out and open it by taking the relais off and the screws here are some pictures:

Image
Image
Image
Image
Image
Image
Last edited by silverneon on Thu Sep 13, 2007 3:37 am, edited 1 time in total.

User avatar
BlackRoseRacing
2009 Platinum Contributor
Posts: 12737
Joined: Sat Dec 25, 2004 8:58 am

Post by BlackRoseRacing » Wed Sep 12, 2007 4:30 am

Not a bad idea...
As for the How To, be a little bit more descryptive on how to even get that switch out of the car since some people dont know how to remove the steering column shrouds alone...
Thanks for the info otherwise :)

User avatar
silverneon
2GN Member
Posts: 75
Joined: Tue Aug 22, 2006 6:49 am
Location: The Netherlands
Contact:

Post by silverneon » Thu Sep 13, 2007 3:39 am

I've changed the text :tardbang: You might whant too change in into readeble english, thats OK!

User avatar
BlackRoseRacing
2009 Platinum Contributor
Posts: 12737
Joined: Sat Dec 25, 2004 8:58 am

Post by BlackRoseRacing » Thu Sep 13, 2007 7:14 am

^^^
Its not a big deal.....atleast you took the time and effort to post this topic..

User avatar
MoparNeonMan
2GN Member
Posts: 407
Joined: Wed Aug 31, 2005 1:39 pm
Location: Little Elm Texas

Post by MoparNeonMan » Mon Oct 29, 2007 5:07 pm

wow...i was lazy. I just cashed in for a new assembly
me and my car have a give and take relationship

it gives me shite and i take it

aperson
2GN Member
Posts: 477
Joined: Sun Apr 15, 2007 10:50 pm
Location: Little Falls, NY

Post by aperson » Tue Nov 27, 2007 10:07 pm

There already is a How to on replacing the MFS. http://forum.2gn.org/viewtopic.php?t=20318
kornholio788 wrote:Cops dont like it when you use their colors and make them blink on a regular basis.

User avatar
jetas
2GN Member
Posts: 1908
Joined: Sat Dec 01, 2007 3:57 pm
Location: Killa Cali

Post by jetas » Tue May 13, 2008 8:46 pm

AAAAHHHHH!!!!!! Dam i want to fix my MFS but the pics dont work!!! :banghead: :cussing: :banghead:
-J.J. | Official I sold my Neon Member #008
86.5 Nissan Hardbody LB- will be for sale soon...

1989 Yota PU- "Tammy" -Rest In Pieces...

2000 Plym Neon- "Stacy" -Sold 3/25/09 =(
Ntyvirus1 wrote:im debadged so i just drive a gray thing.

aperson
2GN Member
Posts: 477
Joined: Sun Apr 15, 2007 10:50 pm
Location: Little Falls, NY

Post by aperson » Sun May 18, 2008 8:37 pm

If you slowly take apart the MFS and play with the fog light switch, you can tell what moves what and the little peg he's talking about that moves the contacts away from each other.
kornholio788 wrote:Cops dont like it when you use their colors and make them blink on a regular basis.

User avatar
jetas
2GN Member
Posts: 1908
Joined: Sat Dec 01, 2007 3:57 pm
Location: Killa Cali

Post by jetas » Mon May 19, 2008 12:25 am

Yea i sat there for about 20 minutes just checkin out every piece and see how it all worked together. Thats jus the kind of person i am
-J.J. | Official I sold my Neon Member #008
86.5 Nissan Hardbody LB- will be for sale soon...

1989 Yota PU- "Tammy" -Rest In Pieces...

2000 Plym Neon- "Stacy" -Sold 3/25/09 =(
Ntyvirus1 wrote:im debadged so i just drive a gray thing.

User avatar
Gnuserup
2GN Member
Posts: 661
Joined: Sun Jun 28, 2009 3:06 pm
Location: Germany

Post by Gnuserup » Thu Jul 02, 2009 4:33 pm

For uninstalling the switch remove two screws underneath the stearing wheel

Image

Image

Unlock the stearing wheel before,

and remove the lower and upper cover

Image

Unscrew the two screws on top (silvercoloured inthe picture)

Image

Unlock the plug on the left behind by taking of the red savetyclip (often it will break) and check the plug carefully (sometimes it´s braised). It´s kind of difficult to unplug it.

Spare the fogswitch from the wiperswitch by unscrewing two Torx (you´ll see them :lol: ) and take the fogswitch out.

Image

Image

Image

Repair of the switch:

The switches for models with and without foglights are usually different. Sometimes you´ll have the switch for the fog-headlights already installed though you have no fog-headlights.


Image

Image


Usually the one without fog-headlight is missing the needed switch-position.

without:

Image

and with:

Image

The most exciting difference is that a small plastic gear is missing at the one without. This is the part which get´s obsolte by time.

Image

You can open your switch easily by unscrewing some Torx and carfefully (don´t turn the opened switch :laughing3: ) taking the parts off. You´ll find that plastic gear after unscrewing the next inner part of the switch.

Image

It´s easier just to repair it by putting a piece of a pencil on the nib
(don´t try to fix the problem with a little screw in the head of the gear instead of that nib, you may destroy it finally). But you will only fix the action for a while not the cause.
Better try to fill up the worn surface with 2K or I thought about asking my dentist :lol:

Image

Image

Both ways will fix the problem with that switch for while...

User avatar
Gnuserup
2GN Member
Posts: 661
Joined: Sun Jun 28, 2009 3:06 pm
Location: Germany

Post by Gnuserup » Thu Jun 30, 2011 2:25 pm

Some more pictures and a video because some have troubles to disassemble/ assemble this unit.

Turnlightswitch-Snap-Back-mechanism

Image

Take a look at the two tiny springs. Normally you wouldn´t have a chance to disassemble the MFS
as much to destroy that mechanism.

Image

Image

Image

unscrew two Torx and unfasten the hooks

Image

Image

Image

Detail from the fullbeam mechanism. This is usually going to fall apart.

Image

One Torx and one hook.

Image

Image

Nacked switch

Image

And here is the video

http://www.youtube.com/watch?v=_-0reGkQaEI

User avatar
nerox
2011 Silver Contributor
Posts: 939
Joined: Sun Dec 20, 2009 10:51 am
Location: United Kingdom

Post by nerox » Thu Jun 30, 2011 4:43 pm

Thought i'd add some more pictures of the re-assembly of the auto-cancelling feature.

I stupidly took this bit apart, probably just coz i was interested and afterwards it didnt cancel out at all. so heres some pictures to help anyone who does the same.

When you take the cover off this is what you will have inside

Image

as well as the top cover, the clip which sticks out and the white bit and spring

the spring fits on the 2 posts of the white piece

Image

the yellow piece fits in the MFS as shown. the white piece located on 2 pins and then clips into place. the yellow piece fits into an oppoitely shaped section on the MFS

Image

The spring MUST fit inside the yellow piece as shown
Image

User avatar
Gnuserup
2GN Member
Posts: 661
Joined: Sun Jun 28, 2009 3:06 pm
Location: Germany

Post by Gnuserup » Thu Jun 30, 2011 5:04 pm

oh damn - 2nd level :lol:
So you fixed it ?

User avatar
nerox
2011 Silver Contributor
Posts: 939
Joined: Sun Dec 20, 2009 10:51 am
Location: United Kingdom

Post by nerox » Thu Jun 30, 2011 5:10 pm

yes it is now fixed !!!

i found that the spring was positioned incorrectly, i could see where was the correct placement from your pictures!

when in germany next i owe you a beer :)

User avatar
Gnuserup
2GN Member
Posts: 661
Joined: Sun Jun 28, 2009 3:06 pm
Location: Germany

Post by Gnuserup » Fri Jul 01, 2011 9:58 am

:thumbup: great ! Just say when :lol: and I´ll show you Berlin...

User avatar
Gnuserup
2GN Member
Posts: 661
Joined: Sun Jun 28, 2009 3:06 pm
Location: Germany

Post by Gnuserup » Sun Apr 27, 2014 7:46 am

Some more, partly new, pictures as I was doing some work on different MFSs ...

Image

The gear which always gets worn

Image

Image

This MFS seems to be a replacement one which I found recently

Image

most interesting difference is a black gear, which seems to last longer than the grey do

Image

Image

And they have two screws holding the inner plate instead of only one. Btw. all inner plates have that second screwhole but I never found it used except on that with the black gear inside now.

Image

These are the contacts of the front fogs, between them the hole where the nose of the plastic gear shows up to move the bridge

Image

and this is what it looks like, when you were waiting too long to repair the malfunction...

Image

"the bridge" - melted as well, when you wait too long

Image

on top the gear with the melted nose after I got it out finally

Image

Image

If the nose is melted you have to do something on it. I prefer a piece of a ball pen refill, but it is sometimes hard to find the right one...

Image

Image

Image

Image

Image

Image

You will always have to look what all is defective when you are working on the MFS. Imho it is not enough to repair the nose only without taking a look onto the rest.
Maybe you have to get the "bridge" working again (for me it was ok to move it a few times with a screw driver and attach some grease there), maybe you just have to fill up the surface. I think you should always try to fill up the hole. Last time I used 2K and attached some nail polish later.
a neon - what else ?

moe8555
2GN Member
Posts: 89
Joined: Tue Jul 02, 2013 1:34 am
Location: Israel

Post by moe8555 » Thu Jun 12, 2014 5:15 am

Thanks to the posts in this thread (and especially to Gnuserup who provided some extra advice through PMs), I managed to refurbish my MFS and fix my fog light toggle which would not turn off anymore.

I would like to add to the advice in this thread through my own experience in fixing the switch.

For those of you who are less mechanically inclined/lazy and have a BUX model (although if you managed to remove the switch from your car and open it, you're probably not in either category), you can cannibalize the little white piece that develops the groove in it from a new switch. The switches with rear fog controls are hard to find and expensive: there aren't any aftermarket manufacturers like there are for the domestic MFS.

I had bought a new US aftermarket MFS for cheap on eBay in despair after not finding a BUX switch for a reasonable price, before I had discovered that I can simply fix my current BUX MFS. Instead of using 2K and all the methods here, I just replaced my worn out white piece/arm with the one from the new switch. Good to go!

Also, nearly all the other parts are swappable. So this is a great way to really overhaul the BUX switch with fresh, new internal parts all around.

Now, upon reassembly, I hadn't realized that the slider piece for the hazard switch was out of place. I used elbow grease to force the back panel back onto the switch, when I really shouldn't have! I then forced the hazard relay back in, when I REALLY shouldn't have. :shock:

So when I turned the car on and used the blinker, there was a loud buzz for a second or two and my blinker/hazards peaced out :tardbang:

I removed the switch from the car and suspected that my force had screwed something up inside the switch. When I opened it back up, this is what I saw:
Image
I had bent the prongs and probably caused a short circuit.

I had to head down to the Tel Aviv dealer to buy a new hazard relay and this is what they gave me:
Image
A 14 year old part that had been sitting in their warehouse since the first 2Gens arrived back in 2000-2001!!! And it was their only one in stock, so I hope nobody else here in Israel burns out their hazard relay. :thumbup:

I used the back panel from the US market MFS, popped in the new hazard relay and put the switch back in. Turned on the car and.... STILL no blinker/hazards!!!

So the next thing to check is fuses. I popped the fuse panel and saw fuse 1 is for power mirrors/hazards. Instead of popping out the fuse, I tried adjusting my mirrors. They worked -- this fuse isn't burnt.

I moved onto the relay center in the engine bay and saw there was another fuse for hazards. Popped that sucker out and it was burnt out. Put in a new fuse and tada: we have blinkers again!

I hope my experience helps others in the future who may have to deal with these issues.

User avatar
Gnuserup
2GN Member
Posts: 661
Joined: Sun Jun 28, 2009 3:06 pm
Location: Germany

Post by Gnuserup » Thu Jun 12, 2014 11:58 am

Nice to hear, that you finally fixed it and thanks for the update here.
a neon - what else ?

Post Reply

Return to “HT Electrical”