http://forums.finalgear.com/questions-a ... ows-52385/
I used this to start my attempt to get this working on a neon..
So here we go
What you will need:
One second (93 or so) gen ford taurus one touch down module with lots of wire on the pigtail.
3 in line splice 's for each module
2 butt splices per each module
Wire crimpers
wire cutters
phillips head
flat head
zip ties
Some sort of velcro or double sided tape
and maybe 20 minutes per module
DISCLAIMER: only a how to its not my fault if something goes wrong i take no responsibility for your attempt on this.
So to start take off your door panel and either take back the plastic stuff or cut it out (I cut mine out just because)
Separate the wiring and cut off the tape next to the respected connector for your window switch to give you some space in the wiring like so:

So in the wires we have:
Tan
black w/ purple tracer (x2)
white w/ light blue tracer
Light blue
These are the wires you will be using. the others are not important for this task
To start with the wiring take an in line splice and splice the yellow with green tracer of the module to the tan in the door harness like so: this is your 12 v source

Next connect your ground: using and in-line splice connect the black wire from the module to one of the black w/ purple tracer wires: Sorry i have no picture for this one but its pretty simple..
After that you need to connect to the window up wire which is gonna be your light blue wire on the door and the solid yellow on the module again using an in line splice

The last part of the wiring install is to connect the final two wires from the module to the down function wire in the door harness. this wire should be white with a light blue tracer. cut this wire giving yourself plenty of space on both sides for butt connectors. finally connect the red wire to the half of the white/blue wire going back into the door using a butt splice.

Then connect the white w/ black tracer wire to the side of the white/Light blue going back to the window switch.

That completes the wiring side of the module next is to tuck everything away. now here is where it is crucial that you get more wiring on the end of the pigtail. run the wiring towards the rear of the door. there is the most space in there to keep the module out of the way of the window YOU DO NOT WANT THEM TO BE IN THE WAY!
Here is my passenger side module with the wiring done just hanging

This is my driver side module. i had to put it by the speaker as i did not grab enough wiring to run it to the back

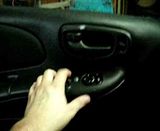
This is my door all cleaned up. you can see the pink zip ties that are holding the wiring back to keep it clean and out of the way.

Finally i used some velcro i had laying around to keep the modules in place however double sided tape like the 3m stuff would work great as well
And to finish this off here is a video of how it works as i know i was curious to see how it worked when i was researching.