How To: Parking Brake Adjustment for Rear Disc Brakes

Post Reply
User avatar
flamingpinhead
2GN Member
Posts: 151
Joined: Tue Apr 03, 2007 9:23 pm
Location: Kansas

How To: Parking Brake Adjustment for Rear Disc Brakes

Post by flamingpinhead » Sun Jul 01, 2007 7:48 pm

Disclaimer: I have provided the following information and pictures out of the kindness of my heart. i assume no responsibility if you mess something up, break something, break your car, injure yourself, somehow die or otherwise f*** something up as a result of reading or attempting this.

What youll need:
- Jack
- Jack stands
- Medium sized standard screw driver
- Some good lighting (trebel light or powerful flashlight)
- Wheel chocks
- Creeper (makes life easier)

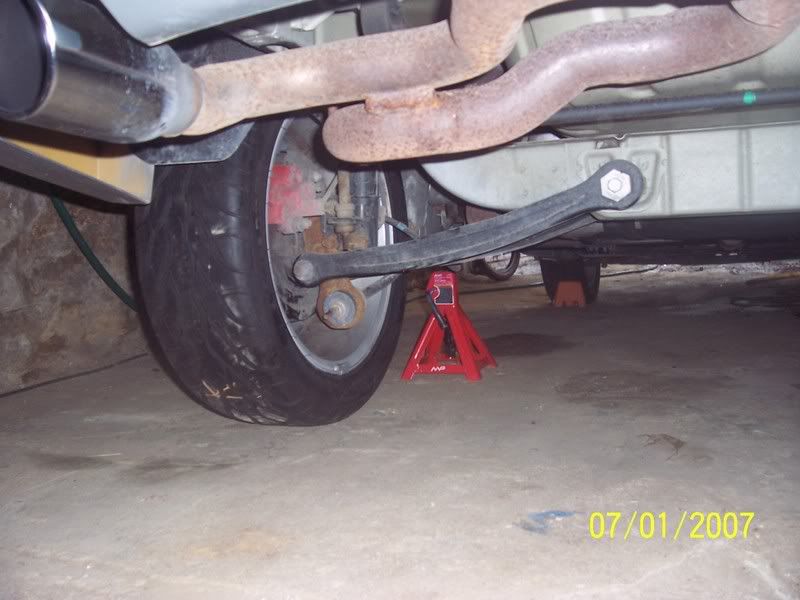
Step 1: Park on a level surface, leave the car in gear and leave the parking brake completley disengaged.

Step 2: Chock the front wheels

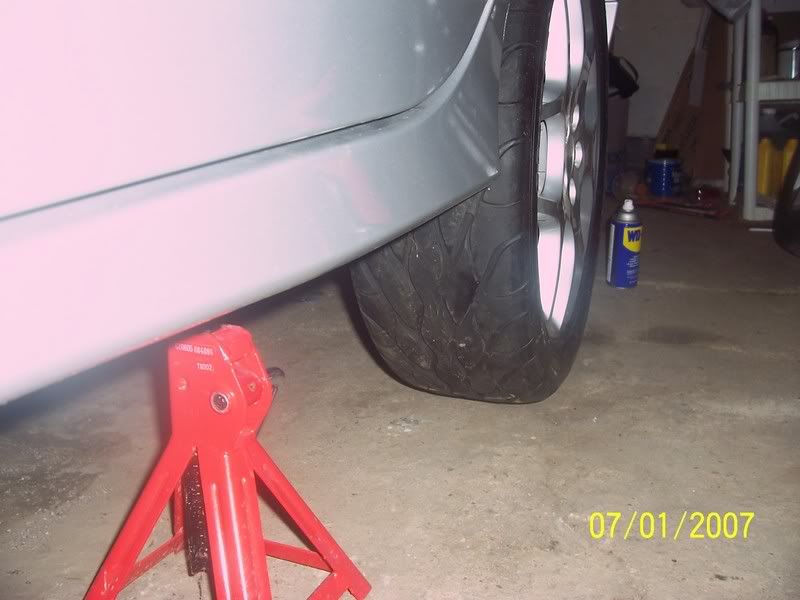
Step 3: Jack up the rear end of the car, supporting it on jackstands

Image

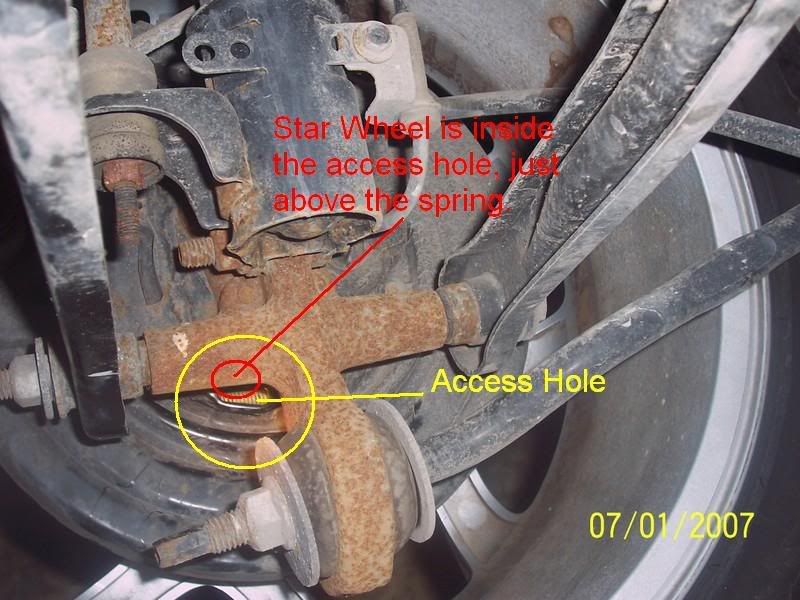
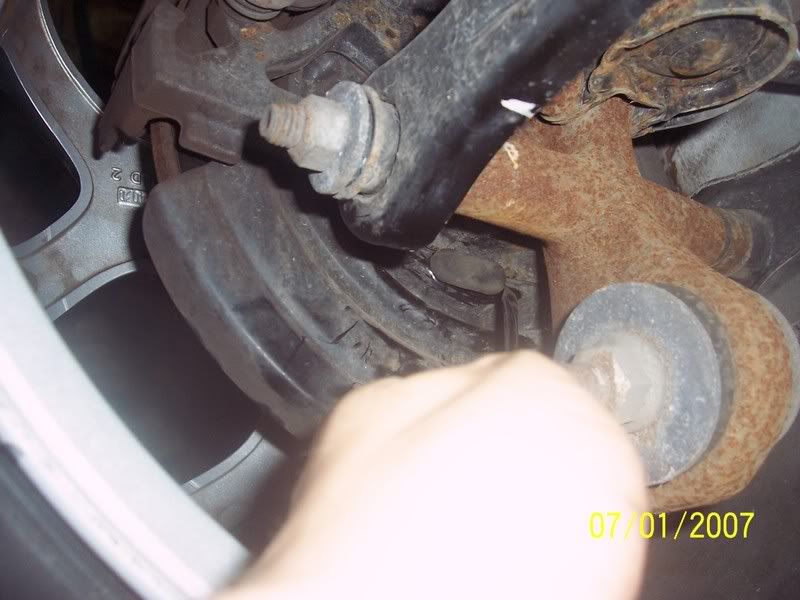
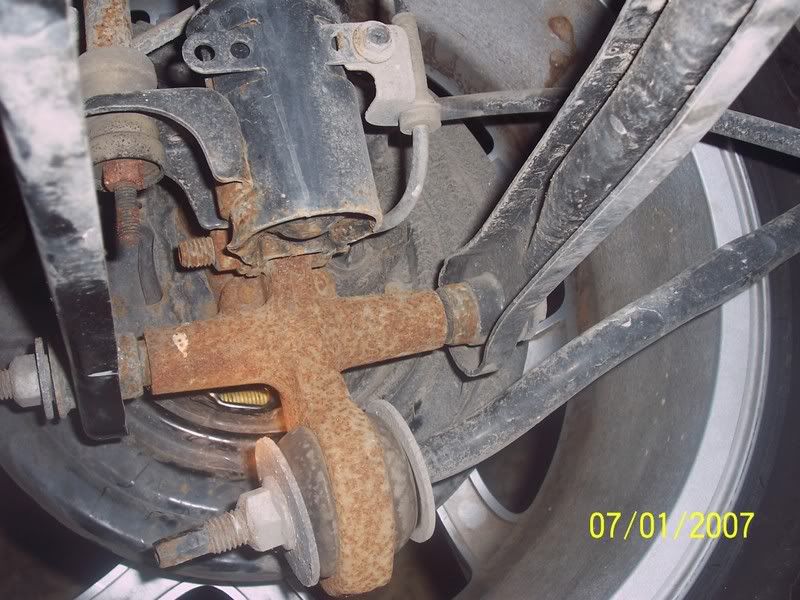
Step 4: Scoot under the car and locate the oval shaped rubber plug covering the hole accessing the disc brake caliper adapter. Remove them and put them somewhere you wont lose them. (They are located on the inside of the brake assembly at the bottom.)

Image

Image

Image

Image

Step 5: Adjust the left wheel as follows:
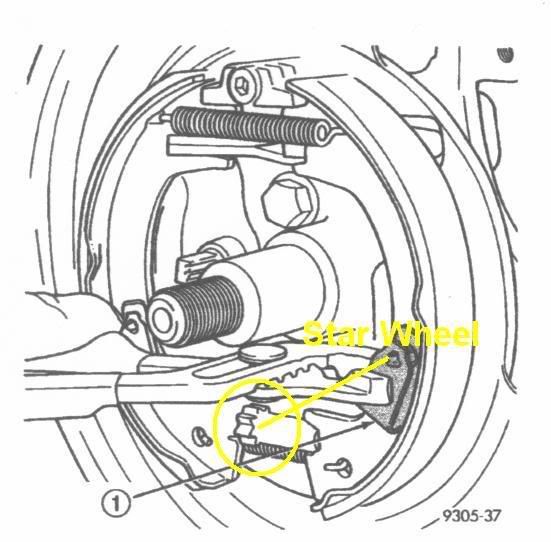
A. Inside the access hole, there is a star wheel just above the spring. Use the screw driver, inserting it through the access hole, turn the star wheel downward until a slight drag is noticed when rotating the rear tire.
B. Rotate the star wheel upward no more than 1 or 2 clicks, backing the brake shoe off the drum just enough to allow for rotation of the wheel.
C. Reinstall the oval rubber plug.

Step 6: Adjust the right wheel as follows (slightly different than the left)
A: Inside the access hole, there is a star wheel just above the spring. Use the screw driver, inserting it through the access hole, turn the star wheel upward until a slight drag is noticed when rotating the rear tire.
B. Rotate the star wheel downward no more than 1 or 2 clicks, backing the brake shoe off the drum just enough to allow for rotation of the wheel.
C. Reinstall the oval rubber plug.

Step 7: With the wheels slightly off the ground (if you were using a full vehicle lift, which i obvously was not, lower the car)

Step 8: Reach into the car and fully apply the parking brake and release it two times. Fully apply the parking brake once more and leave it engaged.

Step 9: With the parking brake fully engaged, attempt to rotate each rear wheel by hand to ensure the parking brakes on each side are engaging. There should be no movement.

Step 10: Fully release the parking brake.

Step 11: Hand rotate each wheel, ensuring there is no drag caused by the parking brake shoes. (you may need to readjust the brakes as necessary, repeating steps 4 thru 11.)

Step 12: Remove the jackstands and wheel chocks.

edit: had some pictures backwards.
Last edited by flamingpinhead on Sun Jul 01, 2007 8:12 pm, edited 3 times in total.

SlvrACR
2GN Member
Posts: 4220
Joined: Thu Jun 16, 2005 5:13 pm
Location: Roseville MI

Post by SlvrACR » Sun Jul 01, 2007 7:53 pm

Nice. Most people have no idea how to do this and this info can save you from your car rollin away. :thumbup:
2gn Member Feedback
My Project Log
01 Dodge ACR - SOLD
01 Dodge RT - 279whp 329wtq

Image

User avatar
flamingpinhead
2GN Member
Posts: 151
Joined: Tue Apr 03, 2007 9:23 pm
Location: Kansas

Post by flamingpinhead » Sun Jul 01, 2007 8:11 pm

yeah, mine has been rather loose for a while. been inquiring on several sites and many people didnt know, or couldnt provide me with the right info (im kinda dumb at following directions unless pictures are involved.)
i finally had someone shoot me a repair manual. this was something contained within it that i was like "wow, gotta do up a how-to on this."

User avatar
BlackRoseRacing
2009 Platinum Contributor
Posts: 12737
Joined: Sat Dec 25, 2004 8:58 am

Post by BlackRoseRacing » Mon Jul 02, 2007 6:47 am

Definately good info!
And as mentioned, I walked into the local store the other day to come out and see my car parked in the street :shock:
Now I leave the car in gear and use the E-brake :lol:

Ifixyawata
2GN Member
Posts: 639
Joined: Sun Jun 12, 2005 1:38 am
Location: NE Ohio

Post by Ifixyawata » Mon Jul 02, 2007 8:17 am

Going out on a limb here, but those directions should be exactly the same, aside from the location of the oval plug for the rear drum cars, too. Assuming the neon's rear drums are set up the same way as most every car I've ever seen.

User avatar
flamingpinhead
2GN Member
Posts: 151
Joined: Tue Apr 03, 2007 9:23 pm
Location: Kansas

Post by flamingpinhead » Mon Jul 02, 2007 5:12 pm

im honestly not sure about the rear drum brakes. never had to adjust the ones on the sxt. dont rear drum brakes automatically compensate for wear (unlike the parking brake only drums on rear disc?)

Ifixyawata
2GN Member
Posts: 639
Joined: Sun Jun 12, 2005 1:38 am
Location: NE Ohio

Post by Ifixyawata » Mon Jul 02, 2007 5:58 pm

Like I said, I've never had my rear brakes apart yet, but if they're like all the drums I've seen before, they should, like you said, automatically adjust. The star adjustment wheel (on rear drum cars) should have a small lever that moves it when you apply the brakes in reverse.

SlvrACR
2GN Member
Posts: 4220
Joined: Thu Jun 16, 2005 5:13 pm
Location: Roseville MI

Post by SlvrACR » Mon Jul 02, 2007 6:14 pm

No, neon re-brakes do not auto adjust.
2gn Member Feedback
My Project Log
01 Dodge ACR - SOLD
01 Dodge RT - 279whp 329wtq

Image

User avatar
flamingpinhead
2GN Member
Posts: 151
Joined: Tue Apr 03, 2007 9:23 pm
Location: Kansas

Post by flamingpinhead » Mon Jul 02, 2007 7:02 pm

^anything to keep costs down!

i can probably shoot a link if i can find where i downloaded that service manual from.

sullygully
2GN Member
Posts: 1267
Joined: Mon Aug 08, 2005 8:23 pm
Location: Banff, Alberta

Post by sullygully » Mon Jul 02, 2007 7:49 pm

Uh, mabe the chrysler mechanic i talked to was on crack, but he told me that the rear wheels should not spin freely without a little resistance. Mabe its different because i have drums :-k

User avatar
BlackRoseRacing
2009 Platinum Contributor
Posts: 12737
Joined: Sat Dec 25, 2004 8:58 am

Post by BlackRoseRacing » Tue Jul 03, 2007 6:17 am

Rear drum adjustment is essentially the same idea as posted above, adjust the star wheel to get minimum resistance on the rear drum when spinning it by hand...

User avatar
flamingpinhead
2GN Member
Posts: 151
Joined: Tue Apr 03, 2007 9:23 pm
Location: Kansas

Post by flamingpinhead » Tue Jul 03, 2007 6:56 pm

sullygully wrote:Uh, mabe the chrysler mechanic i talked to was on crack, but he told me that the rear wheels should not spin freely without a little resistance. Mabe its different because i have drums :-k
yeah, its not giong to spin like a bicycle wheel would.

User avatar
flamingpinhead
2GN Member
Posts: 151
Joined: Tue Apr 03, 2007 9:23 pm
Location: Kansas

Post by flamingpinhead » Sun Jul 15, 2007 9:43 am

Thought this might help a little explaining the star wheel:
It took me a while to uderstand. Its just a gear with teeth. Your looking it from a view where all you see is the teeth. its kind of a pain to get the screw driver onto and turn it.
Image

here is a view of the inside of the brake. you can clearly see the star wheel im talking about above the spring:
Image

danman132x
2GN Member
Posts: 1075
Joined: Sun Oct 01, 2006 7:36 pm
Location: Crestview, FL

Post by danman132x » Sun Jul 15, 2007 1:31 pm

Good write-up. I was never aware that our disk brakes had e-brake shoes. I always adjusted mine by rolling down a hill backwards and pulling on the ebrake. I might have to replace mine sometime :/
2003 Dodge Neon R/T

Image

http://myspace.com/danman132x

User avatar
flamingpinhead
2GN Member
Posts: 151
Joined: Tue Apr 03, 2007 9:23 pm
Location: Kansas

Post by flamingpinhead » Wed Jul 18, 2007 5:28 pm

if you decide to, I have the complete teardown directly from the neon/srt manual.

User avatar
jmr
2GN Member
Posts: 227
Joined: Thu Feb 01, 2007 11:04 pm
Location: STL, MO

Post by jmr » Mon Jul 30, 2007 11:25 pm

The rear disc brakes have a small MANUALLY adjusted drum brake for the e-brake. This is only adjusted by clicking the star wheel NOT by engaging it in reverse. I have found that you need some drag from the e-brake's shoes. This way you don't have to yank the handle to hold the car on a hill. With a manual transmission never trust the e-brake alone, always put it 1st or reverse when parking.

If you have drum brakes they adjust automatically when the brakes are applied hard in reverse, the e-brake for them is also the drum brake only it's cable actuated not hydraulic.
Image
05 Inferno Red SXT: SRT-Design,MTX,SRT Rear Disc,Mopar VC,K&N Filter
05 Orange Blast SXT: SRT-Design,ATX,SRT Rear Disc,K&N Filter
09 Challenger R/T Deep Water Blue: 24F Pkg, K&N Filter,Mopar Hood Scoop Ducts

User avatar
TomZ
2GN Member
Posts: 398
Joined: Sat Jul 03, 2004 7:03 am
Location: Columbus (Blacklick), OH

Post by TomZ » Sat Aug 25, 2007 10:22 pm

The disc brake, e-brake shoes are not really wear items, unless you use them for something other than parking brakes, lol. That's a reason they don't self adjust. I find setting the e-brake 3 clicks engaged, then adjusting them to a moderate rate of friction results in more even adjustment between the wheels.
Image

'02 Dodge ES, Stone White, MTX, '01 Magnum swap, ACR sways, Tokiko blues, Mopar
2GN lowering springs, Comp 200 cam, PT Cruiser clutch, bolt-ons.
'02 Plymouth ES, Stone White, ATX, free project.
'00 Chrysler LE. ATX (Fiancee's) stock. '02 engine from above car. Mopar springs, Tokiko Blues.

Cbussilver01es
2GN Member
Posts: 837
Joined: Tue Jan 30, 2007 1:03 am
Location: New Albany, OH

Post by Cbussilver01es » Thu Aug 30, 2007 4:06 am

thank you thank you thank you! After my car rolled down my driveway narrowly missing my fathers car after I applied the brake all the way up, I now know how to adjust them properly. :thumbup: good write up/
-Sean
01 Dodge Neon MSII 2.0 DOHC turbo, '13 Dodge Dart Mopar Edition 1.4 Multi-Air turbo
Image
Nos is a lot like a hot chick with std's you wanna hit it but are afraid of the consequences.

http://www.cardomain.com/ride/2311033

User avatar
Swordfish2Cowboy
2009 Silver Contributor
Posts: 2693
Joined: Sat Aug 25, 2007 7:06 am
Location: Sandusky, Ohio

Post by Swordfish2Cowboy » Thu Apr 10, 2008 11:35 pm

OMG so I tried to do this without reading the DIY and ended up taking almost the entire wheel assembly off the car. Got to the part in the Hayne's Manual where it says to remove the hub nut but I didn't have a socket large enough so I put everything back on. 03NeonRT told me how to do it last night, but this is more thorough and has pictures! :D

User avatar
BluSoul
2GN Member
Posts: 38
Joined: Sun Apr 12, 2009 12:13 am

L vs. R Adjustments

Post by BluSoul » Fri Oct 14, 2011 6:01 pm

I wish I had read this post first! I will explain.

In my '03 SXT, I have been experiencing loud squeally noises at low speeds (particularly in reverse), excessive e-brake lever pull-up, and excruciating brake drag, all from the rear RIGHT wheel (only). In the process of elimination, before automatically assuming that it was the brake shoes, I first wanted to make sure that the star wheel adjustment was fine, even though I had excessive lever pull-up, along with drag. So, in examining the "down-adjust" to remove the drag, I was adjusting the RIGHT STAR WHEEL UP not down, according to Flamingpinhead's instructions. The manual I use (Neon 2004) doesn't differentiate left and right adjustments like Flamingpinhead did. That means I was increasing tension, not removing it in my determination. Despite this, after coming to the conclusion that it must be the brake shoes, I put everything back together. When I came inside to double check my diagnosis, I found this, Flamingpinhead's post.

So, I wanna make sure before wasting my time. Tomorrow, I will try moving the RIGHT star wheel down and see what happens. Can anyone confirm for sure that there is a difference in adjusting the left and right star wheels?

ThatKevin
2GN Member
Posts: 1176
Joined: Wed Aug 03, 2011 12:48 pm
Location: Brampton, ON

Post by ThatKevin » Fri Oct 14, 2011 7:39 pm

THIS IS SOOO USEFUL!

I've been meaning to do this for the past 4 months or so now, but never really knew how and didn't care too much.

I will definitely be doing this soon, thanks :D
Image
'02 Chrysler Neon RT - SOHC 50trim+Crane 007 ---DEAD---
'05 Dodge Neon SRT4 - DSP & bolt ons ---SOLD---
'08 Dodge Caliber SRT4 - MS1Kv3
Progress Log

charlesh
2GN Member
Posts: 51
Joined: Wed Nov 17, 2010 2:53 am
Location: Miami

Post by charlesh » Tue Oct 25, 2011 9:13 pm

Great DIY! I just did this today, but I think I ran into problems.

I was turning the star wheel little by little, spinning the wheel to judge resistance. Thing is, there's a pulsating resistance--as I spin the wheel, the friction isn't constant, but at a certain point you can hear more resistance. My question is, does that mean there is a problem with my rotors?

I didn't want to tighten it down too much, but I did enough that at least the parking brake completely stops the wheels with it all the way up. I have a parking brake again :rockon:
2001 Neon R/T

occasional demons
Junior Admin
Posts: 20306
Joined: Thu May 03, 2007 12:14 pm
Location: Ashland Ohio

Post by occasional demons » Wed Oct 26, 2011 7:03 am

The drum part of the rotor may not be 100% round. As long as the disc part has no run out, it really won't have much impact. As long as it holds, is what counts.
Bill
Olha Koba, a psychologist in Kyiv, said that “anger and hate in this situation is a normal reaction and important to validate.” But it is important to channel it into something useful, she said, such as making incendiary bombs out of empty bottles.
2000 Neon MTX swap with '02 R/T PCM
1999 neon coupe 2.4 swap
2021 Forester

charlesh
2GN Member
Posts: 51
Joined: Wed Nov 17, 2010 2:53 am
Location: Miami

Post by charlesh » Wed Oct 26, 2011 9:07 pm

I'll try tightening it more then. I was cautious about going too far and causing drag or something, but like the other poster said, it won't spin like a bicycle wheel anyway.
2001 Neon R/T

fox02neon
2GN Member
Posts: 26
Joined: Wed Nov 01, 2006 7:33 pm
Location: Yakima WA

Post by fox02neon » Sun Mar 10, 2013 1:48 am

I did this the hard way a few years back, this is much easier
foxo2neon

Post Reply

Return to “HT Chassis”