On another note, I would only recommend this modification to those interested in fine tuning their car's handling and balance, without regard to comfort and luxury. The vehicle's driveability isn't sacrificed; if anything it is improved. However, some interior/trunk space is lost. In my case, I decided to use the spare tire well, since it is the lowest point in the rear of the vehicle. How you mount it is up to you, but for maximum effect, the lower the weight is to the ground, and the closer the weight is to being over the rear wheels, the better the result.
Materials
20-25' - 4ga Power Battery Cable (Red)
4-6' - 4ga Ground Battery Cable (Black)
(1) - 4ga heavy duty butt connector
(2) - Battery terminals w/ 4ga wire inputs
(2) - 4ga heavy duty ring terminals
(10+) - Zip ties
1' - 4ga heat shrink tubing
1" Bolts, nuts, lock washers, washers.
Battery tie down + threaded rods (or J-bolts)
Battery tray
Crimping and cutting tools
Basic hand tools
Drill and assortment of bits
Razor blade
Optional Materials
Battery box
Battery kill switch
NOTE: Text that states 'Optional' refers to steps that are not required to do the project; they are specific to my procedure. A 'Recommended' note is a step that makes things easier during the process, but is fully optional.
STEP 1: PREP
Remove dash-top by removing two side screws and two top screws in vent. Set aside in a safe place.
Remove fuse panel door. (optional)
Remove drivers side kick panel (optional)
Remove door sills and fasteners from drivers side carpet, front and rear.
Remove rear carpet and sound material (if applicable).
Remove T-47 TORX bolt from drivers seatbelt on lower B-pillar. Pry pillar away from door and peel carpet back enough to access the wiring underneath.
Remove hood (recommended) via four (4) bolts and set aside in a safe place.
Remove windshield wipers and cowl (optional) using 13mm socket and torx bit. Set aside.
Disconnect and remove wiper assembly/motor via three (3) bolts and set aside.
Remove front strut tower brace, if applicable.
STEP 2: POWER WIRE ROUTING
Instead of attempting to route the power wire through the firewall, I chose to go through the cowl instead. This is much easier to access and allows the cable to be hidden easily.
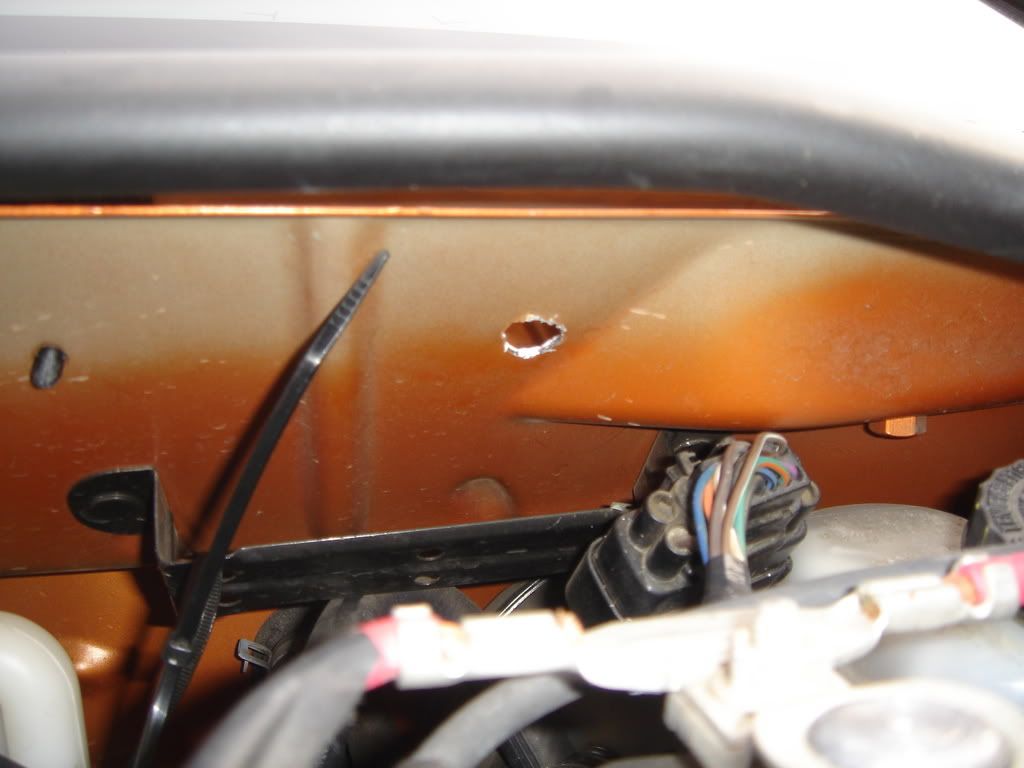
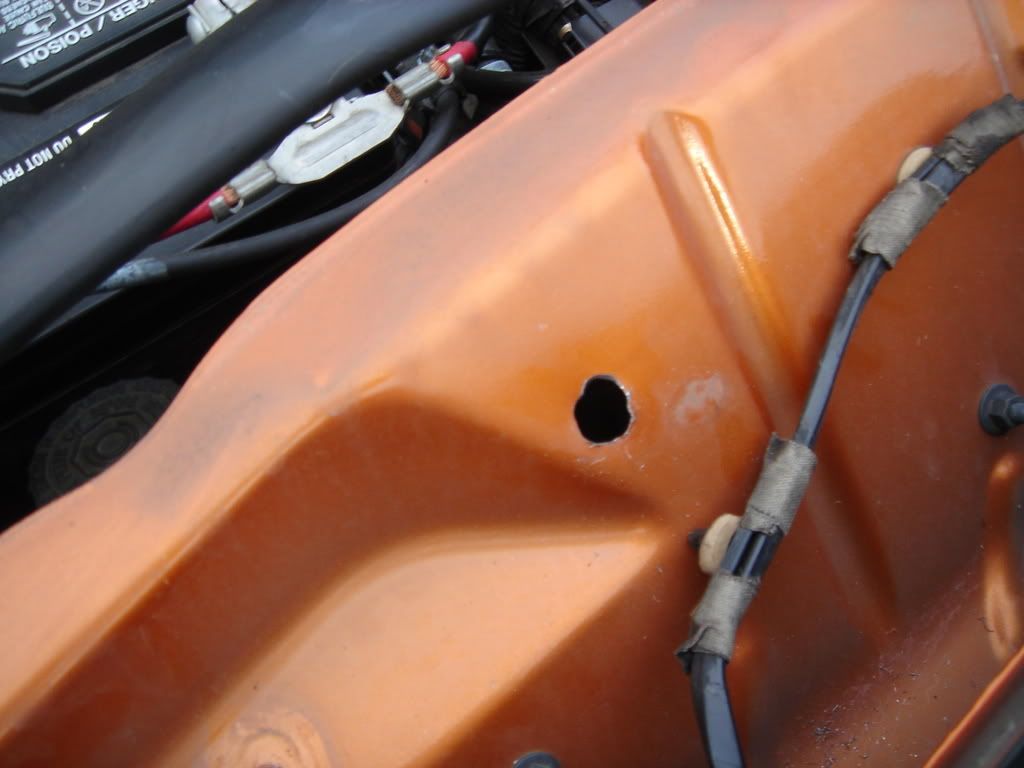
I removed a push-pin from the wiper motor harness-to-cowl and drilled out the preexisting hole to accomodate my power wire with a good amount of breathing room. >>
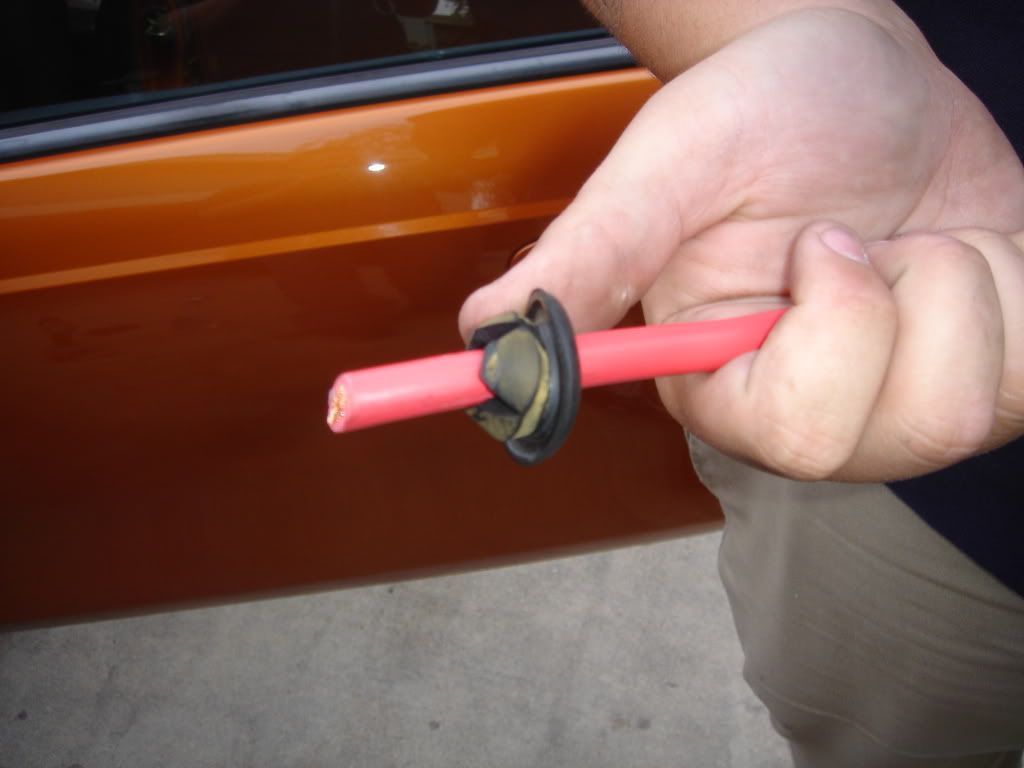
Remove the rubber gromet directly in front of the VIN plate. Cut a ''t' slit in it and press the power wire through it. >>
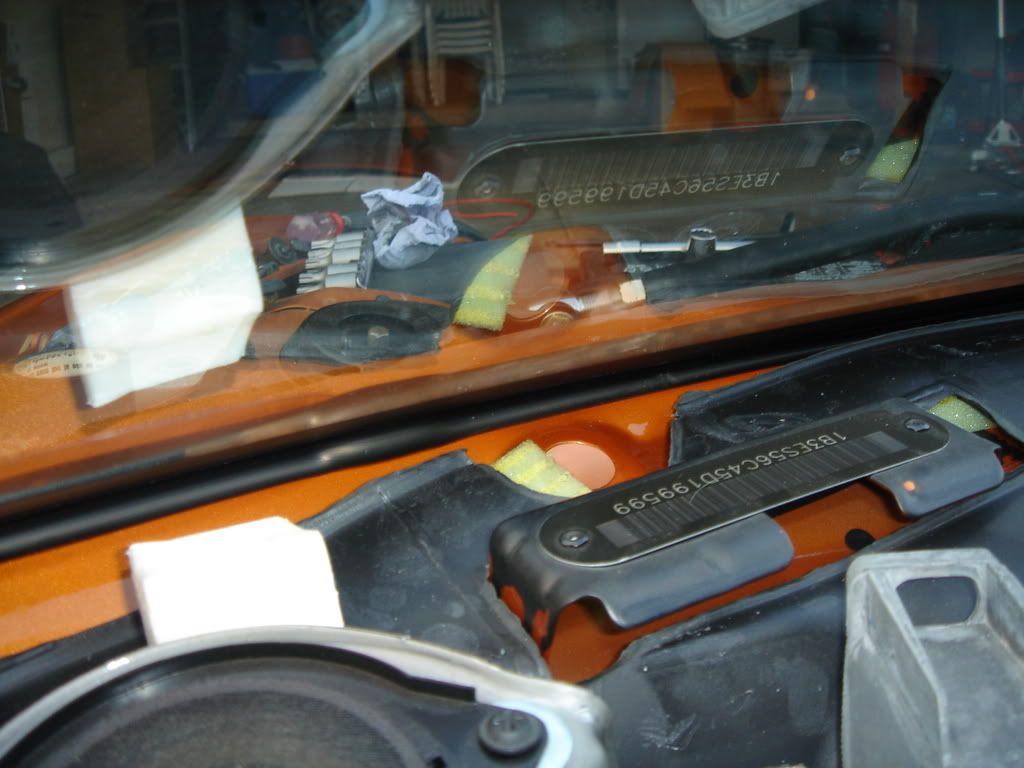
I routed the cable near the VIN plate under the dash-top, around the drivers side dash tweeter, then into the fuse panel area and finally under the carpet behind the kick panel, near the clutch pedal. The wire cannot be seen in the front of the interior. >>
Route the wire into the vehicle from the rear, under the carpet and up through the dash (see above). Once it is out of the dash and into the cowl, reinstall the wiper assembly and use a zip tie to secure the cable away from the moving arms. >>
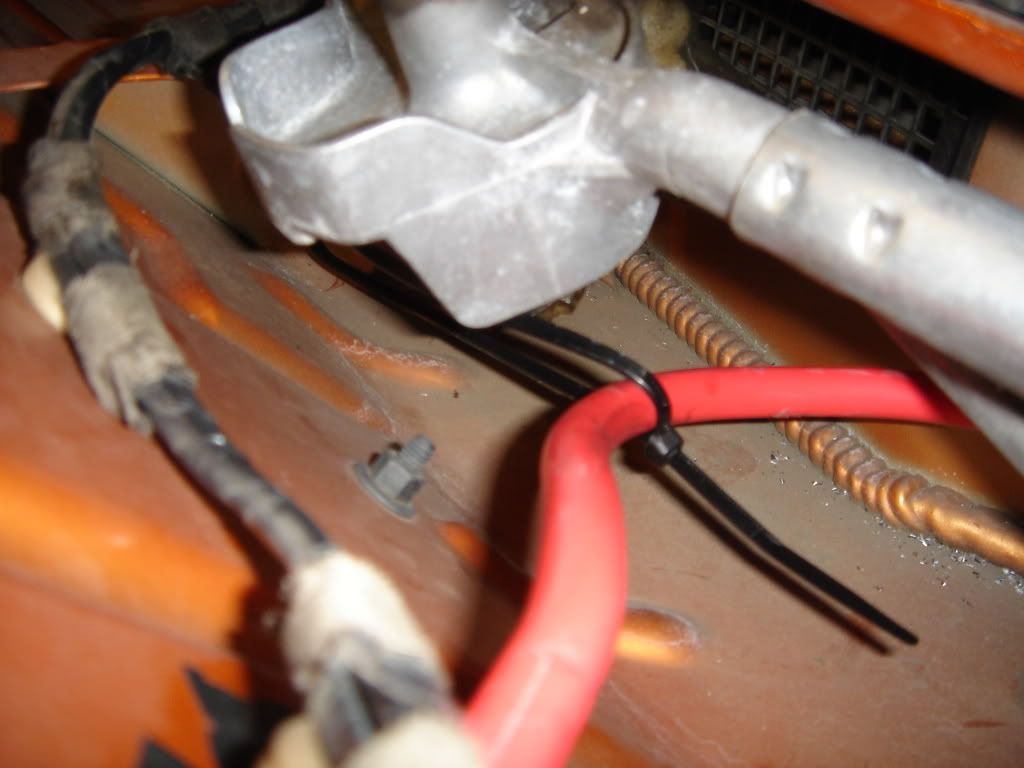
Once the cable is in the engine bay, pull the slack out of it and into the trunk area. Use zip ties wherever the wire may need support and tighten it down. Proceed to reinstall the interior (may be done later if you want).
STEP 3: ELECTRICAL
Remove battery and battery tray.
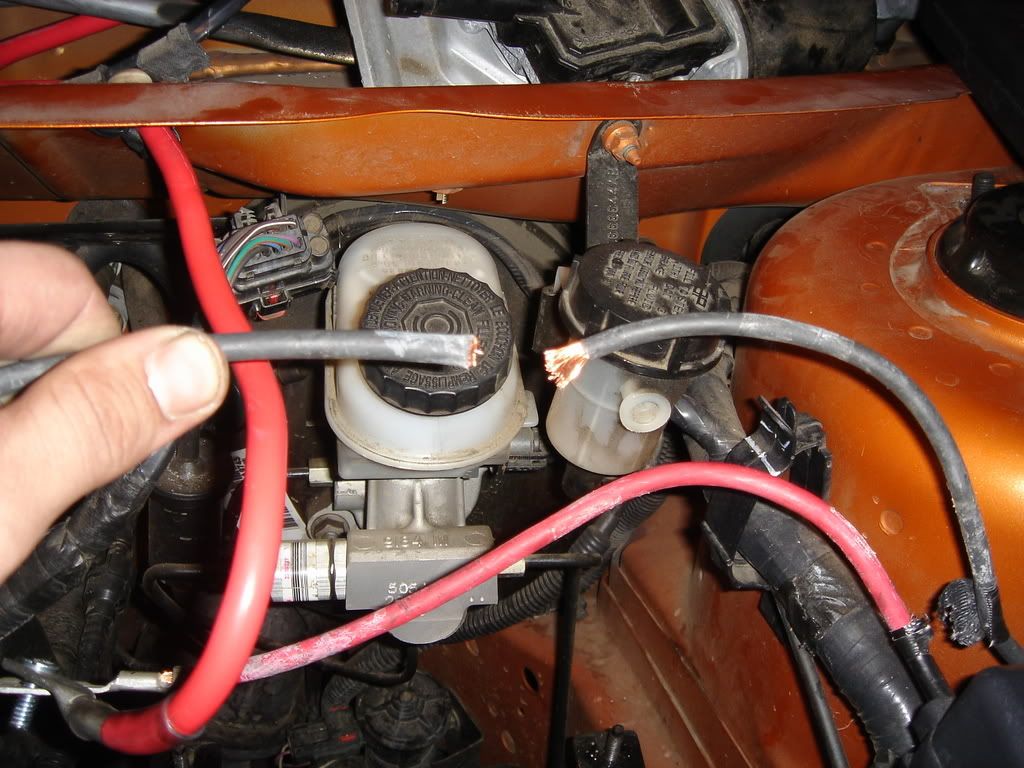
Cut ground side terminal out.
Connect existing ground cables using butt connector and crimp. Heat shrink over connection.
NOTE: Starter ground is now integral with stock battery ground cable (starter now has a dedicated ground). Ground location (on fender near underhood fuse box) can be retained, but it is ideal to remove paint under ground screw for optimal connection and performance.
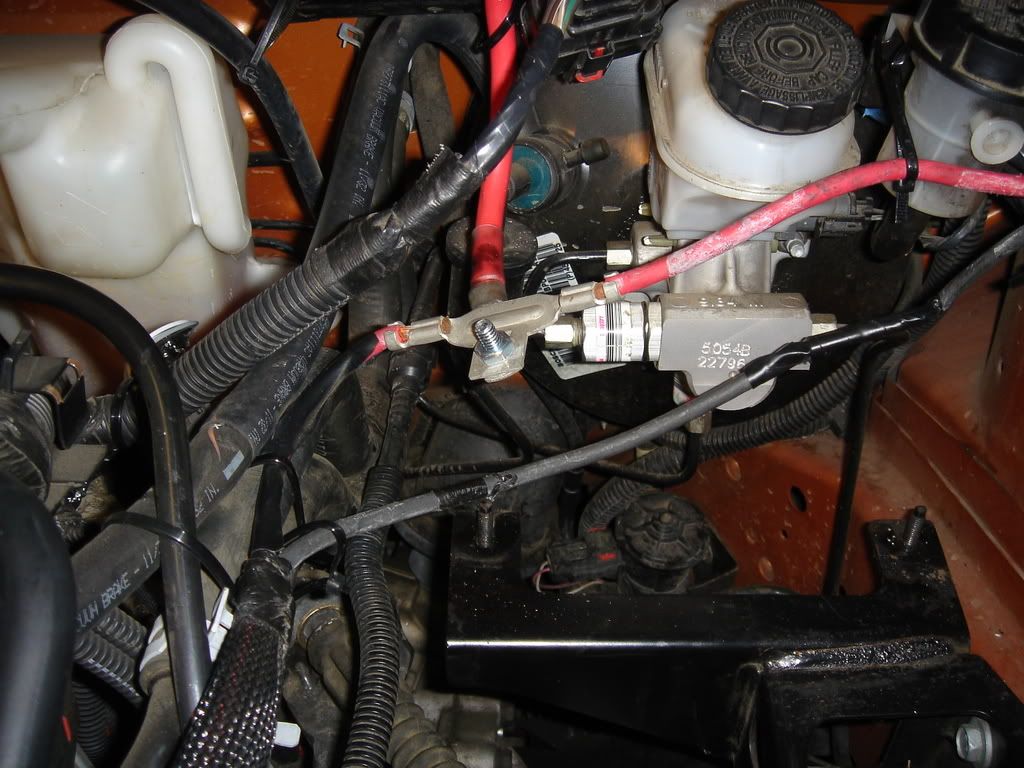
Crimp ring connector to new power cable, and use the existing bolt location on the stock 'T' power terminal to secure using a bolt and nut. Heat shrink new connection Starter and power dist (fuse box) are now powered. >>
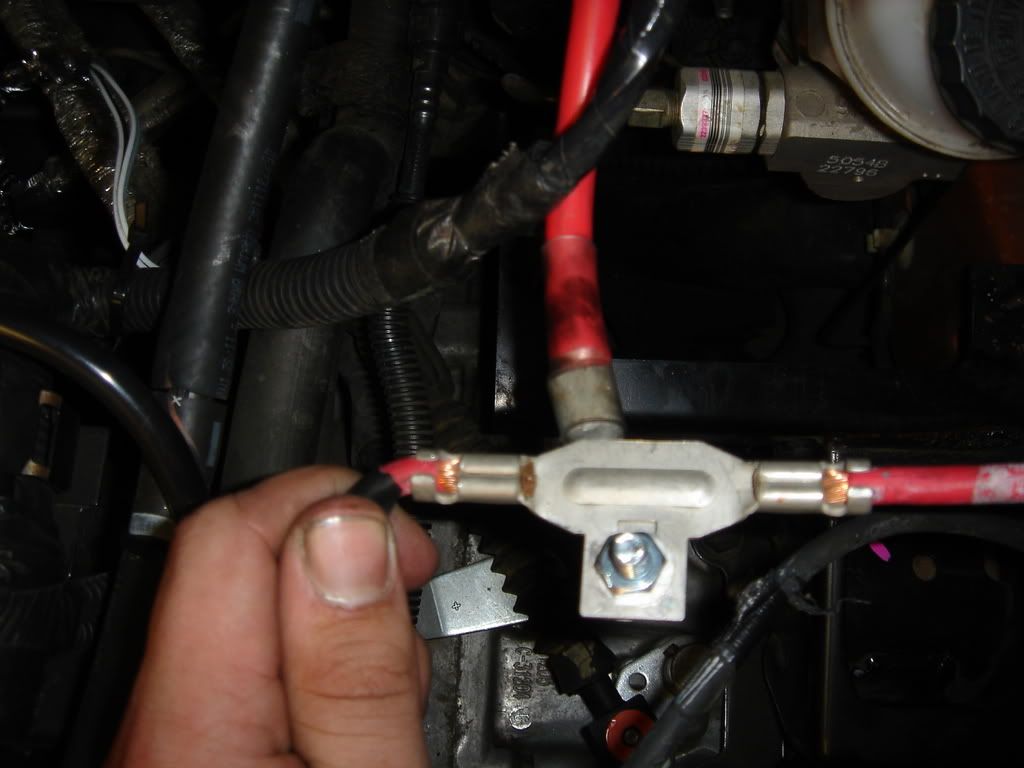
Use zip ties to secure all new wiring. Insulating power 'T' is optional but not necessary if properly secured. Be sure to keep the power and ground wires and non insulated surfaces firmly apart.
Underhood wiring is complete. >>
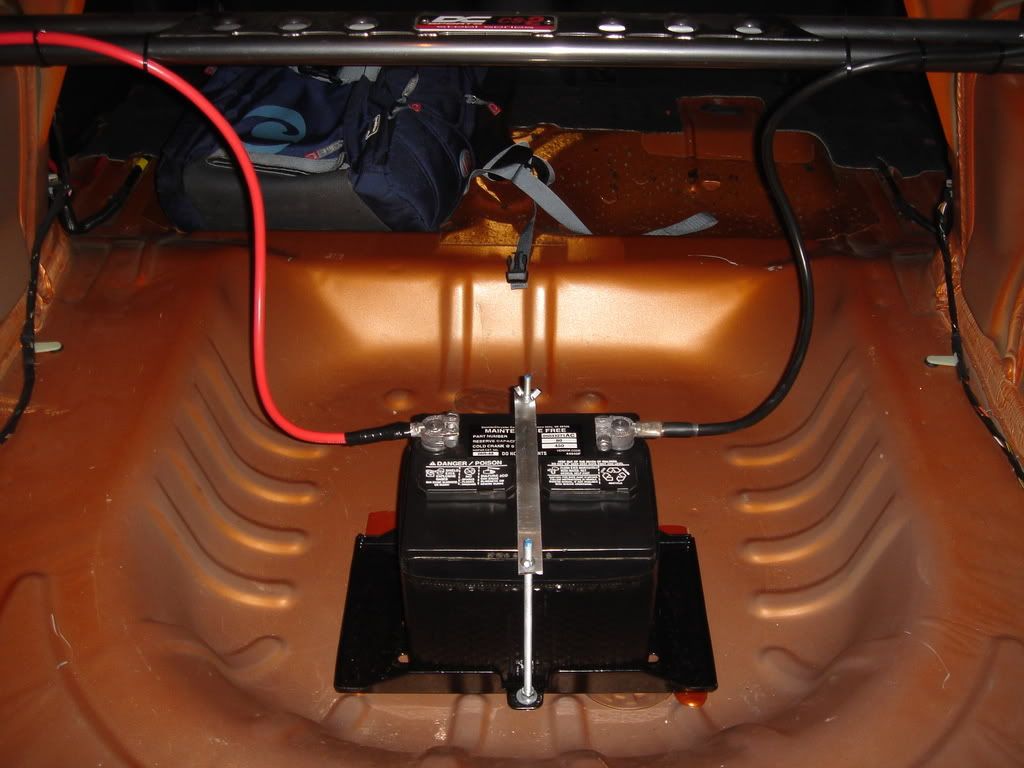
STEP 4: BATTERY MOUNTING AND CONNECTIONS
Move to the trunk and mount battery tray as flush as possible. Drill holes into trunk sheetmetal and use bolts, nuts, lock washers, and washers to secure battery tray to trunk floor.
Insert battery into tray and use tie down and hardware to secure to tray.
Cut power cable to desired length and crimp battery terminal. Heat shrink connection.
Find a good, unpainted ground for battery. I used the top right strut tower bolt and removed the paint under it. Cut ground cable to length and crimp ring terminal to end of ground wire and heat shrink. Secure to strut tower using existing nut.
Crimp battery terminal to battery side of ground cable and heat shrink connection.
Secure both cables using zip ties. I used my rear strut tower brace for several mounting points to ensure maximum stability.
Connect battery terminals to battery and recheck all connections. Vehicle is now ready to start and test.

I suggest using a voltmeter to check charging voltage across battery terminals and compare to specs. Check underhood voltage as well, and compare to battery voltage to verify minimal voltage drop.
That's it, go enjoy your new mod!
[/i]