How-to: Front anti-sway bar removal and installation

Post Reply
daaboots
2GN Member
Posts: 762
Joined: Wed Mar 22, 2006 8:22 am
Location: Ottawa, ON
Contact:

How-to: Front anti-sway bar removal and installation

Post by daaboots » Sat Apr 28, 2007 8:20 pm

Disclaimer: I assume no responsibility for injury or death by following these instructions.

Anti-sway bars help eliminate body roll in cornering and will give your Neon a more sporty feel. SRT-4 sway bars are a great upgrade and are relatively inexpensive. This modification is simple and offers great bang for your buck.

Tools you will need:
- front anti-sway bar
- bushings for the anti-sway bar
- new end links for the anti-sway bar
- car lift jack and safety stand
- 3/8 drive extension (optional)
- 3/8 drive ratchet
- 13 mm socket, 3/8 drive
- 15 mm socket, 3/8 drive
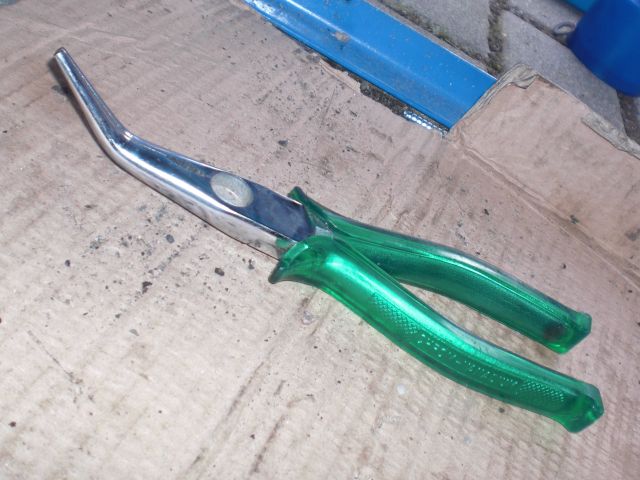
- vise grip pliers
- ratchet and socket (19 mm) to remove your tires
- torque wrench
- WD-40

Overview:
First we need to get the car up on the safety stands and remove the tires. Next we’ll remove the existing sway bar including the bushings and end links. Using the new bushings and end links, we’ll install the new sway bar. Finally we’ll install the tires and torque the lug nuts to spec.

Start by jacking up the car and placing the safety stands underneath the car. Ensure the car is stable before proceeding. Remove the two front tires.

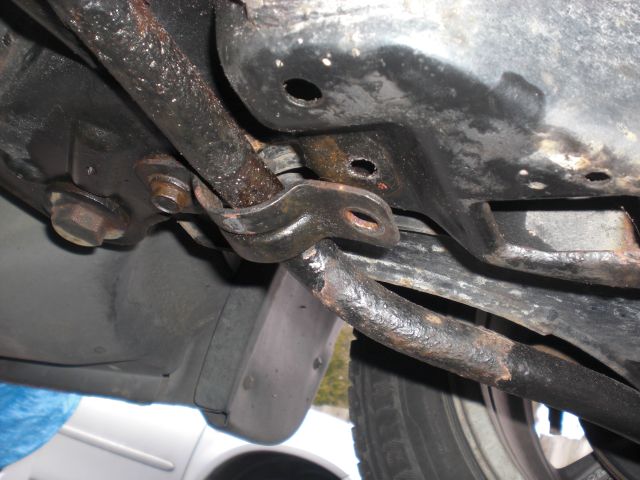
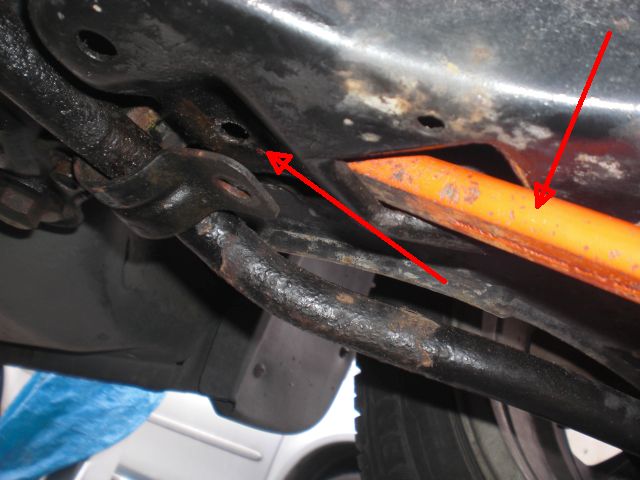
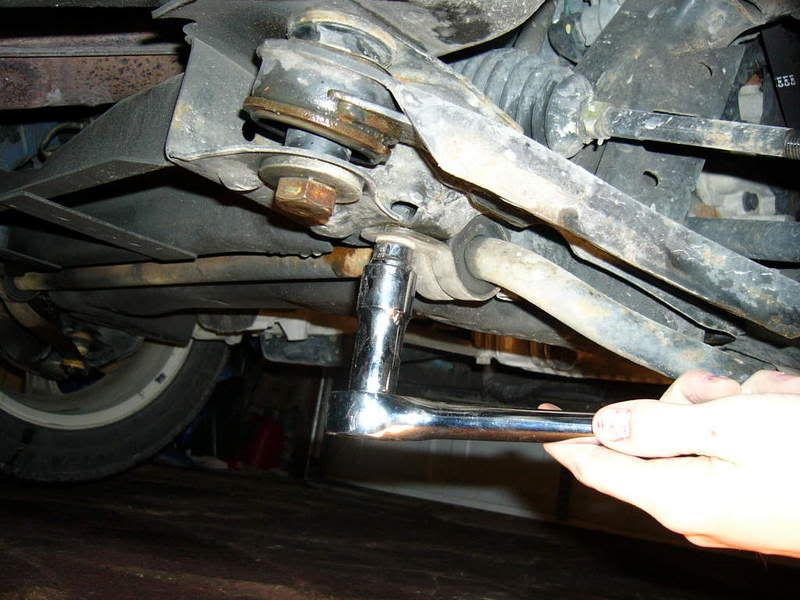
Remove the two bolts for the bracket that holds the sway bar to the frame of the car using the ratchet and 13 mm socket.
Image

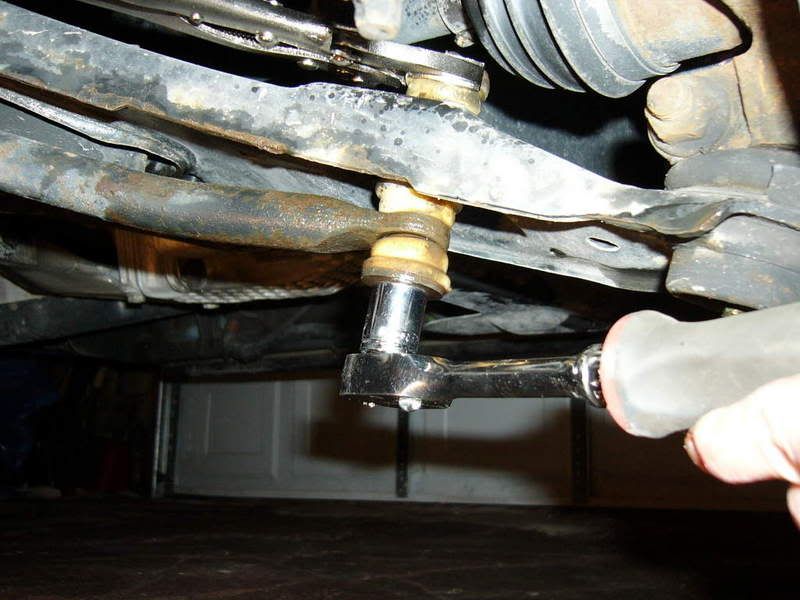
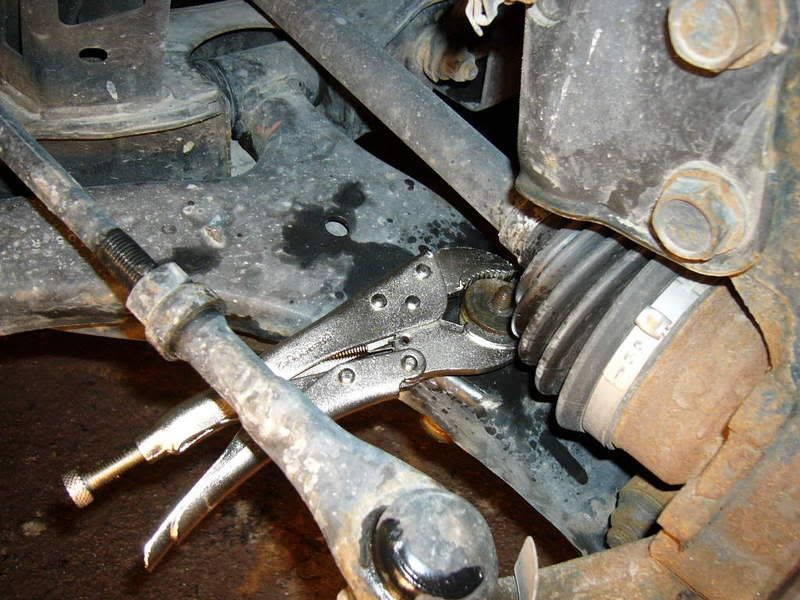
Using the vise grip pliers and the ratchet with the 15 mm socket, remove the old end links.
Image

Image

Repeat these steps on the opposite side of the car.

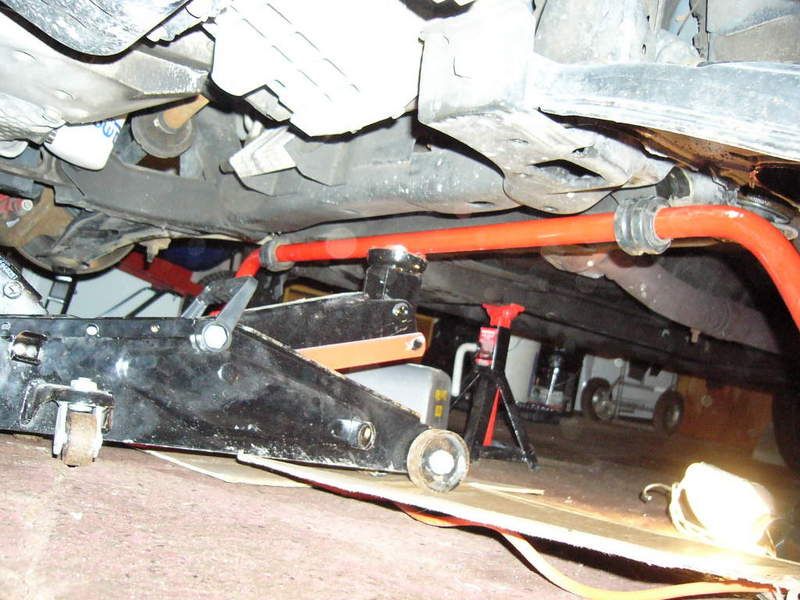
Place the bushings around the new sway bar. Balance the new sway bar on the jack and raise the sway bar into place.
Image

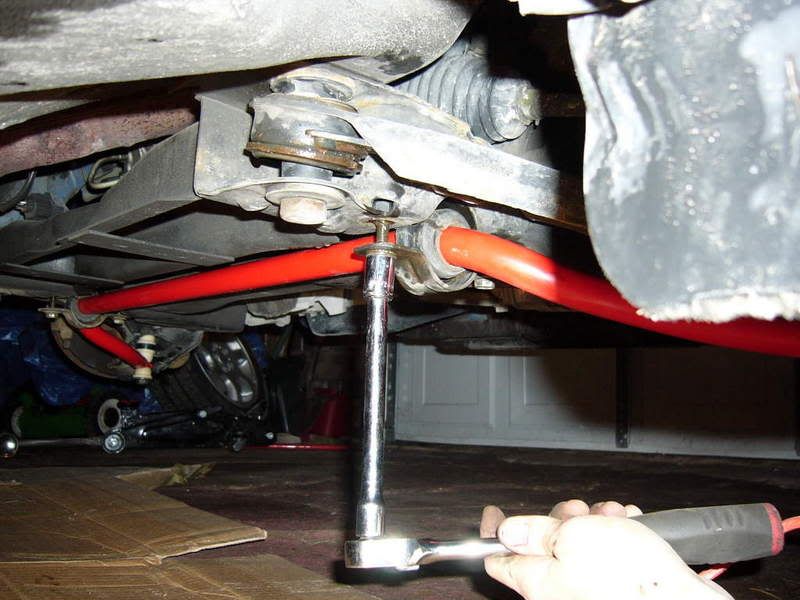
Install the brackets that hold the sway bar to the frame of the car.
Image

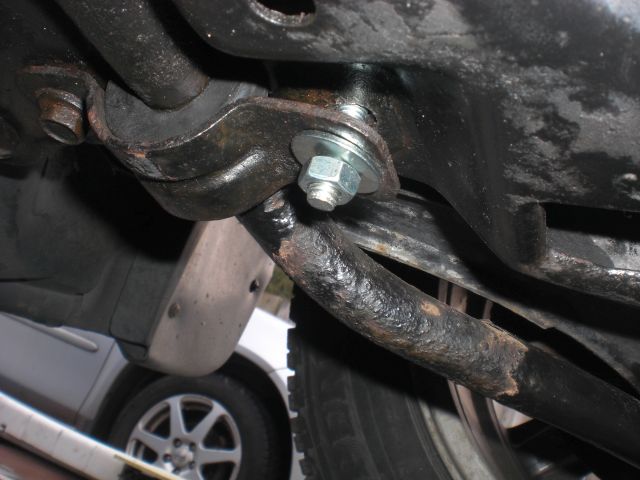
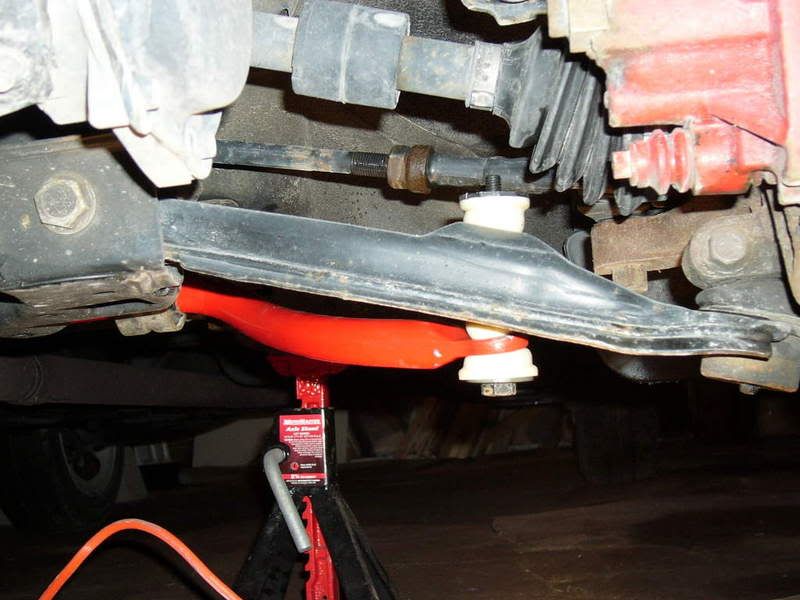
Install the new end links. Tighten the end links until you cannot tighten them anymore. It may seem like you’re over tightening them, but you’re not.
Image

Install your tires, torque your lug nuts, and enjoy :)

Comments and corrections are welcome
Last edited by daaboots on Wed May 07, 2008 8:10 am, edited 1 time in total.
2005 SX 2.0 - http://www.cardomain.com/ride/2092484
Rear sway bar brackets on sale! - viewtopic.php?t=19840
My Feedback - viewtopic.php?t=10546
Image

User avatar
SYRYS04
2GN Member
Posts: 69
Joined: Mon May 05, 2008 5:20 am
Location: WHERE IM AT
Contact:

Post by SYRYS04 » Wed May 07, 2008 3:49 am

So the front sway bar goes underneath and a strut bar goes on top, across the engine correct??
THE TRUTH HURTS
LOVE IS PAIN
SO REGARDLESS OF WHAT I'M DOIN
I'M BREAKIN YOUR HEART

-SYRYS-

daaboots
2GN Member
Posts: 762
Joined: Wed Mar 22, 2006 8:22 am
Location: Ottawa, ON
Contact:

Post by daaboots » Wed May 07, 2008 8:08 am

SYRYS04 wrote:So the front sway bar goes underneath and a strut bar goes on top, across the engine correct??
Yup, you got it :thumbup:
2005 SX 2.0 - http://www.cardomain.com/ride/2092484
Rear sway bar brackets on sale! - viewtopic.php?t=19840
My Feedback - viewtopic.php?t=10546
Image

User avatar
welchspro
2GN Member
Posts: 1365
Joined: Tue Aug 29, 2006 11:25 pm
Location: TriCities, Washington
Contact:

Post by welchspro » Thu May 08, 2008 1:52 am

Thanks for the write-up, this may be something i'll look into this summer
--John
Image


Drive It Till It Dies Member #16

User avatar
Nutmeg
2GN Member
Posts: 1524
Joined: Wed May 16, 2007 7:14 pm
Location: Washington

Post by Nutmeg » Thu May 08, 2008 1:57 am

welchspro wrote:Thanks for the write-up, this may be something i'll look into this summer
:withstupid: A set of sways might be in need.
Image

daaboots
2GN Member
Posts: 762
Joined: Wed Mar 22, 2006 8:22 am
Location: Ottawa, ON
Contact:

Post by daaboots » Thu May 08, 2008 8:07 am

Nutmeg wrote:
welchspro wrote:Thanks for the write-up, this may be something i'll look into this summer
:withstupid: A set of sways might be in need.
No prob guys.
2005 SX 2.0 - http://www.cardomain.com/ride/2092484
Rear sway bar brackets on sale! - viewtopic.php?t=19840
My Feedback - viewtopic.php?t=10546
Image

flhmfd
2GN Member
Posts: 1060
Joined: Mon Feb 06, 2006 11:18 am
Location: toronto

Post by flhmfd » Sun Jun 08, 2008 11:11 am

do the new endlinks go on easily?
Image

ZeroChad
2009 Gold Contributor
Posts: 3165
Joined: Sat Sep 01, 2007 11:08 pm
Location: Austin, Tx
Contact:

Post by ZeroChad » Sun Jun 08, 2008 11:52 am

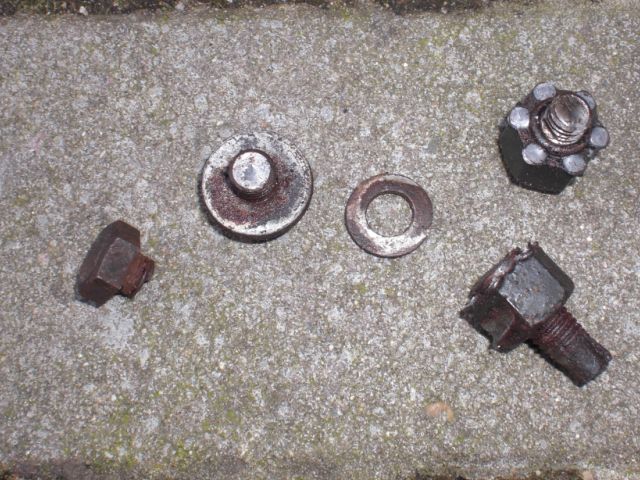
Be careful with the sway bar bracket bolts. I managed to snap all four of mine. Fun times!
Old Neon Log | Feedback

2000 - Corvette Coupe
2002 - Neon SE Fully Built (scrapped)

User avatar
MoxHair
2GN Member
Posts: 3801
Joined: Mon Feb 27, 2006 5:41 pm
Location: Atwater, CA; Orlando, FL
Contact:

Post by MoxHair » Sat Jul 05, 2008 10:16 pm

i wish the sways on my ms3 were this easy to install
2017 Subaru WRX STI
Road Racing > Autocross > Spirited Driving > Sitting in Traffic > Mowing Lawns > Drag Racing

User avatar
TheRandom1
2GN Veteran
Posts: 9938
Joined: Mon Jan 02, 2006 11:17 pm
Location: Chicagoland

Post by TheRandom1 » Sun Jul 06, 2008 1:10 am

Has anybody done this and NOT broken the bolts?
Image
Danteneon wrote:You doing this swap with your tech level is like asking a squirrel to land a 747.

contagious18
2010 Silver Contributor
Posts: 2420
Joined: Wed Feb 21, 2007 3:18 pm
Location: Stockton, CA

Post by contagious18 » Sun Jul 06, 2008 2:10 am

i did, i replace my sways wit da srts and none of the bolts broke and i have a 2000
Antagonist crew| Official "I'm Going to Drive My Neon till it Dies" Club #000031
Image
http://www.cardomain.com/ride/2569968
http://contagious209.mybrute.com

occasional demons
Junior Admin
Posts: 20306
Joined: Thu May 03, 2007 12:14 pm
Location: Ashland Ohio

Post by occasional demons » Sun Jul 06, 2008 6:50 pm

I did it on my '01, but I soaked everything a week before hand with penetrating oil. Even then I could only get three all the way out. I was able to get the 4th out enough to rotate the bracket out of the way. Then when I installed the new crossmember they all came out with no trouble, I guess the oil worked on the rust for a few months! I did install shorter bolts in everything that mounts to the new crossmember, so the ends aren't sticking out past the weldnuts to rust and expand. I also used stainless for the sway brackets, but couldn't find SS for the steering gear. The antiseize and fresh paint should help tho.
Bill
Olha Koba, a psychologist in Kyiv, said that “anger and hate in this situation is a normal reaction and important to validate.” But it is important to channel it into something useful, she said, such as making incendiary bombs out of empty bottles.
2000 Neon MTX swap with '02 R/T PCM
1999 neon coupe 2.4 swap
2021 Forester

contagious18
2010 Silver Contributor
Posts: 2420
Joined: Wed Feb 21, 2007 3:18 pm
Location: Stockton, CA

Post by contagious18 » Mon Jul 07, 2008 2:17 am

i didnt use anyting to grease them, just took dem off
Antagonist crew| Official "I'm Going to Drive My Neon till it Dies" Club #000031
Image
http://www.cardomain.com/ride/2569968
http://contagious209.mybrute.com

User avatar
NiteHawk
2GN Member
Posts: 3130
Joined: Sun Nov 13, 2005 10:48 am
Location: Export, PA
Contact:

Post by NiteHawk » Mon Jul 07, 2008 3:27 am

you could also do what people do for lugnuts... put a litle axle grease on them, itll keep them from rusting and locking up on you...
Matt Cresto
Fueled By Matt
Fueling Your Passion

Fuel systems turbo kits and components, tuning, performance parts. Contact us for all of your performance needs.

DoubtedNeon
2GN Member
Posts: 1483
Joined: Mon Jun 16, 2008 5:28 pm
Location: Larsen, Wisconsin, 54947

Post by DoubtedNeon » Tue Jul 08, 2008 9:39 am

good review thanks a ton!
Image
Swordfish2Cowboy wrote:They left a pry bar? Well get the prints like they do on CSI, and track those fuckers down. Then cap them.
grindpunk16 wrote: You and about 2 dozen other folks want that cover. It came with the car, and it's all mine.. :twisted: :bootyshake: \:D/

daaboots
2GN Member
Posts: 762
Joined: Wed Mar 22, 2006 8:22 am
Location: Ottawa, ON
Contact:

Post by daaboots » Tue Jul 08, 2008 10:04 am

DoubtedNeon wrote:good review thanks a ton!
No problem
2005 SX 2.0 - http://www.cardomain.com/ride/2092484
Rear sway bar brackets on sale! - viewtopic.php?t=19840
My Feedback - viewtopic.php?t=10546
Image

Caraudioholic24
2GN Member
Posts: 4137
Joined: Sat Mar 22, 2008 1:56 am
Location: Cumberland R.I.

Post by Caraudioholic24 » Sun Oct 12, 2008 9:07 pm

Na I went to take it off to lower my car and managed to snap em off. Bummer
Image

User avatar
randomZERO
2GN Member
Posts: 873
Joined: Sun Dec 02, 2007 3:34 am
Location: Baltimore

Post by randomZERO » Wed Jun 17, 2009 12:01 am

So i snapped 3 of the 4 while doing my prothane bushing install. I ordered new hardware but my question is after I get the rest of the bolts out what am I looking at as far as difficulty putting them back in as you cant access the bolts in the crossmember?
Image


viewtopic.php?t=33260<<<<<Pics & Mods

haste4daylight
2GN Member
Posts: 35
Joined: Wed Apr 09, 2008 1:36 pm
Location: Pennsylvania
Contact:

Post by haste4daylight » Thu Aug 20, 2009 3:52 pm

i managed to snap one of my bolts... how should i go about getting em out? easy out?
Image

darthroush
2GN Member
Posts: 1637
Joined: Tue Jul 14, 2009 2:14 am
Location: People's Republic of Kalifornia

Post by darthroush » Thu Aug 20, 2009 4:46 pm

Must be a back east thing from the roads? Mine came out just fine. I just stuck the ratchet on 'em and turned.

User avatar
randomZERO
2GN Member
Posts: 873
Joined: Sun Dec 02, 2007 3:34 am
Location: Baltimore

Post by randomZERO » Thu Aug 20, 2009 5:28 pm

haste4daylight wrote:i managed to snap one of my bolts... how should i go about getting em out? easy out?
use a small drill bit and hollow what's left of the bolt then an easy out
Image


viewtopic.php?t=33260<<<<<Pics & Mods

Jerome Adams
2GN Member
Posts: 1038
Joined: Fri Nov 18, 2005 6:07 pm
Location: Bellevue, NE

Post by Jerome Adams » Sun Mar 18, 2012 3:30 pm

Soak them in PB Blaster for a good 2 weeks before you attempt to take them out. I thought mine was coming out pretty easy and then there was no resistance and the bolt head was in the socket. I let the others soak for 2-3 weeks and they all came out very slowly.

I spent a few hours yesterday and a few today drilling out that bolt. I have busted at least 4 drill bits just to get thru the bolt. Bought a M8x1.25 tap and that didn't work either. I am just going to have to drill the shit out of it and use an insert or have somebody weld a nut in the hole.
Jerome

'03 SXT...DODGE NEON CONES

Official "I'm Going to Drive My Neon till it Dies" Club #067

chappybmode
2GN Member
Posts: 79
Joined: Tue Mar 29, 2011 2:11 pm
Location: West Virginia

Post by chappybmode » Tue Apr 10, 2012 9:26 am

mine broke as well, but instead of ordering new hardwar i ran to the hardware store and got stainless steel self tapers...idk how good that idea was but they are still holding like a champ and have had some serious abuse

fox02neon
2GN Member
Posts: 26
Joined: Wed Nov 01, 2006 7:33 pm
Location: Yakima WA

Post by fox02neon » Sun Mar 10, 2013 1:49 am

This is a nice write up!
foxo2neon

User avatar
Gnuserup
2GN Member
Posts: 661
Joined: Sun Jun 28, 2009 3:06 pm
Location: Germany

Post by Gnuserup » Sat Feb 21, 2015 9:32 am

The screws of the latches usually brake when you try to remove them :roll:

So I think it is best, if you just want to swap the bushings, you try to unscrew the both front screws first. Carefully and soak them with lot´s of WD40. If they really brake, you can easily reach the welded nuts within the subframe with the rest of that damn screw and knock them out with a chisel or something like that.
I did so and used loose screws M8 instead to fix the latch again later.
The other two screws are more critical. I only unscrewed them as much as needed to be able to remove the bushings - so I did not try to remove them at all.


Image

Image

Image

Image

Image

Image
a neon - what else ?

NickKo
2009 Gold Contributor
Posts: 2248
Joined: Sun Jun 11, 2006 11:24 am
Location: IL./WI.border

Post by NickKo » Sat Feb 21, 2015 10:47 am

Gnuserup wrote: I only unscrewed them as much as needed to be able to remove the bushings - so I did not try to remove them at all.
Clever idea !! :thumbup:

The only thing that I would add, is that out here in the Midwestern US -- It is necessary to use a very strong rust penetrant, such as PB Blaster or Kroil.
In the Midwest, WD-40 is almost useless. :lol:


- Nick
-1998 2-dr SOHC MTX= 57mm TB; Maddog STS
-2000 Ply.LX w/MTX = Maddog STS; CAI; 2.5 exh.; 60mm T/B
-2001 ATX w/Syked PCM + Magnum header
-2001 ACR w/SRT T/B bored out to 55mm

Official "I'm Going to Drive My Neon till it Dies" Club #000009

Post Reply

Return to “HT Chassis”